Roofing Tips For The Winter, Roofing in Winter

Roofing Tips For The Winter

Winter is definitely here in Vancouver and as you all know, the harsh conditions can cause damage and decrease the longevity of your home’s roof. If your roof needs repairs, it’s generally better to do them in the drier months. In fact, most experts say the best time to do work on a roof is from July to August when the weather is best. In a perfect world, summer would be great to finish all those projects, but your roof doesn’t just leak during those months.
Moreover, In British Columbia, where the weather is often unpredictable, these ideal conditions can be few and far between. Most roofing companies have to consider how they can perform a roofing job in the winter, in less than ideal conditions.
While not always the best, roof construction and repair can be done in cold weather, as long as precautions are taken. In winter, roofers face a variety of challenges including:

  • Roofing materials don’t work quite as well as they do in moderate temperatures.
  • Shorter days give roofers less time to work which generally means the project takes longer.
  • Tools such as nail guns generally don’t work as well in the cold.
  • Snow and ice can create hazards or cover up dangers to roofers.

What to Expect When Roofing in Winter

Roofing in winter weather requires a lot more foresight, planning and safety precautions than summer days. Be aware that some companies will charge you up to 20% more for their services, while other companies will be looking for work and might give you a discount. Whatever you do, you should shop around and get between three to five quotes and ask them specifically about their winter work.

Winter Safety Is The Most Important

Safety is obviously the most important thing when it comes to roofing – no matter what time of year. Under no circumstances should you hire a company that doesn’t take safety serious as there are some unique cold weather issues to be aware of when doing winter roofing work.
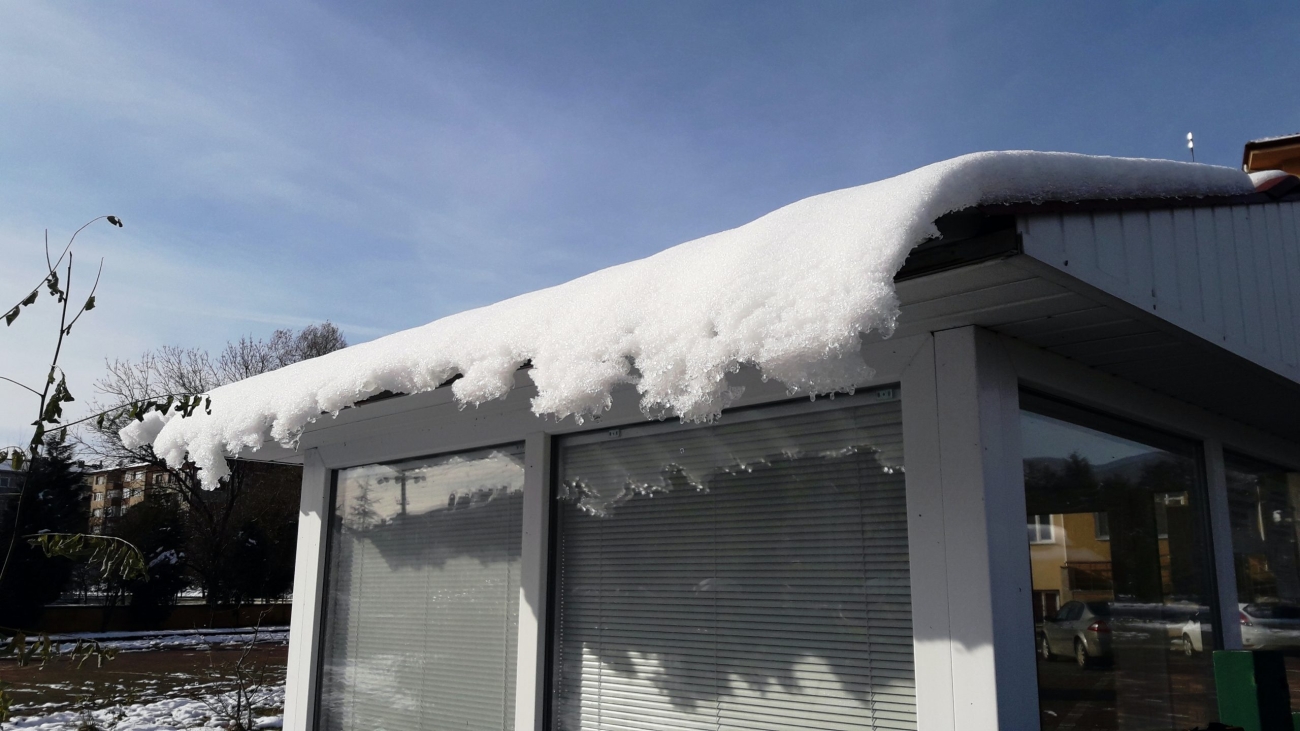
For example, roof surfaces can become slippery thanks to snow, ice, and frost. A common winter problem is snow removal or de-icing of the roof surface must be done after a snowstorm. The roofers must take extra precaution and use specialized equipment, which they need to be trained on, along with increased monitoring while the removal is taking place.

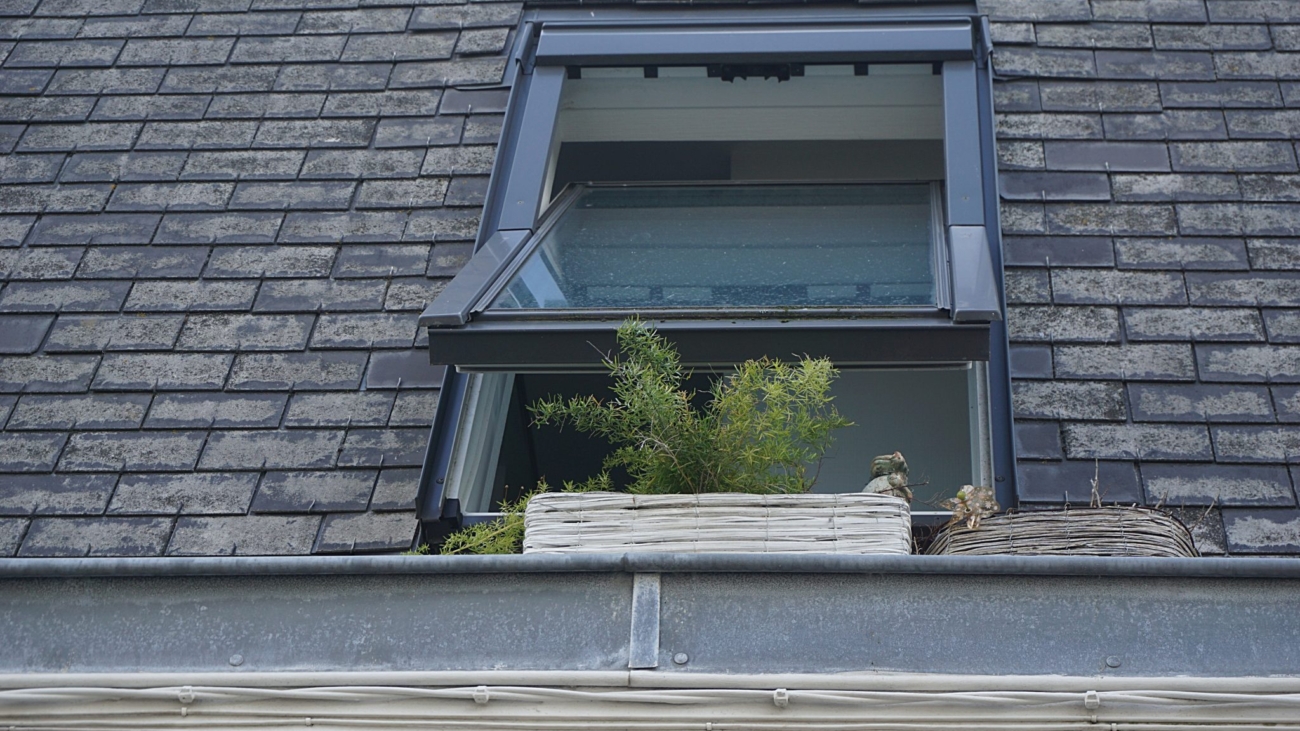
Snow can also disguise dangers such as skylights, debris and other risks. The roofing contractor needs to pay close attention to where they walk to ensure they don’t accidentally step on or fall through a skylight or trip over hazards hidden under snow. Even on a freshly cleared roof, there may be black ice or frost build-up on the roof or deck surface, which can make work extremely dangerous. If the temperature is too cold and the snow and ice remain, it is best to wait until the weather warms up.
Another thing to do before getting a roofing contractor to work is to ensure that the attic space is adequately air-condition. Often, what appears to be a roof leak is actually condensation from interior air drifting up into a cold, improperly ventilated attic.

Working in the Winter

Working in cold, damp temperatures can put a strain on the body, making your heart and lungs work harder, while at the same time putting you at increased risk for hypothermia or frostbite. Be aware roofers, as mentioned before, will work shorter hours, and plan around the sunshine and weather forecasts. Be prepared for work stoppage and delays because of the weather.
Roof contractors should also wear warm clothing that is breathable but also provides an ample range of motion. If you notice that a roofer isn’t appropriately dressed, do not let them work.

The Weigh Of Your Roof

Another thing to consider is the extra weight that snow and ice can add to a roof. If you add a human’s weight into the mix, you can potentially be looking at serious injury. A roofer must ensure that the surface he is working on is sturdy and safe from collapse. An experienced roofer will test the structure before beginning to work on it to ensure that there is no danger from collapse.

Equipment and Materials

Now you know what to expect in the winter, you also have to keep in mind the quality of craftsmanship which can suffer if the roofer is inexperienced.

Asphalt shingles

The best temperatures to install asphalt shingles is between 4 and 26 degrees Celsius. If a roofer decides to install roofing shingles in cold weather below these temperatures, your shingles may become brittle and more prone to breakage. To prevent this, when working in below-zero temperatures, make sure the roofer stores your materials in a warm place until you need them. Shingles will mould to the shape of the surface they rest on, so if you are buying them before using them, keep them flat, stacked and raised on pallets so they don’t touch the ground. Be aware that a roofer should not work in below-zero temperatures unless it is an emergency situation that needs fixing.

Types of Roofing Materials

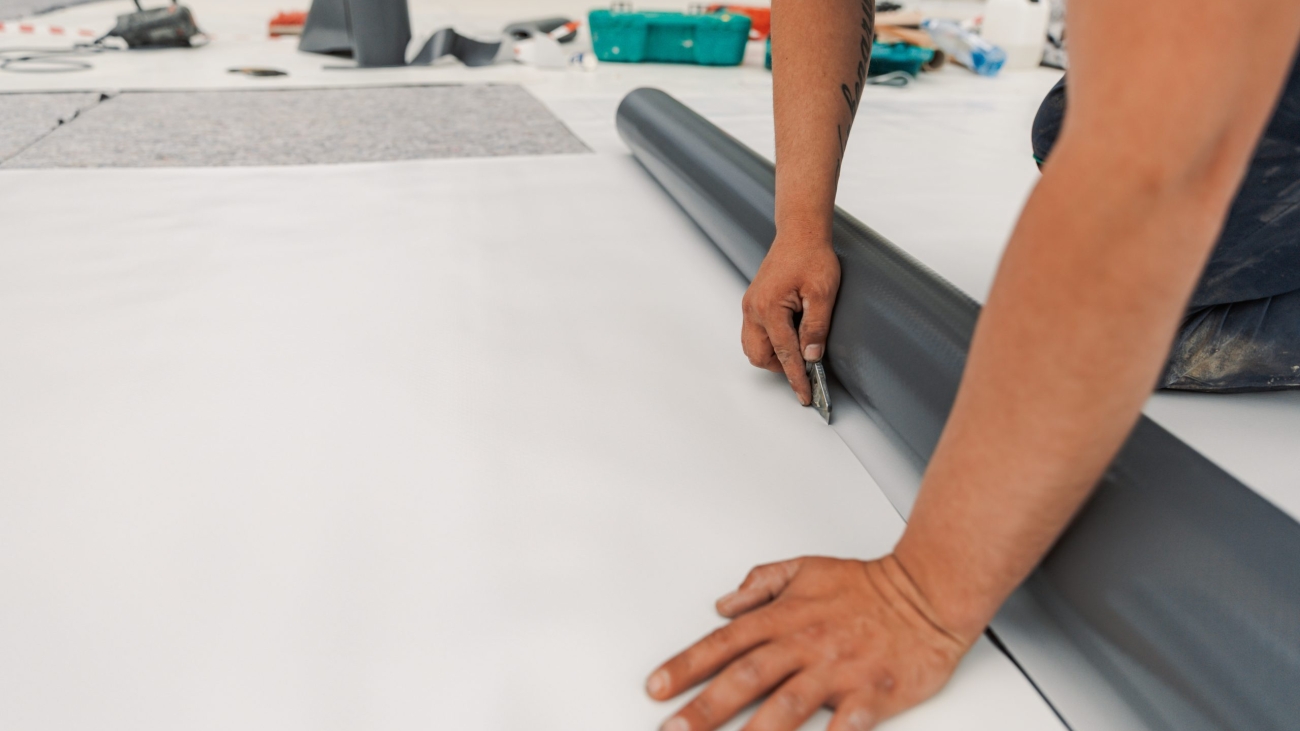
Most roofing organizations recommend using winter weather membranes to seal your eaves, valleys, skylights, and vents, rather than warm weather roll roofing, which can buckle or warp when applied in cold weather. When you choose to use any kind of felt or membrane, the roofer will roll it out in a staging area, away from the elements and allow it to relax before you apply. This will help reduce wrinkles caused by the weather.

Conclusion

The information in this blog is purposeful to be a starting point for cold weather roofing applications. Each situation is different and as always consult a professional roofer before starting. If you have any questions, then please don’t hesitate to contact us at Cambie Roofing to schedule a free roofing estimate.

The Importance of Ventilation and Insulation in Asphalt Shingles

The Importance of Ventilation and Insulation in Asphalt Shingles

Roofs need the right balance of both ventilation and insulation to work properly, especially with the type of weather we’ve been having in Vancouver the past couple of ears. In warmer weather, poorly ventilated roofs can result in hot attic spaces which can significantly damage shingles, causing curling or even breaking, reducing the lifetime of a roof.

In the colder seasons, a lack of ventilation can trap cold air and cause moisture to build up, resulting in problems with mold, rot, and mildew, which can damage the roof and walls. Properly ventilated and insulated roofs upon are important to protecting against the problems caused by seasonal extremes and avoid costly repairs. Just think of the leaky condo crisis that cost Vancouver over $4 billion in damages because buildings didn’t have the proper ventilation.

While in Vancouver ventilation was a problem with newer buildings, it is usually common in older homes, which were generally constructed when building codes did not require as much insulation.
As many Vancouver builders discovered, creating the proper ventilation and insulation of asphalt shingle roofs is isn’t always easy. You need to get the advice of an experienced, licenced roofer to do the job correctly.

Roof Ventilation

Proper roof ventilation reduces electricity bills, extends shingle life, and prevents roof rot and ice dams in winter. Doing it right the first time also protects your house from expensive future repairs. The most important aspect of roof ventilation is to ensure your roof has vents so that the excessive moisture can escape. Ventilation is required by building codes. If you don’t properly ventilate your roof it will likely void your roofs warranty.

The number of vents within roof space will depend on the size of the roof and the material used, however, the general rule is that a single vent should be enough for a squared 30-meter roof space. A specific number of vents are required per square footage to ensure that the right amount of air enters and exits the attic.

Roof Insulation

Insulation plays a vital role in ensuring your home is properly ventilated. While you need to have enough insulation to help your house efficiently maintain a comfortable temperature. It is just as important t that you do not have too much insulation in case it blocks proper air circulation.

An experienced roofer or contractor can decide what your home needs and advice you on the proper course of action. Of course any work a roofer or building contractor does on the vents needs to be done carefully. So you do not decrease the area of the vents or anyway stop the airflow.

You probably won’t notice if something is wrong with your roof’s insulation or ventilation which is why it’s important to have an experienced, trustworthy roofer do a checkup at least once a year. If there is a problem with the airflow, they will know and be able to fix it. Often the solution depends on what is causing the lack of airflow. In the simplest and least costly case, there may be something obstructing the vents which is an easy fix.

lack of ventilation

Unfortunately, in many cases, the lack of ventilation is caused by something more serious. Such as a lack of or inappropriate placement of vents. If that’s the case, you might need to rip up a part or the complete roof to fix it.
Insulation placed on an air-sealed attic floor is simple, yet one of the most underappreciated building assemblies. A vented attic works in all types of climates to keep the home regulated.

Same, unexperienced builders do not install insulation correctly. Which causes excessive energy losses, ice dams, mold, rot which all need to be fixed sooner than it should.

If your builder has properly ventilated your roof space, then you will have to keep the vents free. So they can allow for proper air flow. This means that the vents should not be obstructed otherwise the moisture will still stay trapped within the roof structure. And eventually turn into mold and rot the wood.

Using Vents In Your Roof

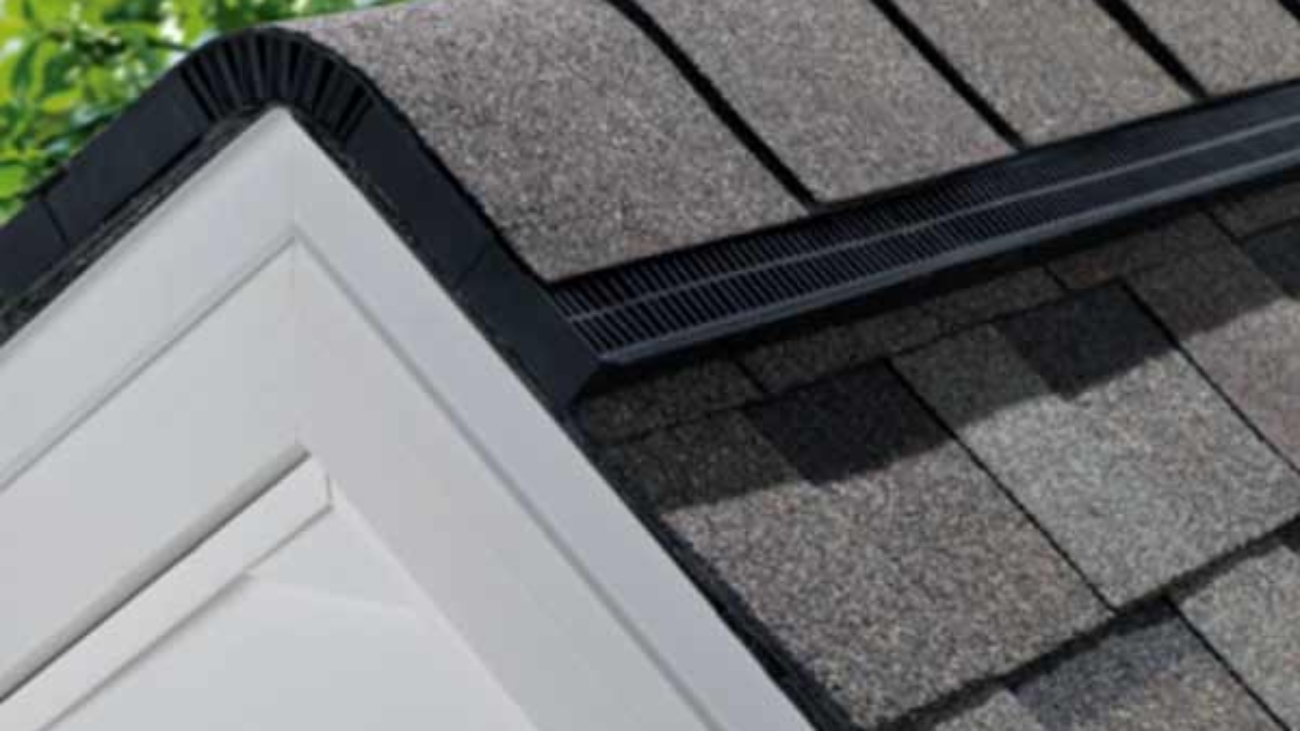
There is a variety of different vents to select from when choosing a new vent for your roof. Two of the more common vents you will find are the box vent and turbine vents. The box vent uses natural air flow to draw hot air out of the attic. However they are not as effective as turbine vents and you will require more of them to properly ventilate your space. Turbine vents are wind-driven and more effective.

There is a third type of vent which are called ridge vents. But they are not as common as the first two. They, as you might suspect, run along the ridge of your roof. Moreover, They keep a more consistent temperature across your roof than box vents. And do not require wind to operate like turbines.

They are slightly more expensive, but when used with soffits. The underside of the area which connects the roof to the wall, they will keep your space well ventilated.

Conclusion

Whether you are in need a roof inspection or have a leaky, it’s important to choose a roofing contractor that is trustworthy, reliable, and experienced. At Cambie Roofing we are experts in providing you the service you need within your budget. Give us a call or email us for a free estimate.

joel-filipe-FMFOFQfchfs-unsplash

Preventative Maintenance 101

Preventative Maintenance 101

A well-maintained roof is the first line of defence for any home or business, protecting against the elements and ensuring structural integrity. Preventative maintenance plays a pivotal role in extending the lifespan of your roof, whether it’s brand new or has weathered the elements for years. In this comprehensive Preventative Maintenance 101 guide, we will explore the essential steps to maintain both new and old roofs, highlight common issues to look out for, and discuss when it’s time to call the professionals at Cambie Roofing for expert assistance.

Maintaining New Roofs:

Regular Inspections:

New roofs benefit greatly from regular inspections. Conduct a visual check to ensure there are no visible signs of damage, such as missing or damaged shingles. Early detection allows for prompt repairs, preventing issues from escalating.

Clearing Debris:

Keep the roof free of debris like leaves, branches, and dirt. Accumulated debris can lead to water pooling, which can compromise the structural integrity of the roof over time.

Gutter Maintenance:

Clean and inspect gutters regularly. Proper drainage is essential for preventing water damage. Ensure that gutters are free from debris and securely attached to the roof.

Trimming Overhanging Branches:

Trim branches that hang over the roof. Falling branches can cause damage, and overhanging branches provide easy access for pests like squirrels to access the roof.

Maintaining Old Roofs:

Thorough Inspections:

Regular and thorough inspections are even more crucial for older roofs. Look for signs of wear and tear, such as cracked or curling shingles, sagging areas, or water stains on the ceiling.

Sealing and Coating:

Consider applying a protective sealant or coating to extend the life of an old roof. This can provide an additional layer of protection against the elements.

Addressing Leaks Promptly:

If you notice any signs of leaks or water damage inside your home, address them promptly. Water infiltration can lead to serious issues, including mold growth and structural damage.

Replacing Damaged Shingles:

Replace any damaged or missing shingles immediately. Damaged shingles compromise the integrity of the roof and can lead to more extensive issues if not addressed promptly.

Common Roofing Issues to Look Out For:

Leakage:

Leaks are a common issue and can result from various factors, including damaged flashing, missing shingles, or worn-out sealant around roof penetrations. Regular inspections can help identify and address leaks before they cause significant damage.

Mold and Mildew:

The presence of mold and mildew can indicate moisture-related issues. Proper ventilation and addressing leaks promptly can help prevent the growth of mold and protect indoor air quality.

Poor Drainage:

Inadequate drainage can lead to water pooling on the roof, increasing the risk of leaks and water damage. Ensure that gutters are functioning correctly, and downspouts direct water away from the foundation.

Wind and Storm Damage:

High winds and storms can cause significant damage to roofs, including lifting or tearing off shingles. After severe weather events, conduct a thorough inspection to assess any potential damage.

When to Call the Professionals at Cambie Roofing:

Extensive Damage:

If you notice extensive damage to your roof, including large areas of missing or damaged shingles, it’s time to call in the professionals. Attempting to repair significant damage without the necessary expertise can lead to further issues.

Persistent Leaks:

Persistent leaks that are challenging to locate or fix may require the expertise of roofing professionals. They have the tools and knowledge to identify and address complex leaks efficiently.

Aging Roof:

If your roof is reaching the end of its expected lifespan, it’s advisable to consult with professionals. They can assess the overall condition of the roof and recommend whether repairs or a replacement is the best course of action.

Professional Inspections:

Regular professional inspections, ideally performed annually, can identify potential issues before they escalate. Professionals at Cambie Roofing can provide a comprehensive assessment of your roof’s health and recommend preventative measures.

Conclusion:

Preventative maintenance is the key to ensuring the longevity and effectiveness of your roof, whether it’s a new installation or has stood the test of time. Regular inspections, addressing issues promptly, and enlisting the help of professionals like Cambie Roofing when needed are essential steps in maintaining a durable and resilient roof. By following these Preventative Maintenance 101 guidelines, you can protect your investment, enhance the overall safety of your property, and enjoy the peace of mind that comes with a well-maintained roof. Cambie will be going in depth about preventative maintenance in upcoming articles because we want our readers to understand how important it is to properly maintain their roofs. Reach out to us today if you have any questions.

ways winter impacts your roof

Ways winter impacts your roof

Ways Winter Impacts Your Roof

As winter descends upon the northern landscapes of Canada, homeowners face a unique set of challenges in ensuring their abodes stand resilient against the season’s frosty grip. Among the vulnerable components of a home, the roof stands as a silent sentinel, combating heavy snow loads, freezing temperatures, and a myriad of winter-related adversities. In this comprehensive guide, we will delve into the manifold ways winter impacts your roof and unveil effective solutions to safeguard your home during the colder months.

Heavy Snowfall and Structural Stress:

The picturesque snowfall that blankets your home can be enchanting, but beneath its beauty lies a potential threat. The accumulation of heavy snow on your roof poses a significant risk to its structural integrity. The sheer weight of the snow can stress the roofing materials and framing, leading to potential damage or, in extreme cases, collapse. This risk is especially pronounced for flat or low-pitched roofs. To mitigate this threat, proactive snow removal becomes crucial. Consider using a roof rake to safely clear excess snow or, for larger tasks, ask the professionals at Cambie Roofing for a snow removal referral, to alleviate the burden and preserve your roof’s resilience.

Ice Dams and Water Intrusion:

Winter’s fluctuating temperatures contribute to the formation of ice dams along the roof’s edge. These dams obstruct the natural drainage of melting snow, creating pools of water that may seep into your home, causing water damage. Proper insulation and ventilation in the attic are paramount to counter this issue. By maintaining a consistent temperature on the roof, you can thwart the conditions conducive to ice dam formation and prevent potential water intrusion. Adequate insulation also helps to minimize heat loss, reducing the risk of ice damming.

Freeze-Thaw Cycles and Shingle Vulnerability:

Winter’s relentless freeze-thaw cycles pose a unique threat to roofing materials, particularly shingles. The constant contraction and expansion can render shingles brittle, leading to cracks and vulnerabilities. A thorough pre-winter roof inspection is paramount to identify any compromised shingles and address them promptly. This proactive measure ensures your roof remains steadfast against the elements. Consider investing in high-quality shingles designed to withstand the rigours of winter, providing an added layer of protection.

Condensation Challenges and Attic Health:

Condensation and moisture issues within the attic space escalate during winter. Inadequate insulation allows warm air from your living spaces to infiltrate the attic, where it meets the cold roof surface, leading to condensation. This moisture can foster mold growth and compromise your roof’s structural integrity over time. Prioritize proper attic insulation and ventilation to create a barrier against these winter-induced challenges. Adequate ventilation allows for proper airflow, preventing the buildup of excess moisture and maintaining a healthy attic environment.

Gutter and Downspout Conundrums:

Winter poses unique challenges for gutters and downspouts, often leading to freezing and blockages. When not addressed, these issues can impede proper water drainage, causing potential damage. Regularly clearing debris from gutters and ensuring downspouts remain unobstructed are essential preventive measures. This not only protects your roof but also safeguards your home’s foundation from water-related issues. Consider installing gutter guards to minimize the accumulation of debris, reducing the need for frequent cleanings.

Final Thoughts

As winter casts its wintry spell, understanding the nuanced impact on your roof is crucial for homeowners in Canada. By proactively addressing the challenges of heavy snow loads, ice dams, freeze-thaw cycles, condensation, and gutter issues, you can fortify your roof against the elements. Embrace these solutions to ensure your home stands resilient and secure throughout the winter, weathering the challenges with grace and strength. A well-prepared roof not only preserves the structural integrity of your home but also provides peace of mind as you navigate the colder months with confidence.

Safely installing Christmas lights on roofs

Safely installing Christmas lights

Safely installing Christmas lights

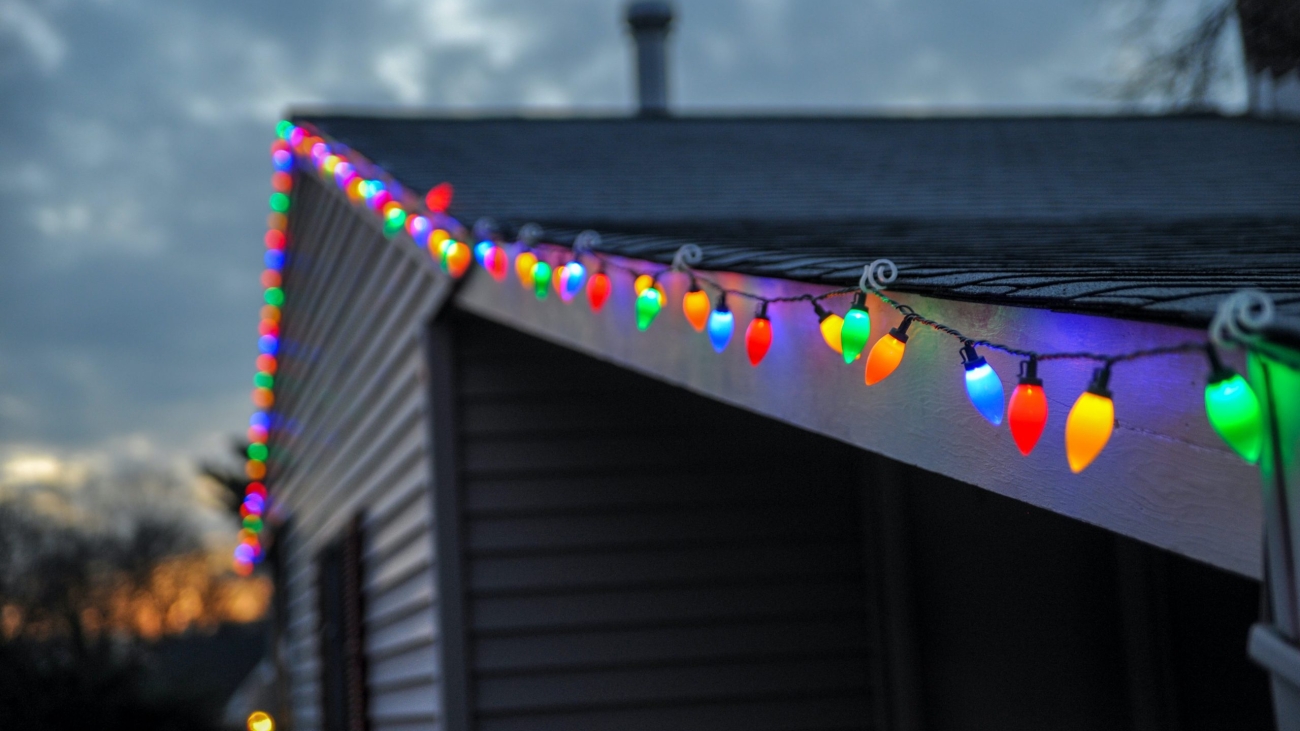
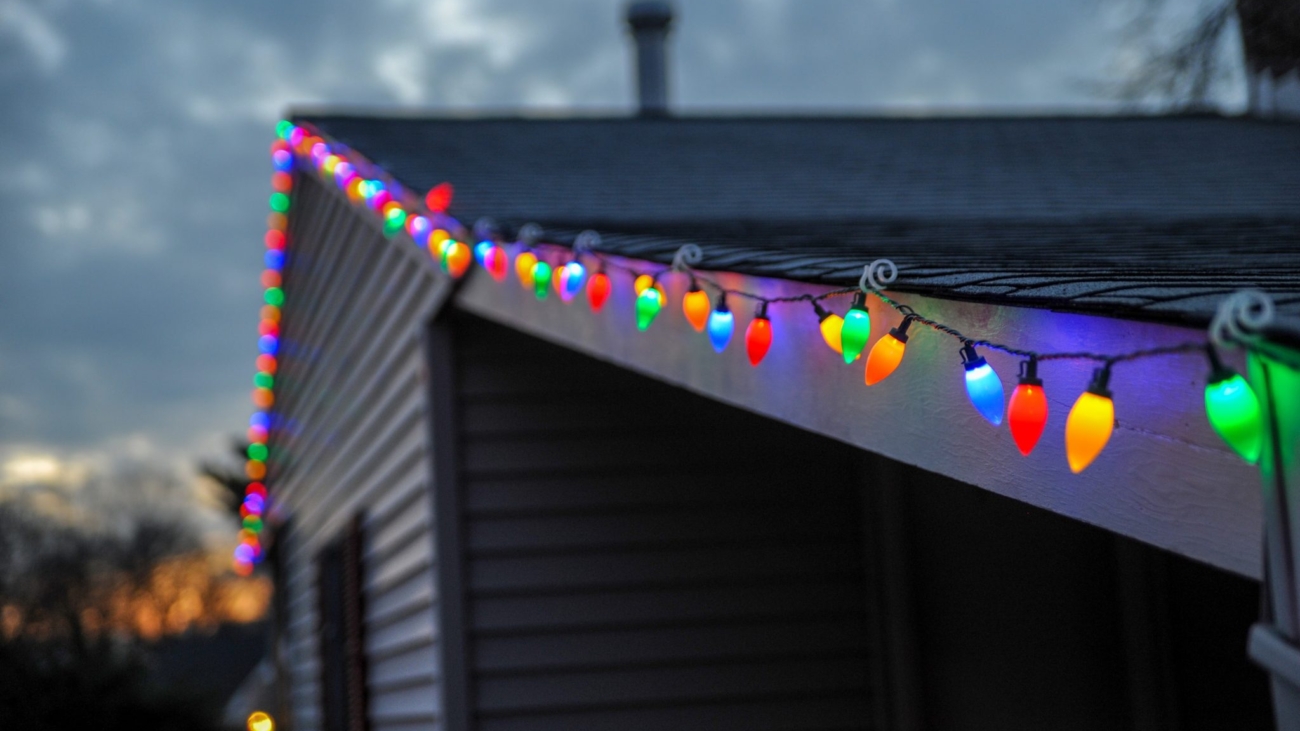
As the holiday season approaches, the tradition of decorating our homes with festive lights adds a warm and inviting touch to the winter landscape. While the sight of twinkling lights can bring joy, it’s crucial to approach the installation process with caution, especially when placing them on roofs. Safely installing Christmas lights not only ensures a dazzling display but also protects your home from potential damage. In this comprehensive guide, the experts at Cambie Roofing will delve deeper into tips and techniques to help you safely adorn your roof with holiday lights while preserving the integrity of your roofing system. Keep reading to learn more about safely installing Christmas lights on roofs this holiday season.

Safety First:

Before embarking on your festive lighting project, prioritize safety. The safety of both yourself and those assisting you is paramount. Begin by ensuring that your ladder is in good condition and positioned on a stable surface. A wobbly or unstable ladder can lead to accidents. It’s advisable to use a buddy system, having someone else present during the installation process. This not only provides an extra pair of hands but also adds an additional layer of safety. If your roof is steep or particularly high, consider hiring a professional to handle the installation. They are equipped with the experience and tools necessary to navigate challenging roof structures safely.

Choose the Right Lights:

Opting for lights specifically designed for outdoor use is essential. Look for a label indicating that they are suitable for all-weather conditions. LED lights are a fantastic choice for outdoor decorations. Not only are they energy-efficient, reducing your electricity consumption, but they also emit less heat. This lower heat emission is beneficial in preventing any potential damage to your roof or other surfaces. Investing in high-quality, outdoor-rated lights ensures not only a stunning display but also the longevity of your decorations.

Inspect Your Roof:

Before attaching any lights, a thorough inspection of your roof is crucial. Identify any existing damage or vulnerabilities that might be exacerbated by the installation process. Addressing these issues beforehand ensures that your roof is in optimal condition to support the added weight of the lights. Clear debris such as leaves and branches to create a clean, safe surface for installation. By starting with a well-maintained roof, you contribute to the overall health and longevity of your roofing system.

Use Clips, Not Nails:

To avoid damaging your roof, opt for specially designed clips for light installation instead of nails or staples. These clips are designed to be roof-friendly, allowing for easy attachment and removal without causing harm to your roofing materials. Ensure the clips you use are suitable for the type of lights you’re installing. This small investment in the right accessories can prevent potential damage and make the removal process smoother.

Mind the Weight:

Be mindful of the weight of the lights and any additional decorations you plan to install. Excessive weight concentrated in one area can strain your roof structure. Distribute the lights evenly across your roof, considering the load-bearing capacity of different sections. This not only protects your roof from potential damage but also enhances the overall aesthetics of your display.

Secure Wiring Safely:

Keep wiring secure and away from walkways to prevent tripping hazards. Use insulated extension cords rated for outdoor use to ensure they can withstand varying weather conditions. When securing cords, avoid running them under heavy objects that could damage the wiring. Additionally, be cautious not to pinch cords in windows or doors, as this can lead to fraying or other damage.

Be Weather-Wise:

Choose installation days with favorable weather conditions. Attempting to install lights during adverse weather, such as rain or snow, can increase the risk of accidents and damage to your roof. If possible, plan your installation on a dry and mild day. Weather-appropriate installation not only ensures safety but also helps preserve the quality of your decorations, preventing potential issues caused by exposure to the elements.

Turn Off Lights When Not in Use:

To conserve energy and reduce the risk of overheating, turn off your Christmas lights when you’re not at home or when you go to bed. This simple measure not only saves electricity but also contributes to the longevity of your lights. Additionally, it reduces the strain on your roof by minimizing the time the lights are in use.

Conclusion:

By following these guidelines for safely installing Christmas lights on roofs, you can transform your home into a festive wonderland while safeguarding your roof from potential harm. Prioritizing safety, choosing the right materials, and taking preventative measures will ensure that your holiday light installation is not only visually stunning but also a stress-free and enjoyable experience. Embrace the spirit of the season, knowing that your efforts are enhancing the beauty of your home without compromising its structural integrity. Remember, a well-lit and secure holiday display brings joy without the worry of roof damage.

Winterizing your roof in Canada.

Winterizing your roof in Canada

Winterizing your roof in Canada

Winter has arrived and in Canada which means some homeowners will face challenges associated with unforgiving weather conditions. The roof, being the first line of defense against snow, ice, and freezing temperatures, requires special attention to ensure it can withstand the harsh elements. In this blog post, we will delve deeper into the essential steps for winterizing your roof in Canada, offering detailed insights and tips, particularly tailored for the challenging winter.

Inspect and Repair Roof Damage:

The importance of a meticulous roof inspection cannot be overstated. Begin by examining the overall condition of your roof, paying close attention to any visible damage. Cracked or missing shingles, loose flashing, and compromised seals around vents and chimneys should be promptly addressed. Repairing these issues before winter sets in is critical to preventing further damage caused by the weight of snow and the freezing temperatures.

Clean Gutters and Downspouts:

Gutters and downspouts are vital components of your roofing system, directing water away from your home. Neglecting their maintenance can lead to clogs and ice dams during winter. Before the first snowfall, take the time to clean gutters and downspouts thoroughly. This will ensure proper water drainage and minimize the risk of ice-related problems on your roof.

Install Ice and Water Shield:

For added protection in regions experiencing severe winter conditions, consider installing an ice and water shield beneath your roofing material. This waterproof membrane acts as an additional barrier against ice dams, safeguarding your home from potential water infiltration. This is not always necessary but if you are replacing your roof, you could benefit from an added layer of protection. The experts here at Cambie Roofing can provide a free estimate and can inform you on whether or not this is necessary.

Trim Overhanging Branches:

Overhanging branches laden with snow and ice can pose a threat to your roof during winter storms. Trim branches that extend over your roof to prevent breakage and minimize the risk of damage caused by falling debris.

Insulate Attic and Ventilation:

A well-insulated attic is crucial for maintaining a consistent temperature on your roof. Inadequate insulation can result in heat escaping, leading to uneven melting and the formation of ice dams. Ensure your attic is properly insulated and well-ventilated to regulate temperature and moisture, reducing the likelihood of condensation and mold growth.

Check for Leaks and Seal Gaps:

Leaks and drafts in your attic can contribute to heat loss, exacerbating the risk of ice dams. Conduct a thorough inspection of your attic for any signs of water intrusion. Seal gaps and cracks in the attic floor, walls, and around openings such as vents and chimneys to maintain a tight thermal envelope.

Consider Snow and Ice Removal:

In areas prone to heavy snowfall, consider proactive snow and ice removal from your roof. Using a roof rake or enlisting the services of snow removal professionals can prevent the accumulation of excessive snow, reducing the risk of overloading and potential structural damage.

Contact Cambie for an Inspection

If you’re uncertain about your roofing system’s condition or lack the expertise to perform a comprehensive inspection, the experts at Cambie Roofing have more than 75 years of experience and can offer top of the line advice following a comprehensive inspection. We can identify potential issues and provide expert recommendations to ensure your roof is well-prepared for the challenges of the Canadian winter.

Final thoughts

Winterizing your roof in Canada is a multifaceted task that requires attention to detail and proactive measures to fortify your home against the rigors of winter. By following these extensive tips and recommendations, particularly tailored for the Canadian climate, you can ensure that your roof remains resilient and your home stays protected throughout the winter months. Taking the time to invest in these preventative measures will not only safeguard your property but also contribute to a more comfortable and worry-free winter living experience.

Roof Warranties

The Ins and Outs of Roof Warranties

The Ins and Outs of Roof Warranties

Homeowners are often confused by warranties and their terms, which is compounded when a lot of roofing contractors don’t explain them adequately. Homeowners assume that when a product includes, for example, a 15-year roofing warranty, that everything to do with their roof installation will be covered for 15 years. Unfortunately, this isn’t always the case. More commonly, a warranty is limited to material costs only, and does not cover cost of labour and other costs associated with the removal and replacement of materials. When looking at roofing warranties always read the fine print and ask if you don’t know.
In fact, roofing warranties can be complicated and it’s important as the building owner that you understand what type of warranty covers your roof, the terms of the warranty, factors that may make the warranty void. In this post, we will demystify some of the issues that surround roof warranties.

 Types of Roofing Warranty

There are two basic types of roofing warranty which area the contractor warranty and the manufacturer warranty. Just as they sound, the contractor warranty is provided by the roofing contractor. That installs your roof whereas the manufacturer warranty is provided by the company that makes your roofing material. The type of warranty can vary significantly from one company to another, from one manufacturer to another. Typically, a contractor offers a warranty that covers labour while manufacturers’ warranties cover materials. Sometimes these warranties overlap, but that’s certainly not always the case. Just what kind of roof warranties do you need, and what does each kind actually protect you against?

While this is not a complete list, here are some of the basic warranties:

Labour warranties: This means the labour costs to remove and reinstall defective building materials. This does not always include the original installation. If leaks are due to workmanship errors with the original installation, a labour warranty may not cover this problem.
Material warranties: are fairly inexpensive but apply only to material defects that cause early deterioration of roofing systems. These Roof warranties include the roof membrane but not flashings, adhesives, or edges. A material warranty will cover the costs of material replacement but not the labour costs associated with repair.
Workmanship warranties: This type of warranty can be confused with a labour warranty. It is, in fact, a type of warranty that will cover you against costs related to actual installation failures and errors which a labour warranty may not cover. If you’re worried about sloppy workmanship, than this is probably the best warranty to purchase.

Terms of Roofing Warranty

As you may have guessed, the terms of your roofing warranty will depend on the type of warranty you have. and also the company providing the warranty. A thing to keep in mind is that the warranty is only as good as the company backing it.
It is important to note that there are typically maintenance responsibilities that are outlined in your warranty. If you fail to maintain your roof, your warranty may be deemed voided. For example, if you fail to fix curling shingles, the warranty may not be honoured. Additionally, roofing warranties are not likely to cover damage from standing water, damage to interior structures, and also so-called “Acts of God”. Acts of God are extreme weather conditions such as a floor, lightning, earthquakes, vandalism, or fire.

It probably won’t surprise you to learn that a lot of roofing warranties are more geared toward protecting the manufacturer than the homeowner. Manufacturers, of course, don’t want to shell out money to homeowners unless they really have to. Which is why they spend a lot of money on lawyers to compose the fine print that ultimately tries to limit their own liability if something goes wrong with their roofing products. That’s why it’s so important that you understand the following before signing off on your project and warranty purchase:

  • What type of roof warranty am I getting?
  • How long does the warranty last?
  • What can void my roof warranty?
  • What are my responsibilities for maintaining my roof warranty?
  • What doesn’t a typical roof warranty cover?

Manufacturer Warranty

The most common kind of manufacturer warranty is a shingle warranty which may cover you for 20 to 50 years. As described earlier, this type of warranty only protects you against defects in the roofing materials themselves, not against improper instalment or worker error.

Although having a manufacturer warranty is important for your peace of mind, it’s actually rare for a roofing problem to be traced to a manufacturing defect. More commonly, a substandard roof is attributable to poor installation which is a separate issue altogether and which a manufacturer warranty won’t cover. Keep in mind even if the materials themselves are at fault, your warranty may only cover those materials, not the labour required to install them.

Conclusion

The actual terms of a roofing warranty will differ from company to company and the roofing material you select. Always ask for a copy of the warranty before signing the contract. And educate yourself about the exclusions and limitations in the warranty.
When you hire a roofing contractor, you should first check to see if your roof is under warranty. If it is, then it can help you save possibly thousands of dollars in repairs. Call us at Cambie roofing because we offer you the most warranty choices for your new roof or roof repairs. For the best protection for your home, call our Vancouver roof experts to schedule a free, in-home consultation.

Originally published February 2019.
Updated and republished November 2023

What is TPO roofing?

What is TPO roofing?

What is TPO roofing?

When it comes to choosing the right roofing option, there are so many choices on today’s market it can get a little overwhelming. In this blog post we are going to answer the question ‘what is TPO roofing?’ – as well as dive into the advantages and disadvantages, what it is, how to install it and if it’s the right choice for you. TPO stands for Thermoplastic Olefin which is a single-ply roofing material made from rubber and reinforcing fillers.

TPO is installed in large sheets that are welded together at the seams using heat. This achieves a seamless and water resistant finish. TPO is typically used for commercial and industrial projects but has been gaining popularity in residential projects.

TPO roofing advantages

Durability: TPO roofing is recognized as an extremely durable roofing material. Because of this, it is favoured in climates with different weather conditions such as intense rainfall, strong winds, hail and extreme temperatures – both hot and cold. The materials found in TPO can withstand tears and punctures caused by these weather conditions.

Cost-Effective: TPO roofing is a very popular choice for those looking to keep costs relatively low. The initial installation cost is low and because of its long lifespan, you won’t be spending a lot of money on maintenance or repairs either.

Low Maintenance & Long Lasting: As mentioned above, TPO roofing is low maintenance. If you want a roofing system installed that doesn’t require much upkeep then TPO roofing might be a good choice. TPO is resistant to chemicals and is less likely to support algae growth.

Environmentally Friendly: Because TPO is 100% recyclable, it is considered an environmentally friendly option. So even when the time comes that it does need replacing, your materials will be recycled. So if you’re looking to reduce your environmental impact, opt for TPO.

TPO roofing disadvantages

Limited aesthetic options: TPO roofing materials can be found in some colours but the selection is not extensive. So if you’re looking for a specific colour to match your aesthetic preferences, TPO might not work for you.

Welding Complexity: Proper installation of TPO roofing requires skillful heat welding of seams. If not done correctly, seam failures can occur, leading to leaks and other issues. It’s important to hire the experts at Cambie Roofing as this is not a DIY project.

Variability in Quality: The quality of TPO membranes can vary between manufacturers. It’s crucial to select a reputable TPO product from a trusted manufacturer to ensure the best performance. The experts at Cambie Roofing choose only the best materials so not to worry!
Despite these disadvantages, TPO roofing is a very popular choice thanks to its reliability, cost-effectiveness and environmental benefits.

Installation process

It is recommended you hire the professionals at Cambie Roofing to install your TPO roofing system. To do so, this system is installed as a single-ply membrane. Firstly, we will prepare your existing roof surface by extensively cleaning it, as well as remove debris. Then we will install insulation to ensure energy efficiency, while providing a stable layer for the TPO membrane.

Next, we will lay out the TPO sheets and attach them together using professional adhesives. Once laid out, the seams between the sheets will be welded together using heat – this creates a water resistant seal. After this, we will ensure all flashing and detail work is perfected to ensure the entire roof is waterproof. Lastly, our qualified team members will perform an inspection to ensure that the roofing system meets all quality standards.

Final thoughts

There are some factors to consider when choosing a roofing system that is best for you. TPO is suitable for most commercial and industrial projects however it can be used on residential builds as well. Take into consideration your budget, climate, building type, local building codes and your overall aesthetic preferences when considering TPO. This type of roofing is durable, emergency efficient, cost effective and easy to maintain. If TPO does align with your specific requirements, give us a call today and we will provide you with a free estimate. A properly installed and maintained roof will last your home or commercial building for years to come.

Sustainable roof coatings

Choosing a sustainable roof coating

Choosing a sustainable roof coating

Whether you’re a homeowner or a business owner who needs roof work, it is imperative that you choose materials that not only protect against the elements but something that offers you a good investment. In this blog post we are going to dive into sustainable roof coatings which have gained popularity in recent years.

These coatings are environmentally friendly but they are also good for your pocket as they lower overall energy consumption. In addition, they will extend the lifespan of your roofing system while minimizing the environmental impact your property has. Continue reading to learn about what roof coatings are, the sustainable options available in today’s market, why you should opt for a sustainable roof and all of the benefits that come with sustainable roof coatings.

What is a roof coating?

A roof coating is a fully adhered fluid that is applied to your existing roof system which works as a protective layer against harsh weather conditions. This protective layer also known as a fluid roofing membrane has a plethora of benefits in addition to weather protection, this includes durability, energy efficiency, cost effectiveness and positive environmental impacts.

Roof coatings are available in many forms whether that be polyurethane, silicone or acrylic among others. Once a roof coating liquid is applied to your roofing system, it will extend the life of your roof while lowering the need for repairs and replacements. A roof coating is always recommended to help extend the longevity of your roof.

What makes a coating sustainable?

If you want to add a sustainable roof coating to your roofing system, there are a few things to look for.

Cool roof coatings: These coatings are reflective which means they reduce the amount of heat that your roof absorbs. In turn, it will help lower your utility bills because you won’t need to run your HVAC as much! A cool roof coating helps keep money in your pocket while also decreasing your carbon footprint, a win-win.

Recycled materials: Some roof coatings can be manufactured from recycled materials which is wonderful for the environment. Ask us, the experts at Cambie Roofing about the different materials available and if utilizing recycled materials is possible for your project. If it is, you’re contributing to reduced waste and the conservation of valuable materials.

Low volatile organic compounds: Also known as low VOC, these roof coatings are made up of less chemicals which means less harmful emissions. These compounds also make for a safer work environment for the roofing installers as well as the people living beneath the roof!

Polyurethane roof coatings

Polyurethane materials contribute to the sustainable preservation of energy. These roof coatings are extremely durable and waterproof, making them a popular choice within the roofing industry. If your building or home is situated in a wet area with plenty of rainfall, having a polyurethane roof coating is going to protect your roof from the elements. These coatings can be applied to various roofing substrates such as foam, concrete and metal.

Silicone roof coatings

Silicone roof coatings are another great option although they are mostly used on flat and low-slope roofing projects. That’s why they are more popular among commercial and industrial builds. Silicone is very long lasting and is wonderful when it comes to UV resistance – making it another sustainable roof coating option. In addition, it is waterproof and weather resistant.

Acrylic roof coatings

Lastly, acrylic roof coatings are another sustainable and versatile option. If your roofing project calls for the restoration of an existing roof, you may want to consider an acrylic roof coating. They are used to restore a plethora of materials including single-ply membranes, asphalt, metal and more. Both used in the residential and commercial roofing worlds, acrylic coatings help reduce heat absorption, in turn lowering your utility bills.

Why choose a sustainable coating

There are a multitude of benefits that come with choosing a sustainable roof coating. The obvious is the positive environmental impacts they offer which help contribute to a greener future in an industry that historically was not environmentally friendly. These coatings are also energy efficient because they reflect heat which means a cooler and more comfortable indoor temperature. Again, this lowers the need for air conditioning which saves you money and reduces your reliance on energy.

It’s important to invest in a roof coating because it acts as an extra layer of protection from any weather conditions your home or business may face. This includes heavy rain, hail, extreme periods of heat, wind and snowfall. By extending the lifespan of your roof, you won’t have to spend nearly as much on repairs or premature replacements. Even if the initial investment costs you money, the longer term financial benefits will prove worth it. These coatings can also help increase your property value which will come in handy if and when you decide you want to sell. Many purchasers look for sustainable features and having an eco-friendly roof could be a main selling point.

Final thoughts

Choosing a sustainable roof coating for your property is a wise investment that benefits your building and the environment. The experts at Cambie Roofing are happy to discuss the various options available to you as well as provide you with a free estimate for your project. Benefit from the various advantages such as being more eco-friendly, energy efficient, reduce your maintenance costs, extend the lifespan of your roof and more.

How To Become A Roofer

How to become a roofer: roofing responsibilities

How to become a roofer: roofing responsibilities

Not surprisingly, roofers use their specialized skills to ensure your home has a proper roof that protects you from rain, wind, snow and other elements. They are the guys who patch holes or build you a completely new roof.
Roofs tend to work on all types of roofs, from asphalt to cedar to metal. These roofs are either sloped or flat. Slopped roofs usually require slating, tiling, or asphalt while a flat roof uses a bitumen layer or fitting felt sheets.
A large part of a roofer’s work is making sure your roof is structurally sound. They repair roofs by removing and replacing broken tiles, cutting, and fitting roofing material.

How Do You Become a Roofer?

There are no specific schooling or academic requirements to become a roofer. They do not need to have a trade certificate or any licence to work in B.C, although there is a certification people can take to enhance their employability. Most roofers start off at the bottom and work their way up first as common labourers while others might go through apprenticeships with professional roofing companies.

Roofers need to be nimble with their hands and need to be able to think on their feet. They also need to be able to handle heights. They should be able to understand architect plans and have some math skills to measure out the different materials. Roofers must also enjoy being outside in the elements and a background in construction certainly helps. It’s a physically demanding job, requiring lots of dexterity. There is a lot of crouching, bending and kneeling involved.

A roofer involves repairing, replacing and installing new roofs on homes or commercial properties. They work with many different types of materials including asphalt, tiles, slates, bitumen, and metal sheets.
The work they put into a roof will ensure that the roof will endure weather of all types including rain, snow, sun and everyday wear-and-tear for years to come.

The Roofers Contractors Association of British Columba (RCABC) is a leader in the roofing industry. RCABC has trained over 1,500 apprentices in the 20 years. Apprentices from throughout British Columbia are engaged in learning theory and practical applications, the latest application technology, current product information and safe work practices. RCABC instructors have over 50 years combined industry experience and keep up to date with developing product technology and applications.

For those interested in roofing, you may be able to find apprenticeship programs or a local unior or contractor association who will sponsor them. The typical entry qualifications for something like a 3-year apprenticeship include:

  1. You must be at least 18 years old
  2. Have a high school diploma or equivalent degree/certificate
  3. Be physically capable of performing the job

Becoming a roofer also requires one be physically fit and healthy enough. Along with possessing a good attitude, to perform the job. Roofers often work in warm weather, on hot roofs, and may sometimes need to climb quite high in order to complete a project. This means being okay with heights and hot weather are very important for anyone considering a career in roofing.
Roofers construct and repair roofs on all kinds of buildings. The jobs can range from stripping and re-slating a roof on a domestic household, working on a renovation project on an historic building, to working as part of a team on a new commercial development such as a shopping centre.

Roofers perform some or all of the following duties:

  • Install, repair or replace built-up roofing systems using materials such as asphalt saturated felts and hot asphalt and gravel
  • Install, repair or replace single-ply roofing systems using waterproof sheet materials such as modified plastics, elastomeric or other asphaltic compositions
  • Install, repair or replace shingles, shakes and other roofing tiles on sloped roofs of buildings
  • Install sheet metal flashings and metal roofs using hand and power tools

Skills and Attributes Roofers Need

Working as a roofer is most rewarding for those who enjoy physical exercise, working with their hands, developing special skills, and the security of steady employment.

A roofer should have the following skills and attributes to be successful:

Ability to work both independently and in a team setting
Good physical condition and ability to lift heavy objects
Good manual dexterity and an eye for detail
Comfortable working at heights
Interested in working outdoors
Ability to read and interpret drawings, specifications and manuals
Ability to work in varying weather conditions

Becoming Qualified as a Roofer

In B.C., an individual can become certified as a roofer by completing either the apprenticeship program through the Industry Training Authority (ITA) or by challenging the ITA Certificate of Qualification. Apprenticeship programs are for people who require more training and have employers to sponsor them, and challenging the Certificate of Qualification is for individuals who have extensive experience working in the occupation and wish to challenge the certification. For more information on the apprenticeship program fora roofer, visit the Industry Training Authority’s website. The duration of the apprenticeship program depends on how training is delivered, however it generally takes 3 years to complete the apprenticeship program through ITA.

If you are already an experienced roofer you may challenge the ITA Certificate of Qualification. To challenge the Certificate, you must apply to the Industry Training Authority and in your application provide proof of 5,400 directly-related work hours as a roofer. This is usually provided in a signed declaration from either a current or previous employer. You will need to provide proof of achievement of required competencies.
If your application and work experience are approved you must write the Interprovincial Red Seal exam and achieve at least 70% on the exam to obtain the ITA Certificate of Qualification. Red Seal endorsement is recognized by employers as a standard of excellence. And indicates that the certificate holder has met the Interprovincial knowledge, skills and work experience standards established by this industry.

The Future of Roofing

Installed properly, a roof should be able to prevent water from leaking into buildings and damaging the interior. With different types of roofs come different techniques and skillsets, which is why some roofers choose to specialize in a particular kind, such as low- and steep-slope roofs, or even roofs with solar shingles.
With the increased popularity in both solar and vegetation features on roofs, roofers can easily adapt to modern trends to make a name for themselves in the already-niche industry.

Originally published January 2018.
Updated and republished Sept. 2023.