install Asphalt Shingles

How to Install Asphalt Shingles

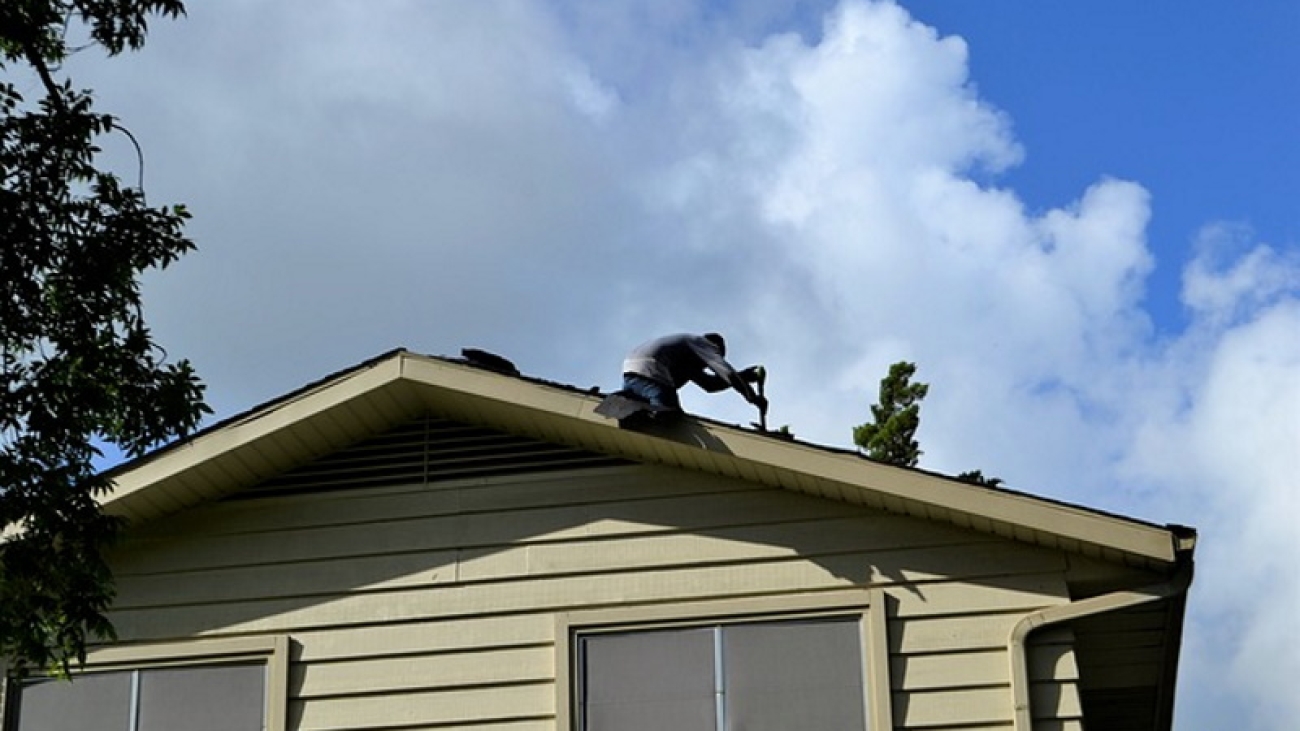
The difference in how you install (replace) a roof in the present compared to the past is like night and day. Thanks to a gazillion “how-to” blogs and instructional videos on YouTube, anyone with the confidence, tools, and the right physical condition can do it. But here’s the thing: installing a roof is still not a project you should undertake if you’re not confident in your DIY skills. It’s a physically demanding job that requires safety precautions, including working from heights. One misstep could mean serious injury. So, while we won’t try to dissuade you from taking on the challenge as we’re advocates of DIY, we’ll provide you with valuable tips before you start swinging those hammers. Let’s find out How to Install Asphalt Shingles.

Step 1 – Focus on safety above all things

The inexperienced homeowner is more likely to fall off the roof while attempting to install asphalt shingles than a qualified roofer. The difference between the former and the latter is that the roofer has presumably been properly trained and knows how to work on a roof safely.

That’s not to say that you can’t install asphalt shingles – you absolutely can, but be sure to take all necessary precautions, including using a ladder or scaffold when working from height, wearing a hard hat, and using safety ropes.

Pro Tip: Not many DIYers realize the value of wearing the right shoes when working on a roof. Many roofing accidents occur because people are wearing the wrong type of footwear, which can cause them to slip and fall. When installing asphalt shingles, wear shoes with soft rubber soles and good tread. That’ll help you maintain traction on the roof and prevent slips and falls.

Step 2 – Study how sloped roofing systems work

It’s not all about you getting up there and hammering away. You need to understand the roofing system you’re working with to install the asphalt shingles properly.

Asphalt shingles are most commonly used on pitched roofs with a sloped surface. The slope of the roof is necessary so that water can run off the roof and away from the building. If you’re not sure how to determine the slope of your roof, there are a few ways to do it. You can use a level to find the pitch of the roof or, if you have access to the attic, measure the rise and run of the roof rafters.

Once you’ve determined the slope of your roof, you need to purchase asphalt shingles designed for that slope. Asphalt shingles come in various grades, each of which is designed for a specific sloped roof.

Pro Tip: If you install asphalt shingles that aren’t designed for the slope of your roof, they won’t perform as well and may even come loose and fall off. So, be sure to purchase the right shingles for your roof.

Step 3 – Gather your tools and materials

You’ll need a few essential tools to install asphalt shingles, including a chalk line, utility knife, hammer, pry bar, and nails. In terms of materials, you’ll need asphalt shingles and felt and cement designed for roofs.

Pro Tip: Be sure to use galvanized or stainless-steel nails when installing asphalt shingles as they won’t rust like regular nails.

Step 4 – Prepare the roof surface

Before installing the newly purchased asphalt shingles, you need to prepare the roof surface. This means getting rid of any existing roofing material and making sure the roof is clean and debris-free. If you’re replacing an existing roof, you’ll need to remove all of the old shingles and the felt paper and any nails left behind. Once that’s done, you can sweep or blow off the roof surface to remove any small debris.

Pro Tip: Be sure to inspect the roof deck for any signs of damage, such as rot or water damage. Any damage must be fixed before proceeding with the installation of the new shingles.

Step 5 – Begin working from the bottom up

Once the roof surface is prepared, you now begin with the drip edge. It’s important to work from the bottom up so that water runs off the shingles and doesn’t seep underneath.

The drip edge serves as the first line of defence against water infiltration and should be installed at the roof’s eaves. It’s a metal or vinyl strip placed along the edge of the roof, extending over the gutter.

Pro Tip: The drip edge should overhang the gutter by at least an inch.

Step 6 – Install the felt paper

The next step is to install the felt paper. Felt paper is a water-resistant material placed between the roof deck and the asphalt shingles. It helps protect the roof deck from moisture and extends the life of the shingles.

You only need to nail the felt paper down with galvanized or stainless-steel nails to install the felt paper. Be sure to overlap each row of felt paper by at least two inches.

Pro Tip: Don’t forget to install a strip of felt paper along the rake edge, the edge of the roof extending over the gutter.

Step 7 – Install an ice and water protector

If you live in a region with harsh winter, installing an ice and water protector is a good idea. An ice and water protector are a synthetic underlayment that helps prevent ice dams and water damage.

The ice and water protector should be installed before the final row of shingles. This will help keep your roof protected from the elements.

Pro Tip: Consult with a professional roofer to see if an ice and water protector is necessary for your region.

Step 8 – Add the roof underlayment

Before installing the roofing cement, you’ll need to install the roof underlayment. The roof underlayment is a layer of asphalt-saturated felt that helps keep the roof deck dry. If your area isn’t prone to harsh winter, you’re better off starting the underlayment at the eave rather than the whole length of the roof.

Installing the underlayment is a simple process. Just unroll it and nail it in place. As in the previous step, you need to overlap each piece by two inches.

Pro Tip: You must also use galvanized or stainless-steel nails to avoid premature rusting when installing the roof underlayment.

Step 9 – Cover the joints and valleys

Some areas or components of the roof need flashing, the purpose of which is to divert water and moisture. The flashing needs to be covered in roofing cement to create a waterproof seal.

The flashing is found at the joints and valleys of the roof. The joints are where two pieces of the roof meet, while the intersection of two sloping roofs forms the valleys.

Simply cut it to size and nail it in place to install the flashing. Then, apply a generous amount of roofing cement over the seams and allow them to dry.

Pro Tip: If you’re not sure how to install the flashing, consult with a professional roofer. You can’t “redo” this step, so it’s better to learn everything about it before proceeding.

Step 10 – It’s time to shingle

Starting at the bottom of the roof, install the first row of shingles. Align the shingles and nail them in place. Be sure to stagger the joints of the shingles as you install them. This will help keep water from seeping underneath the shingles.

Pro Tip: It’s good to use a chalk line to help you keep the first row of shingles straight.

Step 11 – Proceed with the installation of the rest of the shingles.

Once you’ve installed the first row of shingles, continue working your way up the roof, installing one row at a time. Like the previous step, don’t forget to stagger the joints of each row of shingles and use a chalk line to keep the rows straight.

Pro Tip: Use a utility knife to trim any shingles that hang over the roof’s edge.

Step 12 – Don’t forget the hip and ridge caps

If your roof has a hip or ridge, you’ll need to install hip and ridge caps. The hip and ridge caps are pieces of metal or asphalt that cap off the hips and ridges of the roof.

Installing the hip and ridge caps is a simple process. Just measure the length and width of each hip and ridge, then cut the caps to size. Once you’ve cut the caps to size, nail them in place.

Pro Tip: It’s best to use longer nails for ridge cap shingles for them to penetrate the roof deck.

At this point, you already have a clearer picture of how to set up and install asphalt shingles. That’ll help you acknowledge the cost as you purchase the necessary materials for the project and the intricacies that often go into roofing. There’s no shame in consulting a professional if you don’t feel confident.
Would A Tesla Roof Be Economical In Vancouver?, tesla roof in vancouver

Would A Tesla Roof Be Economical In Vancouver?

In this blog post we will discuss Tesla solar roofs and would it be economical in Vancouver – especially during the dark and rainy winters.

Electricity is important to operate all the appliances in your home, especially today when we are dealing with ever-chainging technology that takes up more and more energy to operate. As a reuslt, we commonly rely on the electricity in our home and business more and more. It actually has became a basic need for all of us.

But when we all need the utility capability of electricity, we are also tired of the electricity bill that comes monthly and are rising every time. Using only one source of power will cost you heavy and also can leave your hand when you need it the most. There are many issues that can happen to the conventional electric power line. The better solution for power is solar energy.

Solar Power System

Sunlight gives a lot of energy to our planet, nuturing life, but as humans, we are not able to capture and use it completely. As part of nature, solar power panels are the best way to collect the pure energy from sun and utilize it.

The energy of the sun, if we are able to harness it correclty can fulfil most of the plant’s needs like heat, light, and other electricity dependent needs. Solar energy is derived from the sunlight and this will not only lead to reduce your electricity bill but also provides us with a clean, reusable source of power.

When we are using a lot of conventional electricity which runs on fossil fuels, it leads to many health and environmental issues, distroying our planet in the process. In addition, fossil fuels are getting harder to extract from the Earth which leads to the rising of electricity bills. Using solar energy to power your building is a much more economical source of energy.

Tesla Solar Roof

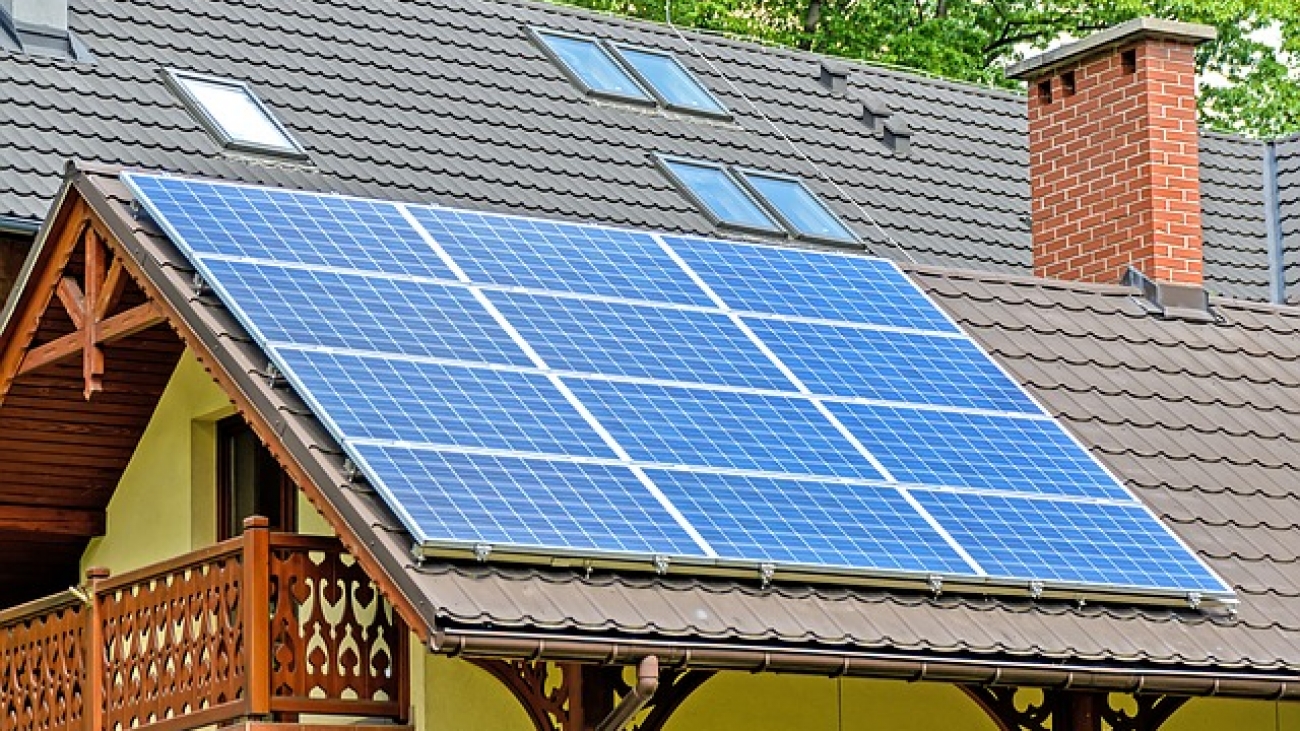
This leads us to one of the most innovative companies of our time: Tesla and their new roofing system. The Tesla roof is a beautiful solar roof with a seamless design that complements your home’s natural aesthetic styling.

Tesla solar roof tiles are durable, strong, and engineered for all-weather protection. It also comes with a 25-year warranty and will produce clean energy for your home for decades to come. Solar roof combined with Tesla invention provides maximum solar production efficiency.

A great feature, unlike any other roof, is that it will continue to be improved with each wireless software update—monitoring and optimizing this system from anywhere with instant alerts and remote access. You can easily power your home at the lowest price per watt of any national provider.

It is economical in Vancouver as it will save money by only one-time installation charges for a long run that means less costly than the conventional electricity. Tesla roof will provide you with solar energy that means your building will use less fossil fuels and become more energy efficenct.

Tesla Roof in Vancouver

Vancouverites and people around the world are installing Solar panels which is increasing the demand and decreasing the price accordingly. Tesla solar roofs are an expensive option and not yet available in Vancouver, but perhaps they will be one day soon.

As of 2019 unveiling, Tesla’s senior director of energy operations explained that Tesla is installing retrofit solar panels in 25 states, and it will be offering the roof in all of those states. The goal, however, is to expand across the country with both the company’s internal teams and third parties.

However, with COVID and global supply chain issues, there has not been much progress. (Especially with Elon Musk focused on other areas of his business.) At the moment, Tesla’s website accepts orders for its retrofit solar panels in these States:

  • Arizona
  • California
  • Colorado
  • Connecticut
  • Delaware
  • Hawaii
  • Florida
  • Illinois
  • Maryland
  • Massachusets
  • Nevada
  • New Hampshire
  • New Jersey
  • New Mexico
  • New York
  • Oregon
  • Pennsylvania
  • Rhode Island
  • Texas
  • Utah
  • Vermont
  • Virginia
  • Washington State

When we can eventaully order them, the real question is are they worth it in Vancouver’s rainy environment? Thankfully the modern solar roof that Tesla solar has designed gets more energy from less sunlight and stores it to power your whole building.

There are many people who understand the benefits of Tesla solar roof and installing it. No doubt, it is costly than other solar panels but it is a one-time cost and worth the investment if you consider the long-term benefits.

Here are the Reasons Why Tesla Roof Is a Worthy Investment in Vancouver

  • Good for the environment

Conventional energy is harmful for the environment because it runs with fossil fuel that contributes to air, water pollution and global warming. Whereas, solar energy is a natural resource that is good for economical or environmental and harnessing the power of sun is the cleanest, safest, renewal choice.

Cost effective energy source- Solar energy is highly reliable because sun is a renewable natural source of energy. Sun charges nothing for providing sunlight but, fossil fuel does. Fossil fuels are expensive and will eventually run out. Solar panel is several times more costly than electrical energy but, one time installation of solar equipment is all that needed to reap the benefits.

  • Saves money

Tesla solar roof is economical in Vancouver because It saves money by reducing the electricity bill that comes monthly and rises eventually. It needs only one time installation and needs no frequent, ongoing, and expensive obligation. Installing it will directly save your money over time and will also save planet from pollution and global warming.

  • Increase economic growth

Tesla solar system spurs economic growth by increasing the job facility in Vancouver. Solar energy industry creates jobs 17 times faster than any other industry.

Promotes energy independent- Solar energy system especially paired with a backup battery system promotes energy independent when you need energy the most. When you just use the conventional energy and no other source of powering your home, there are variety of issues that happen. The issues that can event be like bad weather or damage to power lines.

Final words

The solar electrical panel system is better and attractive in every way than most other forms of energy. People believe that installing solar roofs is expensive but the cost is coming down and one day, perhaps, it will be the same price as a normal asphalt roof.

And when that moment comes, Tesla solar roofs will be there. They are well designed and will provide a great resource in the long run. This state-of-the-art solar system is economical, lowers monthly running costs, has increased reliability, and uninterruptible power supply. For professional Roofing, Call us at Cambie Roofing.

Drainage Solutions for Flat Roofs

Three Drainage Solutions for Flat Roofs in Vancouver

There’s no denying the preference for flat roofs in Vancouver. From apartment buildings to residential homes, Vancouverites love the simplicity of flat roofs over other types. But what about the downfalls? Flat roofs are known for their vulnerable design in inclement weather, puddling water and quick saturation. So, anyone planning to install a flat roof or replace an old one must have a failsafe drainage solution. Check here Three Drainage Solutions for Flat Roofs in Vancouver.

Importance of an Adequate Drainage on a Flat Roof

Proper drainage on a flat roof ensures that both rain and snow are adequately removed. In addition, it’ll prevent leaks, water damage and structural problems with your building’s foundation.

Both the outer surface of the roof and any insulation applied to it become saturated with water, particularly after a heavy rainfall or snow. That’s why a drainage system is necessary during both the summer and winter months as it ensures that the roof doesn’t freeze, causing cracks in the material.

Proper drainage will also reduce ice dams – when thick accumulations of snow form on your roof under shingles or tiles where they melt and refreeze again with water trickling down, causing leaks over time. Unfortunately, if this melting process happens frequently, it’ll also damage the insulation under the roofing material, allowing ice bridges to form.

What Happens If There Isn’t Enough Drainage?

Flat roofs in Vancouver won’t last long without an established drainage solution. The first thing to go will be the roofing material. With enough water exposure, your shingles start peeling at their bottom layers. The underlying roof deck will then be damaged, resulting in leaks.

And if your building’s insulation is affected by water damage, expect to pay more out of pocket for heat in the cold winter months. Plus, the humidity build-up in the insulation leads to mould growth in your attic space. It even speeds up shrub growth on the roof surface that also leads to roof leaks.

Further compounding these problems is polluted rainwater. With inadequate drainage, rainwater will sit on your roof’s surface for extended periods. You don’t want those contaminants to find their way into your indoor environment, contaminating both the soil and groundwater where they eventually reach groundwater used for drinking.

These problems can all be prevented with a well-planned drainage design for your flat roofing project.

Choosing the Right Solution for Your Building

If you have a flat roof on your house or building, these three drainage solutions offer the best protection:

1 – Gutter System

The best thing about gutters is that you don’t need to perform a pricey modification on your flat roof to install them. Gutters work by directing water from the roof into a downspout. The bigger the gutter and downspout, the more effective it is at draining off excess water.

Aside from being a cost-effective drainage solution, a gutter system doesn’t require a ton of maintenance, provided you install protection, i.e., gutter guards or mesh. Of course, you’ll need a professional who’s experienced in installing gutters and their accompanying protection, but it shouldn’t be expensive either.

Warning: Gutter systems often accumulate debris over time and may need to be maintained or cleaned. Otherwise, you’ll experience blockage and overflow, especially if you don’t equip them with protection.

2 – Scuppers

Scuppers aren’t as common as gutters, but they’re an excellent drainage solution for flat roofs. Scuppers are simply openings in the roof that allow water to seep into a perforated pipe leading to cleanouts and downspout extensions.

The perforations on the scupper’s pipe direct rainwater to the downspout, avoiding any overflow. In addition, it means they protect your building’s foundation from water seeping through cracks and holes, which could lead to irreparable damage.

Scuppers are a better drainage option for flat roofs because it’s one of the least expensive solutions that offer excellent performance. It works best for homes or small commercial buildings with minimal roof area that can accommodate scupper openings.

Warning: The drawback to using scuppers is that small debris or fallen leaves can clog the roof opening and prevent water from draining. You may need to maintain them regularly, i.e., by cleaning out any excess dirt and debris.

3 – Interior Drains

For larger flat rooftops, using interior drains is the best option. It requires drilling holes in your roof decking and placing drainage pipes below to direct water elsewhere.

This drainage solution comprises guttering, pipes, and a system of drains that ensure water is never allowed to remain on your roof. The system works if the density of your insulation is higher than other flat roofs. Where water accumulates faster after heavy rainfall. The downside of this solution is that you’ll need to cut through the roof decking, which can be an expensive process.

Warning: Installing an interior drain system requires hiring a professional plumber and roofer who’s experienced in installing drainage systems for flat roofs. You’ll also need to regularly clean the system to avoid blockage, leading to water build-up.

Why Not DIY?

If you’re tempted to design your own drainage solution for your flat roof, don’t.

A DIY approach may save you money initially, but there’s a high chance it will cost more in the long run. Flat roofs are difficult to work with and require specialized designs that aren’t possible without professional installation. You’ll end up wasting time and money if you try to do it yourself.

Of course, a DIY approach might work for a small roofing structure with a less complicated design. However, for anything more extensive or complicated, hire a professional.

Why Do Asphalt Shingles Cup and Curl?

Why Do Asphalt Shingles Cup and Curl?

Have you ever wondered why asphalt shingles cup and curl? There are plenty of reasons besides weather conditions that compromise your roof.
Asphalt shingles offer a multitude of advantages over other roofing materials. Besides their cost-effective quality, they’re also versatile enough to cover different angles, forms, and shapes.
Asphalt roofing is energy efficient and can withstand fire and high winds. But like all other roofing materials, it has its share of weaknesses. 
You’ve come across several houses in your neighborhood with asphalt roofs, and the one thing you notice right away is the cupping and curling shingles. Have you ever wonder why?

Why do Asphalt Shingles Cup and Curl?

Since it’s a relatively common sight, you may think that it’s no big deal. On the contrary, cupping and curling shingles are telltale signs that something is wrong with the roof. 
Cupping occurs when the shingle’s center portion is curved in or concave, forming a bowl-shaped appearance. On the other hand, curling happens when the shingle’s edges elevate or turn up while the center remains flat.
Most homeowners don’t pay attention when or why their asphalt shingles cup and curlo until it’s too obvious. Usually, they believe that it’s purely an aesthetic issue.
But get this: there are reasons why asphalt shingles cup and curl compromising their usual shape, and it’s a problem requiring an immediate inspection; the lack of attention may eventually force you to re-roof. 
It’s your job as a property owner to learn of the possible causes behind the cupping and curling of shingles so that you’ll prevent them from happening in the first place.
You’re in no condition to fix the problem unless you’re a professional roofer. The best option is to call a licensed roofing company as soon as possible. 

1 – Severe Weather

Some reasons are beyond your control, including harsh weather conditions. If your roof is less than five years old, there’s no reason for the shingles to start showing signs of deterioration other than extreme weather.
Contributory factors include hailstorms and constantly changing temperatures. Hail usually damages a few tiles, which you can replace individually. But extreme heat does more profound damage to asphalt shingles. 

2 – Age

Like harsh weather, you don’t have control over the age factor. No matter how much you take great care of your asphalt roof, it’ll never last forever. So, expect the shingles to start cupping and curling when the roof is at the end of its life.
Some homeowners try to delay the inevitable by replacing individual shingles, but they’ll have no other choice down the road but to replace the whole structure. 

3 – Insufficient Roof Ventilation

Extreme heat impacts the asphalt shingles on two fronts: above and below. The lack of proper ventilation underneath the roof traps the heat from the sun.
When there aren’t enough vents in the attic, heat doesn’t find a way to get out and the lack of airflow makes matters worst. As a result, the asphalt material gives in to the heat, causing the shingles to deteriorate. This problem is remedied by improving attic insulation. 

4 – Inadequate Binders 

Supposed you’ve installed your asphalt shingles less than five years ago, haven’t been exposed to harsh weather, and you have proper roof ventilation. Yet you notice some of them curling and cupping; the likeliest culprit is a manufacturing defect.
This is where you’ll feel the impact of choosing a cheap and low-quality roofing material. If there’s not enough asphalt binder on the shingles, the underlying layer doesn’t have sufficient protection against heat damage.
When the thin binder washes off, the shingles give in to the extreme heat and start to curl up. 

5 – Handling and Storage Issues

In terms of production and storage of asphalt shingles, what do you porducers prioritise? Quantity over quality, or viceversa? Yes, you have guessed. Here, due to the high demand for the material, producers prioritize quantity over quality.
Although you can still get high-grade asphalt roofing, defects like cupping and curling may still surface early in the roof’s life. It’s because the shingles may have been improperly stored or mishandled before the installation.
There is no way to know when those shingles you bought were produced, and how much time they were exposed to the sun before they ended in your roof. Therefore, those shingles have a significant ‘wear and tear” in them even before you got them. 
There are special protocols to handle and store shingles to preserve tgeur physical integrity. If they’re left exposed to the rain and direct heat from the sun, they’ll saturate or get overheated.

What to Do When your Apshalt Shingles Cup and Curl

So, even if you haven’t done anything wrong, there’s always a chance thos asphalt shingles to cup and curl before your eyes.
You can always claim the installer’s workmanship guarantee if there’s proof of mishandling or poor storage as a last resort. But you’ll have to document everything from the beginning, including the name of the roofing contractor and the materials used.
If most of the shingles on your roof show signs of severe damage, you may no longer have a choice but to replace the entire structure. But don’t dwell on anguish – at least you’re now armed with the knowledge on why shingles cup and curl.
It’ll help you prepare for what can happen to your new roof and at least try to prevent the circumstances that lead to its premature decline. And by the way, please hire a licensed and reputable roofing contractor next time. 

best roofing material

What To Do If You Can’t Afford a New Roof

Nothing lasts forever – not even the most expensive roofing material. Regardless of what your roof is made of, it’ll eventually age or give in to severe damage caused by extreme weather or another fortuitous event.

When that happens, you’re left with no choice but to have it replaced. But like many property owners before you, the problem is not having the money to afford a new roof. You’re in a mess, left in a corner with no solution in sight.

If you can’t afford a new roof, know that there are other options to consider. It’s not like you sit idle and wait for nothing. Keep reading this article and learn about the potential ways to smartly solve your predicament.

Do You Actually Need a New Roof?

Some property owners are overwhelmed by the prospect of replacing a roof.  They and you are right: The cost associated with it is a big deal. But before you stress yourself out, think about the possibility of having it repaired instead.

Just because a local roofer told you that you need a new roof doesn’t mean that he’s accurate or telling the truth. Talk to other roofing contractors and tell them about your situation. Some roofers can salvage a roof for less money than it’ll cost to replace the structure.

Some old and severely damaged roofs can be remedied with the necessary repairs and the best roofing material. That will last you for at least a year. That should be enough time to save money for the inevitable replacement. Instead of relying on the sole assessment, you must get at least three independent assessments and repair estimates to fix your roof.

Property owners spend an average of $900 for roof repair, although minor fixes typically cost around $200. If you’re facing a major roof repair project, you’ll have to shell out at least $500 and upwards to $1500.

As much as you want to replace your severely damaged or aged roof, you may have to contact a roofing professional first to inspect the structure. Roof repair costs less than a total roof replacement, but even that is a hard pill to swallow when you’re low on funds.

Financing Options that Include Best Roofing Materials

If you can’t afford to pay cash for roof repairs, there’s a handful of financing options available to ease your burden. Use your credit card to get the repairs done and have enough time to pay off the charges.

If you’re uneasy about the credit card option, getting a personal loan is the next best thing. It gives you the option to pay on a monthly scheme while the needed repairs are addressed right away. Keep in mind that this is a short-term investment for your property, so please be sure to use the best roofing material. Use money wisely.

Improvement and Renovation Grants with Best Roofing Material

Applying for a home improvement or renovation grant is a popular option for roof repairs. They’re available from the local and national governments, and they usually include the best roofing material.

In North America, these home improvement or renovation grants are meant to provide financial assistance to property owners who can’t afford to have their homes fixed after weather devastation or natural disaster.

Another type of grant focuses on low-income homeowners who need help in improving their houses. Home improvement and renovation grants are meant to give property owners relief as they come with low-interest rates compared to standard loans.

Consider DIY

If you have tried roof work before, then you should explore fixing the structure one more time. On the other hand, DIY roofing projects are only meant for minor repairs. Unless you’re a roofing professional, you’ll have to tap the services of a licensed contractor for major repairs and replacements. But because you’re short on cash, there’s nothing wrong in pondering a DIY solution.

Refinance the Property

Refinancing your home make sense, too. Home improvement loans include refinancing the property, where there’s an explicit set of guidelines to be followed. In most scenarios, the loan is exclusively intended for the needed repairs and cannot be used for other purposes. Since the roof is part of the property, this option is viable for major roof repair jobs.

See to it that you talk to a financial expert before taking this path. You need professional advice since refinancing your home is a long-term responsibility that affects you and your family’s future. Aside from getting a reasonable interest rate and favourable loan term, the financial expert helps you understand the legal consequences in the failure to pay the loan.

Why Not Save Some Cash?

Investing in a new roof is out of the question, but with the help of a professional roof inspector, you could wait it out for several months to afford a repair project.

Call a local roofer to examine the structure. If the inspection report says that you can live with the damage for a year or so, you can go through your budget and save the necessary funds for a major repair. There’s always the option of cutting costs on stuff like food, vacations, and entertainment.

Instead of getting a loan and paying for the interest rates, you’ll save cash and end up fixing your roof with no long-term financial responsibilities to cover.

common roofing terms

Roofing Terminology: A Guide to Common Roofing Terms

Give a step forward learning common roofing terms in advance! Replacing or fixing your roof means that you’re about to hear industry-specific terms from the roofing contractor.
Yes, you’re most probably unfamiliar with most of these terms, but you can always ask the roofer to expound. Nevertheless, it’s helpful to learn some roofing terminologies on your own so that you won’t feel overwhelmed. All it takes is to read this guide.

Common Roofing Terms

There are thousands of roofing terms, and one post isn’t enough to tackle them all. So, we stick to the most common ones for the typical property owner. It makes sense to start with the five popular roofing options in North America:

Asphalt Roof

Shingles made from asphalt are by far the most preferred residential roofing material in this part of the world.
Fiberglass reinforces the new iteration for extended life. Fortunately, the price remains competitive, which is why an asphalt roof never goes out of style.

Wood and Cedar Shake

Wood shingles are as competitive as asphalt in pricing, but its advantage is its aesthetic value. In other words, it looks more pleasing than the conventional asphalt roof, thanks to the rustic and natural appearance.

Metal Roof

Roofs in metal are better to resist extreme weather all year. As metal is resilient and resistant to severe conditions, i.e., snow, strong winds, and torrential rain. Metal roofs in North America come in two styles: shingles and panels. The material composition can be aluminum, copper, stainless steel, and zinc.

Tile and Slate

Tile and slate make for an ideal customized and DIY roof as they’re versatile and come in a handful of colours. Unlike asphalt and metal, tile and slate roofing materials are light enough for a DIY enthusiast or a handyman to install.

Rubber

The purpose of a roof made from rubber material is to mimic the asphalt shingle. It’s the newest roofing material available in North America and is causing quite the stir because of its competitive price and durability.
Aside from the types of roof, there’s a handful of common terms in roofing you should know:

1. Course

Refers to a row of shingles or other roofing materials that run horizontally across the structure’s length.

2. Decking

The roof’s decking is a sheet material usually made from plywood. It is attached to the rafters, which in turn is found in the attic. The decking serves as the host for other roofing materials, i.e., shingles and underlayment.

3. Downspout

This part of the roof comes in the form of a pipe installed to the building’s sides. Its purpose is to direct water from the gutters and away from the structure.

4. Drip Edge

It’s an L-shaped metal strip situated along the edges of the roof. It allows the water to drip, preventing a possible buildup in the eaves, siding, and decking. The drip edge is also responsible for preventing moisture penetration in the fascia boards.

5. Chalk

In roofing, chalk refers to a powdered residue applied on the surface of a material.

6. Chalk Line

It is a line purposely made on the roofing structure by snapping a cord wrapped in coloured chalk. Depending on the roof material, some contractors use a taut string instead. The idea of a chalk line is to provide a guide for alignment purposes.

7. Chalking

The term pertains to the degradation of a chemical ingredient used in roofs, such as coating and paint.

8. Chimney

The chimney is a structure that projects through and above the roof for aesthetic and practical purposes. Wood, stone, metal and masonry are the most common materials to build chimneys.

9. Fascia

Those boards exposed on the roof eaves or overhang’s front edge make up the fascia. The boards are typically made from wood, vinyl, or aluminum. The gutters can’t be adequately installed without the fascia.

10. Flashing

The flashing is a sheet metal material that prevents water from penetrating through the projection and intersections in a roofing system.
Contractors install flashing to protect the chimneys, valleys, joints, vent pipes, and other parts of the roof where water naturally finds its way through.

11. Gutter

The gutters are troughs embedded in the fascia board. Guttering is crucial for collecting water run-off from the roof, leading to the downspouts and the ground.

12. Ice Dam

This describes a condition in which the combination of ice and snow thaws and re-freezes at the roof’s lower edge.
Ice dams cause water to back up and collect under the shingles. The pressure created by the buildup of water causes leaks and extensive water damage if not addressed.

13. Overhang

“Overhang” is the part of the roof which extends beyond the exterior walls of the building or house.

14. Rafters

The rafter provides support to the roof. It is the one you see in an unfinished ceiling of an attic. As raffers are attached to the roof deck, they play a critical role.

15. Ridge

The ridge describes the top edge of a couple of intersecting sloping roof surfaces.

16. Valley

The roof valley is an area where two adjoining sloped planes meet. It’s easy to spot since it creates a “V-shaped” depression on the roof.
Knowledge of common roofing terms comes in handy when you’re venturing on a repair, installation, or replacement project.
It protects you from getting ripped off by a mischievous roofer, and it helps you find the best roofing contractor by sharing educated conversations with them.

Vancouver roofing

How Colour Affects Your Roofing Choice In Vancouver

As you drive through your Vancouver neighbourhood, the colour of a roof is probably the last thing on your mind. In fact, you will probably only notice a roof if it’s out of place or doesn’t look right. Well, allow us to explain why you should mind about your roofing in Vancouver. Yes, the roof colour in Vancouver tends to blend into the background of the landscape, but did you know your home’s roofing colour affects your home in more ways than one? In this blog post, we explore why the colour of your roof matters.

Vancouver Roofing: Light or Dark Colours?

Unfortunately, there’s no straightforward answer to which is better: light roofs or dark roofs.Ultimately, the best roof colour for your home is the one you like the best and the one that fits in with your neighbouring roofs. But there is a little more than just aesthetics when it comes to roofing colour choices in Vancouver.

How Roof Colour Reflects or Absorbs Heat

Did you know roof colour affects your home’s internal temperature?  In general, light-coloured roofs reflect away heat from the sun, while dark-coloured roofs absorb much of that heat and transfer it into the rooms below.
Obviously, if you have a lighter-coloured roof, your home absorbs less heat through the roof during summertime. As a result, your air conditioner operates more efficiently, uses less energy, and leads to lower utility bills.
In contrast, a dark roof likely raises the temperature inside your home’s highest rooms. Your cooling system works harder to compensate for the extra heat, and your bills slowly rise.
However during the colder months, the reverse is true. A dark roof brings in more heat from the sun than a light roof. This feature makes dark roofs advantageous in colder climates with long winters and short summers.
Thankfully in Vancouver we live in a temperate climate which means that there aren’t as hug fluctuations in temperature as there are in other cities. In Toronto, for example, you get extremely humid summers and bitter cold winter months.
In Vancouver, we’re more likely to have worry about the colder months but we are also seeing hotter summers in recent years so we may seem lighter roofs becoming more popular.
Or course, colour isn’t the only aspect of your roof that affects home temperature but it is a larger factor.
The roofing material also affects how your roof reflects or absorbs the sunlight. For example, asphalt shingles are less reflective than metal or rubber roofing. This quality means even tan asphalt shingles may welcome more heat into your home than a dark brown metal roof.

How Roof Colour Affects Snow Melt

Now, let’s consider how snow, another huge factor affects the equation. Because dark roofs absorb more heat, they can also help melt snow but does it actually help enough for you to take into consideration?
First, consider Vancouver has fewer sunny daylight hours during the cold winter months. And less sunlight exposure means less sun beating down on a roof and less time for the roof to absorb that heat.
Next, remember that even dark-coloured roofs may not actually appear black during the winter because they’re covered in snow. Snow actually reflects much of the sunlight before it can reach the roof so the dark roof underneath cannot absorb heat and melt the snow. This means dark-coloured roofs may have a small snowmelt effect but not a sizeable one.
Similarly, if your roof experiences winter problems like ice dams, your roof colour probably isn’t the primary culprit. More likely, insufficient attic insulation and poor roof ventilation create the problem.

Location 

Which part of your roof gets the most sunlight? Does the front of your home face north? Is the sun blocked by taller buildings or maybe you are high up on a hill? Sunlight can affect the appearance of your roof. Because of how far north we are in the hemisphere, the sun can bring out cool, blue hues while in southerly regions, roofs can appear more orange. These variations can completely change the look of a roof.

Roof Design

the architectural style and materials of your home should be kept in mind when deciding on a roof colour. Also what colour roofs are your neighbours?
Your home will look awkward if your roof sticks out like a sore thumb in your neighbourhood. There might actually be homeowner associations or subdivision rules about how your roof should look so remember to check with your neighbours before doing any major work.
Lastly, You should keep in mind that, like paint in a room, dark roofs make a home look smaller and light colours make a home look larger.

Last Thoughts in Vancouver Roofing

If you have the budget, advances in modern roofing material technology mean you can likely find a colour your like in a roofing material that suits your taste without worrying too much about heat or coolness.  However, if you just want to stick with the traditional materials you should think about
Cambie Roofing will bring you shingle samples to your home for you to view the colour next to your brick or siding. This makes the decision extremely simple as you can visualize how it will look.
Homeowners should be smart and do research when searching for a roofer who can correctly advise you on how to proceed. It could save you money and prevent a whole lot of trouble if you find a roofer that you can trust and who will do the job properly the first time around.
If you need a roof replacement from a reputable contractor, call our team at Cambie Roofing. We are happy to help with any questions you may have.  We look forward to hearing from you and assisting with your roofing repair needs.

Home Renovations and Insurance in Vancouver

Home Renovations and Insurances in Vancouver

Getting tailored-made home renovations and insurances in Vancouver is possible if you contact professionals. Design a insurance policy with added features just for you.
Any insurance professional will tell you that having insurance does not provide protection against everything during a renovation. However, while accidents can happen, a person’s disaster preparedness will affect outcomes at least as much as their insurance policies.
Now, is it possible to be ready for home renovations, and having bullet-proof insurances in Vancouver? Sure it is! Of course, the first thing you need to do is activating your accident barometer, and tweak over it.

Alarm System Monitoring

For many years, companies have offered discounts for alarm systems, but not all alarm systems are the same. In order to qualify for this home renovation discount on your insurance policy, your alarm system must be centrally monitored by an approved company

Fire Monitoring System

Smoke and CO2 dioxide alarms are an inexpensive investment even if there were no insurance discounts associated with them. Luckily, there is sometimes an insurance reward, but for just a few dollars per unit, don’t skimp out on these lifesaving devices.
If it’s centrally monitored, meaning that if you’re out of town and the fire alarm goes off, a third party company can send a fire truck to help, you can expect to receive a better discount on your home insurance quotes.

Home Renovations To Your Plumbing System

Houses built in the 1970s and 1980s may still be using lead piping. This type of plumbing is susceptible to increased corrosion and can crack under extreme temperatures and can be hazardous to your health. It is highly recommended to substitute these with more modern copper supply lines and updated drains.
This would positively impact both your health and your insurance premiums.

Home Renovations To Your Electrical Wiring

If your house still has aluminum or knob and tube wiring, you should look at upgrading it to modern copper wiring. If you don’t, you might have to get your policy from high-risk insurance providers. Some companies may offer you coverage, but they will likely require an inspection through a certified electrician.
A lot of old wiring resulted in fires, upgrading to the new, safer standards will reduce the chance of a fire destroying your valuables and save you money on your home insurance premium.

Use Seismic Technology

British Columbia home insurance quotes are significantly higher than in other provinces since they are prone to earthquakes as we are located in a seismically unstable region.
Almost all homes are seismically resistant these days, but if you have a newly built house with updated seismic technology often you are rewarded with extra discounts. You might want to consider adding extra earthquake insurance to your home insurance policy if you haven’t already.

Home Renovations To Your Roof

It costs more to insure homes with older roofs and some providers may not offer you coverage at all if your roof is too old. Water damage to the inside of your home and costly repairs to your roof are claims an insurer wants to avoid and they will charge you extra for an old roof. Investing in a new roof will reduce your home insurance premium.
Also, know that home insurance is not a maintenance plan. If there is damage to your roof you’re ignoring, your claim may be denied altogether.  If you can afford it, opt for more than asphalt shingles and look for something that may cost more, but has a much longer life.
A lot of things can happen during a home renovation – your contractor falls off the ladder while fixing your roof, a hammer goes through your window, or a subcontractor is injured on your property. Despite all precautions, if there’s an accident on your property that leads to a liability issue, you, as the homeowner, can be in trouble.

Home Renovations and Insurances in Vancouver: The Rules

The general rule is that owners are not vicariously liable for the wrongful act of their independent contractors. But, there are a number of exceptions to this general rule. You should be aware of them for these reasons:
First, a fully awared homeowner understands the nature and extent of liability risk. Like this, they mitigate risk through carefully drafted contract documents or assign the risk to a third-party insurer.
Second, having an accurate understanding of the liability risks helps to assessing the feasibility of the project.
Finally, being fully aware of the potential liability for the acts of independent contractors may inform the choice of contractor. The owner may decide to choose a more competent and reliable contractor, rather than the one with the lowest price.
The time to find out risk and liability is before an accident happens:

Step 1:

Check the personal liability section of your homeowner’s policy. Talk to your insurance agent before beginning a renovation project. Like this, you can update your policy and extend coverage to the new space, if needed.
You may also want to ask your agent about whether you may benefit from an add-on protection called theft of building supply coverage, which may protect the construction materials while your project is in the works.

Step 2:

Check your contractor’s liability insurance. Do the same with the worker’s compensation (WCB) insurance, and ask your contractor to provide you with a policy certificate before you begin the project.
If a contractor is unwilling to verify his coverage, consider hiring someone else. This applies to subcontractors as well.

Step 3:

Minimize risks – remove fallen branches, wet leaves, and kids’ toys from your driveway before the workers even show up.

Conclusion

We hope these tips help you with home insurance and renovations. Although home renovations and insurances can be time-consuming or annoying, they provide a extended lifespan of your property.
If you’d like to have someone come out and inspect your roof for you, give the experts at Cambie Roofing a call. We’ll let you know how your roof weathered this winter, and fix any issues. For more information, or to request a free repair estimate.

roofing quote

Roofing Quote: What a Homeowner Should Look for and Expect

If a crack or a leak needs repair or maintenance, it can be easy to shove it into the background of your mind and not think about it. As an essential part of your house and your family’s protection, a roofing quote can be overwhelming and scary. You will probably have a lot of questions such as:

  • How much is it going to cost?
  • Does the entire roof need to be replaced?
  • How long will it take?

As you’re not a roofing expert, it can be scary to leave the decision to other people. The good news is at Cambie roofing, we have the experience and the knowledge to steer you in the right direction without being too salesy. Because ultimately we leave the decision up to you.
Many homeowners have horror stories about when a roofing contractor quotes them something and it costs way more than expected.  These experiences tend to have a lasting and negative effect and causes them to suspect all roofing contractors are lying to them. Thankfully this is not the case.

Roofing Quote: How A Roofing Contractor Quotes  

To start the roofing quote process, we recommend the homeowners get three or four quotes for comparison purposes.
Unfortunately, hidden costs are always a possibility when it comes to any roofing project, such as unseen rotten wood or stucco that needs to be removed and replaced. Always ask your roofer to go over any potential extra charges. That way, you won’t be hit with any significant surprises.
Remember that every roofing job is different and each coming with its own unique set of challenges.
While reliable roofers will do their best to give you the most accurate roofing quotes possible, sometimes the unforeseen does occur. If this happens an open dialogue between the homeowner and roofing contractor is always important.
Nobody likes it when cost overruns and while sometimes there are unavoidable, a lot of them can be prevented if you follow these three steps.

  1. looks at reviews on Better Business Bureau and Google
  2. interviews several different roofing contractors.
  3. takes the time to fully review and understand all aspects of the quote

There’s no getting around that roof repair or replacement requires a significant investment. However, you shouldn’t think of it as a cost, rather an investment into your home that will increase the value.
We get that you’re busy with your job and your family but it’s important that you don’t gloss over these steps or skip them entirely.  The consequences can be both stressful and costly.
This means you shouldn’t get a handyman or your cousin to do the work.  Rather make sure a certified roofing professional near you. This will make sure that no problems occur down the road which could easily have been dealt with by a professional.

What Questions Should Homeowners Have Answered?

What are the questions that should be answered, in a written quote, to help determine which contractor will be the best choice for the job?
Here is the information they want to see:

  • Complete contact information including company name, business license number, phone number, and e-mail
  • Anticipated duration of the project including estimated start date and completion date
  • Itemization of all materials (quantities, colours, brands, product codes)
  • Itemization of labour cost
  • Terms including the timing of all payments
  • Confirmation of valid workplace insurance and general liability insurance coverage
  • Details of all warranties relating to materials and labour plus conditions
  • Responsibilities for property clean-up

While this may be an extensive list, it is important for a  roofing contractor to provide this type of detail if they want to secure the roofing project, and it is equally important for the homeowner to be fully satisfied with this information before accepting and signing the agreement. There should be no surprises, for either party, when the work is done.
Here are some of the more important points broken down into greater detail.

Projected Time Frame

One of the important pieces of choosing a roofing company is getting an idea of the time frame for your roofing project. A professional roofer should be able to estimate when they will start, how long the project should take, and what date you can expect the work to finish. Having a clear timeline will help you figure out what will best suit your schedule and your needs.

Roofing Quote: A Complete Work Description

Roofing quotes should also include an itemized description of the work. That needs to be done including exactly what the problem was and how the contractor fixed it. Don’t settle for some vague description or no description at all. Make sure that you understand the entire process and what the roofing company is doing.

The Roofing Repair Cost

The cost is always one of the most important aspects of any roofing project. Therefore you’ll want to know what to budget for and prepare adequately. Your estimate should include the cost of both labour and materials including the roof covering, underlayment, flashing, and gutters. There should also be a separate breakdown of wish list items or add ons like removing your old roof, hauling away debris, or renting a dumpster.

The Bottom Line

Whether you are a new homeowner or have been living in your house for many years, undergoing a roofing project is never fun. Thankfully with a little research and some helpful advice can help to ensure the roofing work meets your expectations and your budget.
At Cambie Roofing, we have over 50 years of experience building and installing roofs. We will help you through every step of the process including the initial quote, pick the roofing that is right for your home, and the installation. Call us today to discuss which roofing option is right for your home.

Commercial Roof Systems, Slopped shingled Commercial roofing system

Commercial Roof Systems (Updated)

Updated Feb 15, 2020
Originally Published: April 23, 2017

Commercial Roof Systems

Whether you are constructing a new commercial building or need to replace the roofing on an existing structure, it is important to understand the different types of commercial roof systems so that you can make the right choice for your business. Unlike residential roofing, commercial roofing has very specific requirements because commercial buildings are usually larger and taller. The roofing material you choose will determine the life of your building and the safety of the residents.

Low Slope Roofing

The roof you choose for your commercial property depends entirely on the degree of slope of the roof. Materials that work on low slope roofs are not always the best choice for high slope roofs. The following are options to consider for a low slope roof

Ethylene Propylene Diene Terpolymer Roofing (EPMD):

EPDM roofing is a type of rubber roofing made from a combination of ethylene and propylene. EPDM roofing is extremely versatile and is known for its durability. Moreover, EPDM is the longest lasting type of commercial roofing available on the market and can easily last up to 40 years with the right environmental conditions and routine maintenance. They are easy to maintain and repair, and have a simple clean look.

Thermoplastic Roofing (TPO):

TPO roof systems

are becoming extremely popular in commercial construction because of their cost effectiveness and functionality. TPO roofs are made from a durable material which stands up in high and low temperatures making them a good option for any climate. They are impervious to ultraviolet rays, chemical exposure, and the ozone as well as being resistant to punctures, fire, and damage from high winds. On average a TPO roof lasts over twenty years and can withstand even the harshest environments.

Polyvinyl Chloride Roofing (PVC):

PVC roofing

is similar to TPO roofing and is also an excellent choice for commercial properties. PVC roofing is created by using sheets of PVC that contain plasticizers and stabilizers. They are available with a fleece backing that helps insulate the building. Like TPO roofs there are extremely durable and can withstand a full range of temperatures. They can withstand damage from punctures, fire, ultraviolet rays, chemical exposure, and other harsh environmental factors. With a wide range of colours to choose from, they are a popular choice.

Built-Up Roof Membranes (BUR):

BUR

are commonly referred to as “tar and gravel roofs” and are one of the oldest styles of commercial roofing. This system is created through layering. Flat roofs can be single-ply or built-up using multiple layers of liquid tar or asphalt over tar/asphalt saturated paper; or have multiple layers of other types of waterproof membranes. This is topped with a layer of pea-size gravel to protect the tar from the elements. The lifespan of a BUR roof depends on the materials used and the thickness of the layers but they have been known to last up to 50 years.

Steep Slope Roofing

If you have a steep slope roof (greater than 4/12 pitch) on your property, you need a roofing material that works with your architecture. The following options should be considered when dealing with a high slope roof:

Roof Shingles:

Shingle roofs

are one of the oldest roofing systems and are still very common across North America. Shingles are a roof covering made up of individual overlapping sections laid in courses from the bottom edge of the roof up. Each successive course overlaps the joint below, creating a layered, water shedding system. Shingles are available in various materials such as asphalt, wood, tile, metal, plastic, fibre cement, and flagstone. The durability of your shingle roof will depend on the type of material you select.

Asphalt Shingles:

are a water shedding system, and a great option for high or steep sloped roofs. Asphalt shingle roofing starts with a layer of base material followed by a sturdy felted fabric upon which the shingles are layered. Depending on the type of asphalt shingles chosen they have warranties ranging from 20 years to a lifetime. This option is easy to maintain and offers a wide variety of colour options.

Cedar Shakes/Shingle:

Wood shingles and shakes

are a favoured roofing option due to their beautiful colouring, durability, and natural insulating properties. This differs from shakes, which are made by splitting pieces of wood from a bolt. Wood shingles and shakes come in a variety of distinctive patterns and materials. Cedar wood is a popular choice for shakes and shingles. Cedar can be expensive up front and requires regular maintenance. However, cedar roofs are durable, lasting up to 10 years longer than asphalt roofing, and are resistant to heavy rains, hail storms, snowstorms, and strong winds. They are also a natural insulator, making them an eco-friendly, energy efficient option.

Tile Roofing:

There are two types of tile roofing available for commercial applications: concrete and clay tile. Both concrete and clay tile are very attractive roofing options. Not only are they beautiful, they are incredibly durable, especially against environmental factors like high winds, dramatic temperature changes, the ozone and ultraviolet rays. Tile roofing can last 50 years with the right maintenance so they have a long-term cost benefit.

Metal Roofing:

There are three types of metal roofing available for steep slope applications: architectural metal panel, structural metal panel, and metal shingles. Metal roofing is a very good option in areas experiencing heavy rains or snow as they are designed to help direct precipitation off the roof. With minimal maintenance, a metal roof can last 60 years or more making it a cost-effective choice.

Synthetic Roofing:

is a catch-all term that describes manufactured products that replicate asphalt shingles, concrete tile, clay tile, metal panels, slate, wood shakes and wood shingles. Synthetic roof coverings contain recycled plastic and/or rubber as a key ingredient, making them significantly lighter than other roofing materials, and eco-friendly. They are mould, hail and fire resistant and can be less expensive than some of the other options. Depending on the type of synthetic roof you choose, they can last as long as 100 years.

Picking The Right Commercial Roof

With so many options, it can be a bit daunting to decide which commercial roofing option is right for you. Luckily, the experts at Cambie Roofing are here to help. We have over 50 years of experience installing commercial roofing and will help you pick the roofing that is right for your building and your business needs. Call us today to discuss which roofing option is right for your commercial property.