The Importance of Ventilation and Insulation in Asphalt Shingles

The Importance of Ventilation and Insulation in Asphalt Shingles

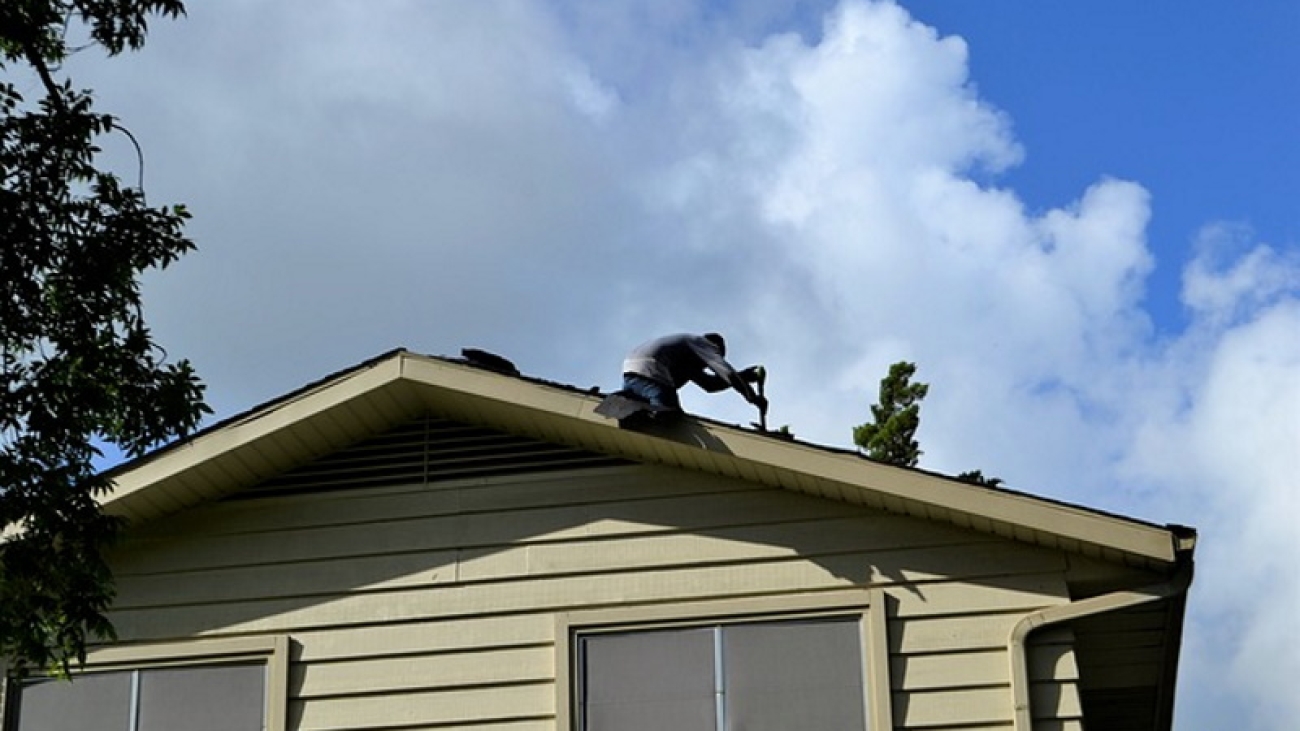
Roofs need the right balance of both ventilation and insulation to work properly, especially with the type of weather we’ve been having in Vancouver the past couple of ears. In warmer weather, poorly ventilated roofs can result in hot attic spaces which can significantly damage shingles, causing curling or even breaking, reducing the lifetime of a roof.

In the colder seasons, a lack of ventilation can trap cold air and cause moisture to build up, resulting in problems with mold, rot, and mildew, which can damage the roof and walls. Properly ventilated and insulated roofs upon are important to protecting against the problems caused by seasonal extremes and avoid costly repairs. Just think of the leaky condo crisis that cost Vancouver over $4 billion in damages because buildings didn’t have the proper ventilation.

While in Vancouver ventilation was a problem with newer buildings, it is usually common in older homes, which were generally constructed when building codes did not require as much insulation.
As many Vancouver builders discovered, creating the proper ventilation and insulation of asphalt shingle roofs is isn’t always easy. You need to get the advice of an experienced, licenced roofer to do the job correctly.

Roof Ventilation

Proper roof ventilation reduces electricity bills, extends shingle life, and prevents roof rot and ice dams in winter. Doing it right the first time also protects your house from expensive future repairs. The most important aspect of roof ventilation is to ensure your roof has vents so that the excessive moisture can escape. Ventilation is required by building codes. If you don’t properly ventilate your roof it will likely void your roofs warranty.

The number of vents within roof space will depend on the size of the roof and the material used, however, the general rule is that a single vent should be enough for a squared 30-meter roof space. A specific number of vents are required per square footage to ensure that the right amount of air enters and exits the attic.

Roof Insulation

Insulation plays a vital role in ensuring your home is properly ventilated. While you need to have enough insulation to help your house efficiently maintain a comfortable temperature. It is just as important t that you do not have too much insulation in case it blocks proper air circulation.

An experienced roofer or contractor can decide what your home needs and advice you on the proper course of action. Of course any work a roofer or building contractor does on the vents needs to be done carefully. So you do not decrease the area of the vents or anyway stop the airflow.

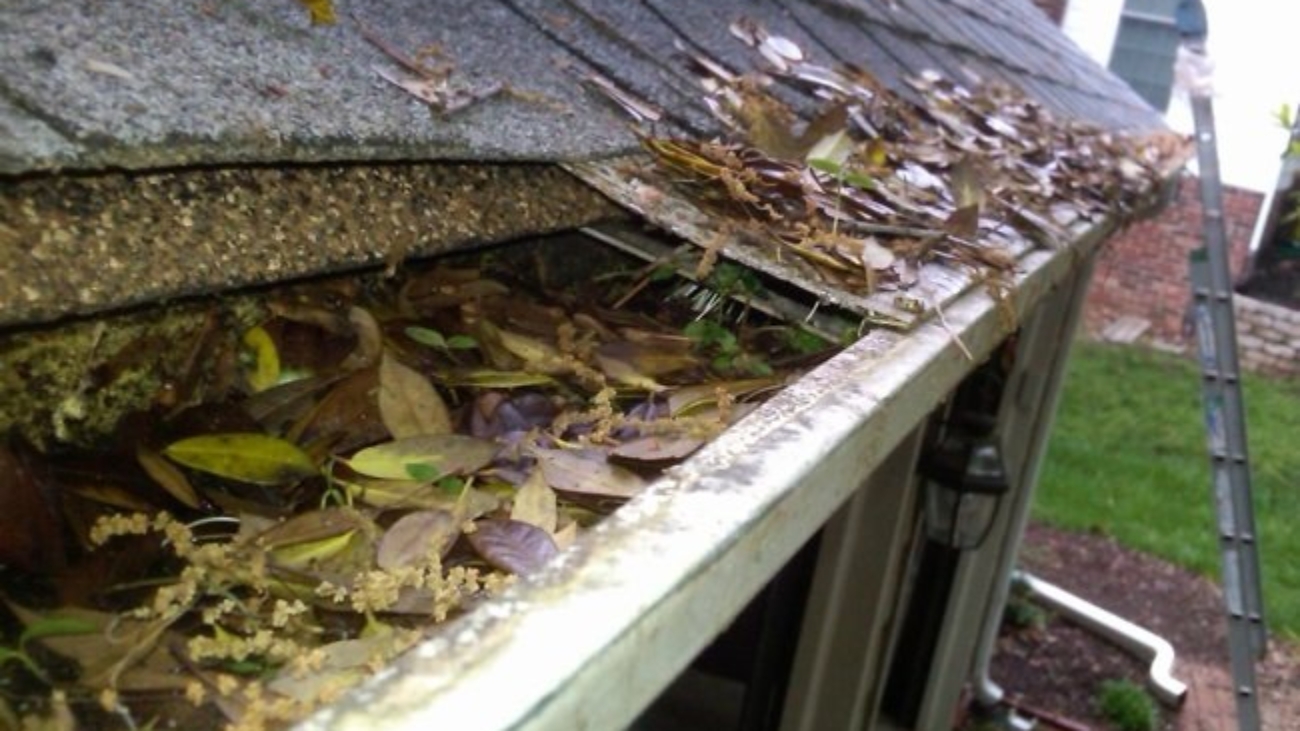
You probably won’t notice if something is wrong with your roof’s insulation or ventilation which is why it’s important to have an experienced, trustworthy roofer do a checkup at least once a year. If there is a problem with the airflow, they will know and be able to fix it. Often the solution depends on what is causing the lack of airflow. In the simplest and least costly case, there may be something obstructing the vents which is an easy fix.

lack of ventilation

Unfortunately, in many cases, the lack of ventilation is caused by something more serious. Such as a lack of or inappropriate placement of vents. If that’s the case, you might need to rip up a part or the complete roof to fix it.
Insulation placed on an air-sealed attic floor is simple, yet one of the most underappreciated building assemblies. A vented attic works in all types of climates to keep the home regulated.

Same, unexperienced builders do not install insulation correctly. Which causes excessive energy losses, ice dams, mold, rot which all need to be fixed sooner than it should.

If your builder has properly ventilated your roof space, then you will have to keep the vents free. So they can allow for proper air flow. This means that the vents should not be obstructed otherwise the moisture will still stay trapped within the roof structure. And eventually turn into mold and rot the wood.

Using Vents In Your Roof

There is a variety of different vents to select from when choosing a new vent for your roof. Two of the more common vents you will find are the box vent and turbine vents. The box vent uses natural air flow to draw hot air out of the attic. However they are not as effective as turbine vents and you will require more of them to properly ventilate your space. Turbine vents are wind-driven and more effective.

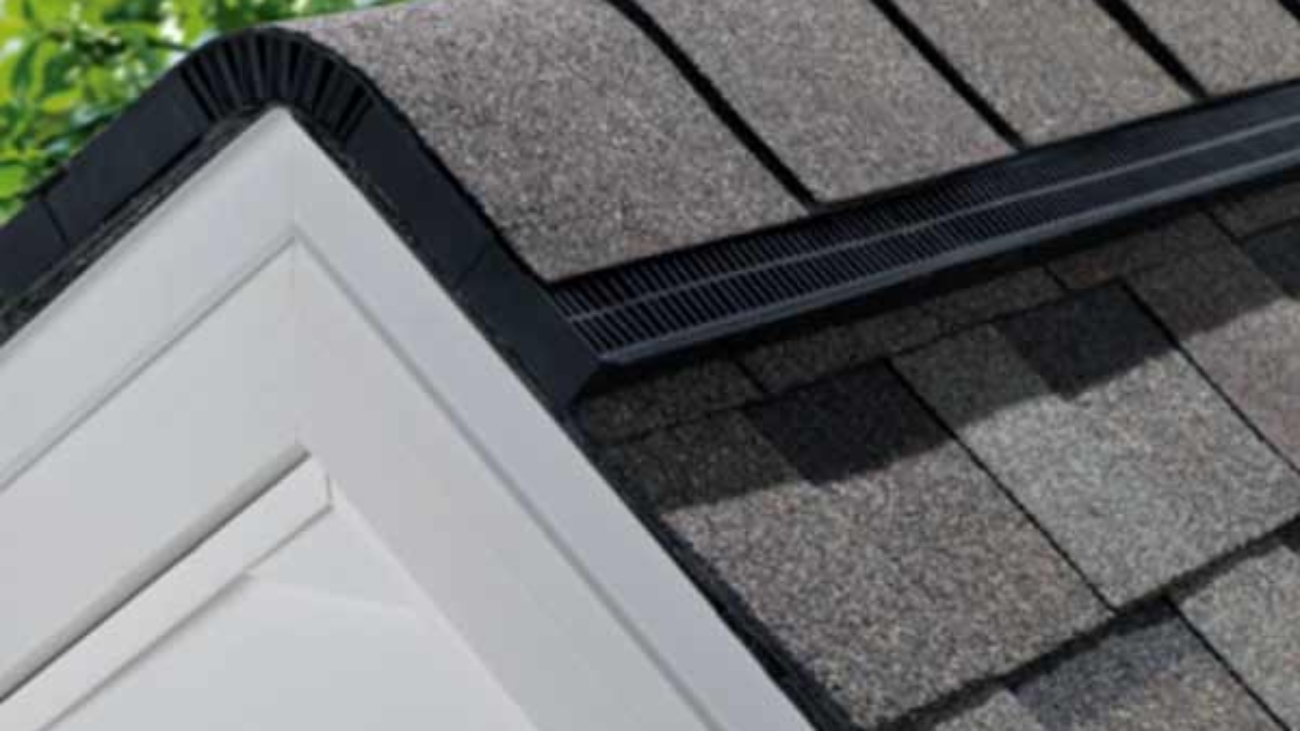
There is a third type of vent which are called ridge vents. But they are not as common as the first two. They, as you might suspect, run along the ridge of your roof. Moreover, They keep a more consistent temperature across your roof than box vents. And do not require wind to operate like turbines.

They are slightly more expensive, but when used with soffits. The underside of the area which connects the roof to the wall, they will keep your space well ventilated.

Conclusion

Whether you are in need a roof inspection or have a leaky, it’s important to choose a roofing contractor that is trustworthy, reliable, and experienced. At Cambie Roofing we are experts in providing you the service you need within your budget. Give us a call or email us for a free estimate.

The Best Roofing Options for living in Vancouver, estimate the cost of a roof

The Best Roofing Options for living in Vancouver

Originally published on Nov 15th, 2018
Updated January 28th 2021, Updated July 15th 2022

The Best Roofing Options for living in Vancouver

Looking for roofing options when replacing your home’s roof is an important decision, and can be an expensive process. That is why choosing the right roofing options and materials can improve your home’s aesthetic appeal.
But also, you need to think about increasing longevity and keep within your budget. Replacing the roof also increases the value of your home for resale.

Many homeowners underestimate the importance of a good roof. If you’re thinking about reconstruction keep in mind the premise:

There is no point in creating an amazing home if water is going to leak in and damage the inside. So, if you are rebuilding your roof, consider rain, snow, wind, and everything that can ruin it in a matter of hours – if not minutes.
It’s much better to have peace of mind and do it right the first time so you don’t have to worry.
As you probably know already, Vancouver is prone to a unique set of roof problems. Moss buildup, mildew and mold count among them due to the heavy amounts of rain the area gets.

The more you invest in your house, the better you’ll want to protect it

It is important that homeowners understand which type of roof can naturally resist these problems in order to efficiently protect the integrity of the roof and the inside of the home. Roofing materials are extremely important, but the actual style of the roof can play a major role when it comes to resisting a wet climate.

How To Choose Your Roofing Materials

There are so many different roofing options. You should ask your roofing contractor what is the best material for your home. If you’re not an expert, it can be very difficult to identify just the right material if you don’t know what it needs to be capable of surviving.
You should look for information about lifespan, weight so it won’t crush the roof framing, and roof sloping. You should also find out whether it’s permitted by local building codes, how resistant it is to fire and extreme wind, and how much it costs.
There are a lot of different types of roofing used in Vancouver, depending on style – asphalt composition shingles, metal, wood, plastic polymer, clay tile, concrete tile, and slate. We’ll go over some of the most basic options so when you talk to your contractor, you’ll be able to make an informed decision.

Asphalt Shingles

Asphalt Shingles are the most common and economical roofing material used throughout Metro Vancouver. They come in 2 main types; three-tab and architectural shingles. Both perform well with little e to no maintenance and come with varied warranties.
Three-tab shingles most often carry warranties from 20-30 years, while architectural shingles often have longer, and even lifetime, warranties.
On the other hand, asphalt shingles are effective and inexpensive. However, they are the last option to take into account because they do not enhance the visual appeal of homes, neither increase the value of your home.
Architectural shingles, however, come in many different styles and can mimic the look of more expensive roofing materials.

Cedar Roofing

Cedar roofs are a traditional Vancouver and Pacific Northwest roofing material that can give your home a natural, homely feel.
In BC, Cedar is readily available and fairly inexpensive. Cedar shakes and shingles are the most common wood roofing material and add a rustic, natural, particularly Vancouver appeal to many homes.
Due to the visually appealing nature of cedar products, using a cedar system can often increase the value of your home. While cedar products are lightweight and durable, they can be susceptible to moisture-induced mold or algae and may require more maintenance than other roofing options.
While untreated cedar roofing materials can fall victim to the elements, pre-treated options are now available. These pre-treated cedar shakes and shingles are slightly more expensive but offer a natural appearance and the equivalent effectiveness of a synthetic product.

Metal Roofing

Metal Roofing materials come in a range of styles, are durable, low-maintenance and visually appealing, with a clean look. The most common metal roofing material is standing seam, a series of interlocking panels that extend the entire length of the roof.
While installation of a metal roof is slightly more expensive than other options, it has a long lifespan, requires little to no maintenance and can increase the value of your property. Like asphalt, metal roofing materials that mimic the look of other roofing systems are available in many different styles.

Torch-on SBS Membrane Roofing

Torch-on SBS Membrane is available in many colours. It is one of the most durable roofing materials and can provide many decades of protection from the extreme Vancouver weather with proper slope and installation.
Torch-on membranes are commonly used in low slope or flat commercial and residential applications, giving them a more modern feel.
As these types of membrane systems are so robust they can greatly increase the value of your commercial or residential property. Torch-on is one of the more expensive options in roofing but the lifespan of the system can often offset the initial cost.

Don’t Forget about the Warranty

There’s a manufacturer’s warranty that covers all the problems that can arise from the actual roofing material.
Also, look for optional roofing contractor’s warranty that covers all the problems created by the contractors’ negligence. Accidents must be part of them when installing the roof.
Some warranties can’t be transferred to other owners. So, your children or a person to whom you sell the house must know and take previsions. Always search the contract for this information.
Homeowners must consider many factors when choosing the roofing material that best suits their home. Yes, aesthetic appeal and expense are important when choosing the roofing system. But homeowners should ultimately seek to find a balance between form and function.

Conclusion

It is important to understand which materials are the best for Vancouver’s weather conditions. Since British Columbia is a temperate rainforest, you need a roof that provides protection from the rain, wind, and the occasional snowfall.
If you have any questions or need an estimate on your roof call the experts. At Cambie Roofing, we have been in business for over half a century. Share the same confidence we have when saying we are your best roofing choice.

install Asphalt Shingles

How to Install Asphalt Shingles

The difference in how you install (replace) a roof in the present compared to the past is like night and day. Thanks to a gazillion “how-to” blogs and instructional videos on YouTube, anyone with the confidence, tools, and the right physical condition can do it. But here’s the thing: installing a roof is still not a project you should undertake if you’re not confident in your DIY skills. It’s a physically demanding job that requires safety precautions, including working from heights. One misstep could mean serious injury. So, while we won’t try to dissuade you from taking on the challenge as we’re advocates of DIY, we’ll provide you with valuable tips before you start swinging those hammers. Let’s find out How to Install Asphalt Shingles.

Step 1 – Focus on safety above all things

The inexperienced homeowner is more likely to fall off the roof while attempting to install asphalt shingles than a qualified roofer. The difference between the former and the latter is that the roofer has presumably been properly trained and knows how to work on a roof safely.

That’s not to say that you can’t install asphalt shingles – you absolutely can, but be sure to take all necessary precautions, including using a ladder or scaffold when working from height, wearing a hard hat, and using safety ropes.

Pro Tip: Not many DIYers realize the value of wearing the right shoes when working on a roof. Many roofing accidents occur because people are wearing the wrong type of footwear, which can cause them to slip and fall. When installing asphalt shingles, wear shoes with soft rubber soles and good tread. That’ll help you maintain traction on the roof and prevent slips and falls.

Step 2 – Study how sloped roofing systems work

It’s not all about you getting up there and hammering away. You need to understand the roofing system you’re working with to install the asphalt shingles properly.

Asphalt shingles are most commonly used on pitched roofs with a sloped surface. The slope of the roof is necessary so that water can run off the roof and away from the building. If you’re not sure how to determine the slope of your roof, there are a few ways to do it. You can use a level to find the pitch of the roof or, if you have access to the attic, measure the rise and run of the roof rafters.

Once you’ve determined the slope of your roof, you need to purchase asphalt shingles designed for that slope. Asphalt shingles come in various grades, each of which is designed for a specific sloped roof.

Pro Tip: If you install asphalt shingles that aren’t designed for the slope of your roof, they won’t perform as well and may even come loose and fall off. So, be sure to purchase the right shingles for your roof.

Step 3 – Gather your tools and materials

You’ll need a few essential tools to install asphalt shingles, including a chalk line, utility knife, hammer, pry bar, and nails. In terms of materials, you’ll need asphalt shingles and felt and cement designed for roofs.

Pro Tip: Be sure to use galvanized or stainless-steel nails when installing asphalt shingles as they won’t rust like regular nails.

Step 4 – Prepare the roof surface

Before installing the newly purchased asphalt shingles, you need to prepare the roof surface. This means getting rid of any existing roofing material and making sure the roof is clean and debris-free. If you’re replacing an existing roof, you’ll need to remove all of the old shingles and the felt paper and any nails left behind. Once that’s done, you can sweep or blow off the roof surface to remove any small debris.

Pro Tip: Be sure to inspect the roof deck for any signs of damage, such as rot or water damage. Any damage must be fixed before proceeding with the installation of the new shingles.

Step 5 – Begin working from the bottom up

Once the roof surface is prepared, you now begin with the drip edge. It’s important to work from the bottom up so that water runs off the shingles and doesn’t seep underneath.

The drip edge serves as the first line of defence against water infiltration and should be installed at the roof’s eaves. It’s a metal or vinyl strip placed along the edge of the roof, extending over the gutter.

Pro Tip: The drip edge should overhang the gutter by at least an inch.

Step 6 – Install the felt paper

The next step is to install the felt paper. Felt paper is a water-resistant material placed between the roof deck and the asphalt shingles. It helps protect the roof deck from moisture and extends the life of the shingles.

You only need to nail the felt paper down with galvanized or stainless-steel nails to install the felt paper. Be sure to overlap each row of felt paper by at least two inches.

Pro Tip: Don’t forget to install a strip of felt paper along the rake edge, the edge of the roof extending over the gutter.

Step 7 – Install an ice and water protector

If you live in a region with harsh winter, installing an ice and water protector is a good idea. An ice and water protector are a synthetic underlayment that helps prevent ice dams and water damage.

The ice and water protector should be installed before the final row of shingles. This will help keep your roof protected from the elements.

Pro Tip: Consult with a professional roofer to see if an ice and water protector is necessary for your region.

Step 8 – Add the roof underlayment

Before installing the roofing cement, you’ll need to install the roof underlayment. The roof underlayment is a layer of asphalt-saturated felt that helps keep the roof deck dry. If your area isn’t prone to harsh winter, you’re better off starting the underlayment at the eave rather than the whole length of the roof.

Installing the underlayment is a simple process. Just unroll it and nail it in place. As in the previous step, you need to overlap each piece by two inches.

Pro Tip: You must also use galvanized or stainless-steel nails to avoid premature rusting when installing the roof underlayment.

Step 9 – Cover the joints and valleys

Some areas or components of the roof need flashing, the purpose of which is to divert water and moisture. The flashing needs to be covered in roofing cement to create a waterproof seal.

The flashing is found at the joints and valleys of the roof. The joints are where two pieces of the roof meet, while the intersection of two sloping roofs forms the valleys.

Simply cut it to size and nail it in place to install the flashing. Then, apply a generous amount of roofing cement over the seams and allow them to dry.

Pro Tip: If you’re not sure how to install the flashing, consult with a professional roofer. You can’t “redo” this step, so it’s better to learn everything about it before proceeding.

Step 10 – It’s time to shingle

Starting at the bottom of the roof, install the first row of shingles. Align the shingles and nail them in place. Be sure to stagger the joints of the shingles as you install them. This will help keep water from seeping underneath the shingles.

Pro Tip: It’s good to use a chalk line to help you keep the first row of shingles straight.

Step 11 – Proceed with the installation of the rest of the shingles.

Once you’ve installed the first row of shingles, continue working your way up the roof, installing one row at a time. Like the previous step, don’t forget to stagger the joints of each row of shingles and use a chalk line to keep the rows straight.

Pro Tip: Use a utility knife to trim any shingles that hang over the roof’s edge.

Step 12 – Don’t forget the hip and ridge caps

If your roof has a hip or ridge, you’ll need to install hip and ridge caps. The hip and ridge caps are pieces of metal or asphalt that cap off the hips and ridges of the roof.

Installing the hip and ridge caps is a simple process. Just measure the length and width of each hip and ridge, then cut the caps to size. Once you’ve cut the caps to size, nail them in place.

Pro Tip: It’s best to use longer nails for ridge cap shingles for them to penetrate the roof deck.

At this point, you already have a clearer picture of how to set up and install asphalt shingles. That’ll help you acknowledge the cost as you purchase the necessary materials for the project and the intricacies that often go into roofing. There’s no shame in consulting a professional if you don’t feel confident.

Roofing Budget on Track

5 Tips to Keep your Roofing Budget on Track

No roofing project is cheap. Many property owners are wrong to think that they can skimp on the costs and get away with a subpar roofing job because “it’s just a roof.” That’s the elephant in the room we need to get over with as we talk about keeping track of your budget for a new roof. Let’s check out 5 Tips to Keep your Roofing Budget on Track.

Your roof is one of the most important investments you’ll make for your home. It protects you and your family from the elements, but it also adds curb appeal and can affect your home’s resale value.

But having said that, it doesn’t mean you just lay it all out there without any planning. You still need to be strategic about your spending, which is why we’ve put together these five tips to help you keep your roofing budget on track:

1 – Know your priorities

The first step in any roofing project is to determine your priorities. What are you trying to achieve with this project? Are you looking for a complete overhaul or just some minor repairs?

Your priorities will help you set your budget and ensure that you’re not spending more than you need to. For example, if you’re only looking for some minor repairs, you can probably get away with a smaller budget. But if you’re looking for a complete overhaul, then you’ll need to be prepared to spend a bit more.

Note: Whether it’s a small repair job or a total replacement, you must hire a professional roofing contractor to do the work. No roofing project is meant to be DIY.

2 – Come up with an outline

You first must obtain multiple quotes from local roofers. The idea is to get a feel for the market rates in your area. You probably have a budget in mind at this point, and you want to align that with what the roofers are quoting.
So, what’s in a roofing quotation?

For starters, the roofing contractor will look at your property and assess the damage. They will then estimate the materials needed and the labour required to fix the problem.

This is where things can quickly get out of hand if you’re not careful. Some contractors will try to upsell you on materials or add extra fees for things you may not need. Therefore, it’s important to get multiple quotes and compare them side-by-side.

After you’ve collected quotes from different roofing contractors, the next step is to come up with an outline for the project. This will help you keep track of the costs and ensure that you’re not going over budget.

Your outline should include all the materials, labour, and other costs associated with the project. Once you have an outline, you can start comparison shopping to find the best deals on materials and labour.

There’s no way you’ll memorize everything in your head, so an outline is key. This document will help you keep track of the costs and keep you from overspending.

3 – Be practical when it comes to material choices

One of the biggest mistakes that property owners make is choosing roofing materials that are too expensive. Just because you want the best for your home doesn’t mean that you have to break the bank. There are plenty of practical and affordable options out there.

Talk to your roofing contractor about your options and find something that fits your needs and your budget. There’s no need to go for the most expensive option when a more affordable one will do the job just as well.

Even inexpensive roofing materials offer great durability and performance with the latest technologies. For example, asphalt shingles have come a long way in recent years and can now offer the same level of protection as more expensive options.

4 – Shop around for financing

If you’re not able to pay for the project upfront, you’ll need to finance it. There are many different financing options available, so shop around for the best rates and terms.

You may ask your roofing contractor if they offer financing options. Many contractors offer financing, which can help you get the project done without worrying about the upfront costs.

Financing is a sensible option when it comes to long-term cost considerations. With proper financing, you can spread out the project’s cost over a longer period, which can make it more affordable in the long run.

5 – Have a contingency fund

Always expect the unexpected when it comes to any kind of roofing project. There may be unforeseen problems that arise during the project, which can add to the costs. It’s always good to have a contingency fund for unexpected costs.

By having a contingency fund, you come prepared for these unexpected costs and can avoid going over budget.

Hire a Competent and Honest Roofer

Keeping track of your budget is just one of the several concerns in a roofing project. Just as critical is finding a competent and honest roofer; unfortunately, not everyone you meet in this industry will have your best interests at heart.

To avoid getting ripped off or overcharged, take the time to do your research on potential roofing contractors. Put a premium on two attributes: licensed and insured. You can’t risk hiring an unlicensed and uninsured roofing contractor for cheap labour only to end up with a shoddy roof over your head.

tips to replace roof, Roof replacement in Vancouver

Tips for Vancouverites Looking to Replace Their Roof

Vancouver is known for its mild climate and temperate environment, but these perks can’t protect your home from the weather. Regardless of where you live, roofs play an indispensable role in preventing water and moisture from entering the walls and, subsequently, in your living space. However, if your roof is old and damaged or has construction defects that can’t be fixed, then it’s time to look into a replacement. Roof replacement in Vancouver makes sense in a few situations, including:

  • If your roof is damaged or has several leaks
  • If you need to add insulation to your attic
  • If you have shingles that are over 15 years old
  • If you are building a new home

But navigating this pricey endeavour can be overwhelming if you’re not sure where to start.

Assess the Damage First

Before doing anything else, assess the damage so you can find out exactly what your roof needs. For example, you’ll likely need a new roof if there are several leaks because shingles can’t be patched together.

Unless your roof is still under warranty, you must look into a replacement immediately because shingles don’t last forever.  Even if there aren’t any leaks and your shingles look perfectly fine, it’s still a good idea to replace them when they’re almost two decades old because of weather damage.

The sun and rain will slowly erode your shingles over several years, potentially leading to leakage.

Finding a Skilled and Reliable Roofer

The most important aspect of a roof replacement project is finding the right contractor. Mind you, it’s easier said than done, knowing the fact that there are hundreds of prospective roofers in Vancouver alone. But you don’t have to overwhelm yourself – all you need is to follow these tips for Roof replacement in Vancouver:

Tip 1 – Consult with family, friends, or other members of the community.

Expect other homeowners to have personal experiences with a contractor with similar credentials to what you’re looking for. If someone can recommend a reliable contractor, then this is the best way to get started.

Be sure to validate any information through the Better Business Bureau; you’ll see if there’ve been complaints or violations with the contractor in their previous projects.

Tip 2 – Work with a certified and licensed roofing contractor.

The roofing industry comprises several specialties, so you’ll need to find one that has the credentials for your particular project, whether it’s a simple asphalt shingle replacement or designing and installing metal roofs.

By looking up their membership database, you can check if your contractor is certified with the Canadian Roofing Contractors Association (CRCA). This tells you that they’ve been vetted and provided quality workmanship to their clients for several years now.

Credentials vary depending on the project, so you must look into your contractor’s specific experience and background.

Tip 3 – Narrow your list down and do interviews. 

>Once you’ve compiled a list of roofers, it’s time to narrow them down further by interviewing each one. This will allow you to ask specific questions about their work history and qualifications, giving you an idea of whether they are well-suited for your project.

When doing interviews, there are several key points that you should consider:

  • Does your roofer have a strong affiliation with a company or business?
  • How long has the contractor been in business?
  • What kind of experience does the contractor have with roof replacement projects like yours?
  • What’s included in their quotes, and how do they measure up to the competition?

At the end of your interview, there must be a good rapport between you and your contractor. It’ll make working together much easier in the future when problems arise with your roof replacement project.

Tip 4 – Get a reasonable quote.

After doing interviews with your shortlisted contractors, it’s time to get quotes from them. You’ll need to ask each contractor for the same set of information so you can compare their quote against one another.

Be sure to ask about their company profile and qualifications; this will give you a good idea if they’re capable of handling your roof replacement project.

Their quote should include the following:

  • A breakdown of costs associated with their project
  • The length of time it will take to complete your roof replacement
  • References from other satisfied clients
  • A timeline for the project if you must coordinate multiple contractors during a specific period

Tip 5 – Dig deep on project logistics. 

You should have a list of qualified roofers at this stage, and they’ve provided their quotes for your approval. Now it is time to do some digging into the logistics of the project.

By asking these questions, you’ll know if your chosen contractor has all the necessary skills to complete the project:

  • How long will the roof replacement project take, from start to finish?
  • What’s included in their quote, and what are the price variations if you need additional services or materials?
  • Are there any extra charges for late-night work so your home won’t be disturbed?
  • How will they prepare your home for roof replacement, such as putting up protective tarps, and how long will it take to do so?

It’s crucial your contractor is reliable and can provide you with accurate information about their company. However, you should also feel comfortable with them; if they fail to answer your questions, you must consider this a major red flag.

Tip 6 – Get everything in writing.

Negotiating with a contractor can be stressful and confusing, especially if the two of you aren’t on the same page about specific details. However, some things may seem trivial now, but they’re important to note as you’ll need them later down the line.

When working with your contractor, make sure you get everything in writing regarding the following:

  • Their company profile and qualifications
  • The costs involved for your project
  • If there are any additional charges, what they are and how much they cost
  • Any warranties available to you upon completion of the project
  • What is included in your quote and the variations if you need additional services
  • The timeline for completion of your roof replacement project
  • Your responsibilities as a homeowner
  • Their responsibilities as a contractor, including any liability should accidents or damages occur on site

It’s best to draft up a contract that both parties can sign. This will remove any confusion about what was agreed upon and help you get on the same page.

Don’t Be Afraid to Look Elsewhere

Reliable contractors are worth their weight in gold, but there may be times when you feel that your roof replacement project has taken too much of a toll on you. Other reasons for getting quotes from other contractors include feeling that someone else can do the job faster or better than your preferred person.

Take the time to compare different quotes and ensure you’re getting the best value for your money. If you’re not, then it’s time to look elsewhere and find someone who can help you with your roof replacement project.

COVID and cost of your roof

How COVID-19 Will Impact the Cost of Your Roof

How COVID-19 Will Impact the Cost of Your Roof? There’s every reason to believe that property owners hoping to replace or install a new roof will have to prepare for significantly higher costs amid the pandemic.

As there is no reason for optimism about COVID-19, it’s no surprise that costs are already on their way up. The average price of a new shingle roof rose by at least 5% in 2021.

And it gets worse – the impact of COVID-19 on affordable housing providers will be even more significant. There is no simple way for them to make roof installation more affordable; in other words, local roofers expect to spend more across the board.

Economic Shutdown’s Impact on Roof Materials

The shutdown of several manufacturing plants and the loss of skilled labourers have meant that roofing suppliers and manufacturers have had to import materials from overseas.

Though the materials aren’t any different, they’re imported means there are additional shipping costs. For the most part, the added expense is shouldered by property owners who need to replace their roofs and buy products.

Opting for imported roofing materials is a costlier option – but with local supplies hit by the stranded economy, both property owners and roofing contractors don’t have much choice.

Even if a substantially lower number of property owners spend on a roof replacement during the pandemic, this trend doesn’t translate to cheaper materials. Companies, especially those that struggle to compete with well-established brands, are forced to adhere to COVID-19 adjustments in the factories.

This means social distancing, limited physical contact, and constrained work hours. All in all, everyone in the roofing industry must deal with reduced production.

Costlier Supplies + Lower Demand = Higher Prices for Your Roof

Whatever your roofing needs, it’s almost guaranteed that you’ll need to prepare for higher costs.

For homeowners struggling to maintain their properties, this means putting home improvement projects on hold. But when the roof can no longer function the way it’s expected, you have no other choice but to have it replaced, even if it means having to take the risk of exposure to COVID-19.

Manufacturers of roof materials know all too well that property owners are forced to pay a premium for their products. And since many homeowners are compelled to turn to less affordable options, they’re also more likely to sell at a higher price.

We’re not saying that everyone’s taking advantage of it. Nevertheless, even big-time manufacturers and suppliers are struggling to meet ends, forcing them to increase the price of roofing materials.

Mandatory Safety Guidelines Make Everything Difficult

Roofers and manufacturers don’t dictate the price of roofing materials, at least for the most part – they’re not the ones to blame for the increased cost of roof replacement.

Government-mandated safety guidelines and policies in the workplaces across all service industries make it almost impossible to stick to the usual turnaround time. This is quite true in the construction sector, where roofing belongs.

The result?

  • More delays
  • More time for the roof to deteriorate
  • Increased construction costs all around

As a result, you’re forced to pay more if you want your roof replacement as soon as possible.

So, aside from paying more for the materials, property owners are likely to acquiesce to higher cost estimates for labour. Several factors come into play, including that workers must be cautious not to get infected with the virus on site. It usually means a higher demand for paid overtime, extra compensation, and hazard pay.

Some property owners decide to do things cheaply, i.e., hiring a handyman to install a new roof. But this, too, could cost you more in the long run. Working with an unqualified roofer means increased susceptibility to mistakes. This only makes the roof more vulnerable to leaks and expensive repairs sooner than later.

Is It Best to Delay Roof Replacement?

If your roof is in good condition, then you might want to consider deferring the replacement for now. However, when there’s a massive storm approaching or when it starts leaking, you’ll have no other choice but to replace it in time.

You need to protect your family under the assessment of a professional – regardless of whether COVID-19 already hit your community or not.  Fortunately, there are ways to limit physical interaction while you’re weighing your options.

For example, you can search and hire a roofing contractor without meeting them in person. You can also arrange for a virtual appointment and a simulation of their work sites.

An online meeting with your prospects will suffice when it comes to figuring out the best options available. Another alternative would be to have a third party contact them on your behalf.

Cost Of Your Roof And COVID-19

With most roofing companies adapting to the new normal, you expect them to be fully versed in online correspondence. After all, working with clients online reduces overhead costs and maintains productivity.

There always will be a handful of prospects out there who’ll give you a reasonable quotation to get some work done in otherwise slow trade.

So, the problem isn’t finding a qualified contractor to install your new roof in the middle of the pandemic. The more obvious concern is the cost – will it be too much for anyone to back off and put the project on hold? Even with the pandemic ravaging the entire construction industry, there’s no way that roofing companies will cease their operations.

The roofing industry is going through a tough time. But if you’re smart about it, then there’s no need for you to pay an outrageous price to have your roof replaced in time. Know how to compare prices online, get free quotes from multiple contractors, and ask the right questions.

Keep in mind that COVID-19 is already making impact over the cost of your roof. Be ready to deal with it while saving money in the long term.

What Are Some Environmentally Friendly Roofing Choices?

What Are Some Eco Friendly Roofing Choices?

Roof replacement usually takes a backseat whenever you think about spending money on home improvement. It’s not surprising, considering the fact that it’s one of the priciest investments for your home or building. Nonetheless, you really don’t have a choice because all roofs must be replaced sooner or later. And when that time comes, you’re hard-pressed to find a decent replacement that won’t break the bank. Let’s see below What Are Some Eco Friendly Roofing Choices you have?

While cost is the primary consideration for most people, there are other things to factor in choosing the material for your next roof, one of which is sustainability. Simply put, you must look into the possible effects of your roofing material on the environment.

The following are some Eco friendly roofing materials you might want to consider:

1 – Cool Roofing

Cool roofs are designed to keep the inside of your house cooler during hot days and warmer during cold nights.

Cool roofing materials don’t absorb the heat from the sun, which makes them a good choice for homes in warm climates. They come in white or light shades to reflect heat from the sun and then release them slowly instead of trapping and holding it inside, allowing the house to warm up.

2 – Rubber Roofs

Rubber roofs usually come in a rolled-out form which can be installed on top of your existing roof. It’s a viable option for roof replacement because it looks more natural and doesn’t carry that much weight. In addition, rubber roofs are low-maintenance, highly durable, and waterproof too.

Roofs reinforced with rubber are eco-friendly because the material used in them are repurposed. This means they’re already deemed undesirable and cannot be used for anything else; instead of throwing rubber waste in landfills, they’re ingeniously used to prolong the life of the roofing structure.

3 – Metal Roofs

On the surface, metal roofing sounds like a poor choice because it’s one of the costlier materials for roofs. But don’t be fooled by its initial price tag – metal is actually quite affordable in the long run because it lasts longer than most other options and can withstand extreme weather conditions.

A standing seam metal roof is eco-friendly since it’s made from recycled material. The roof’s design naturally reflects heat, thereby helping you reduce your heating and cooling requirements. In addition, metal prevents the buildup of ice dams in the winter and can last over 50 years with regular upkeep.

4 – Corrugated Roofing

Just like metal roofs, corrugated roofs are also eco-friendly because they’re made from recycled materials. Corrugated roofs can last more than five decades – way longer than traditional roofing choices. They’re suitable for homes in areas with heavy snowfall because the corrugated design effectively sheds water away from the building.

The corrugated roof’s inherent durability makes it a sustainable choice for homeowners who hate the idea of spending money on constant maintenance and repair.

5 – Green Roof

A green roof is considered the most sustainable choice for roofing. Essentially, they’re built to serve as an extension of your garden, where plants and grasses grow and thrive on top of your building. It makes sense in the perspective of eco-friendliness since the plants help clean the air and minimize the scorching heat.

Green roofs provide insulation benefits, plus they help conserve energy by absorbing heat from the sun during summer days and vice versa during winter seasons.

6 – Recycled Shingle Roof

A recycled shingle roof is made from repurposed material, i.e., plastic, rubber, wood fibre, and asphalt. The material is versatile in design because the manufacturer emulates the appearance of those expensive but unsustainable roofing materials like slate and tiles.

The best attribute of a recycled shingle roof is its price. You get a lower price for a roofing material that’s built to last and has a flexible design that’ll help boost your home’s curb appeal.

7 – Green Wood Shakes

Green wood shakes are made from reclaimed wood, which means you don’t contribute to deforestation. In addition, you’re confident about this roof’s durability because the material is treated to withstand rotting and insect infestation.

If you need a natural-looking roofing material that comes with several colour options, then consider green wood shakes as your choice. This eco-friendly roofing material is popular among environmental advocates because it’s cost-effective and requires low maintenance.

8 – Clay Roof

Clay is one of the oldest materials used to build roofs, and there are excellent reasons why it’s still relevant today. For example, a clay roof is fireproof and weather resistant. Likewise, it has a very sophisticated aesthetic, which makes it the perfect choice for Mediterranean-style homes.

Did you know that clay is an excellent insulation material? A clay roof promotes comfortable temperatures inside your living space.

Additionally, they come in different designs to complement your taste and preferences. Like most eco-friendly roofing materials on this list, clay roof tiles require little maintenance, and you can’t see any other cheaper alternative to them.

Why an Eco-Friendly Roof?

There’s more to your roof than protecting you and your property underneath it. Choosing a sustainable roof means you care about the welfare of future generations. Imagine how many roofs will be built in the next decade or so. And you immediately understand why it’s essential to select eco-friendly roofing materials right about now.

A sustainable roofing solution also helps minimize energy consumption. Which is beneficial to the planet because less greenhouse gas emissions equals cleaner air for everyone. That alone is enough reason for you to go for an environment-friendly material to replace an old roof.

Hiring a Roofing Contractor Checklist

Hiring A Roofing Contractor Checklist

It’s not easy hiring a roofing contractor for the first time. You’re here because you need help for a repair or replacement project, but you’re clueless on where (or how) to begin your search. Unsurprisingly, many homeowners abandon the plan of a roofing project simply because searching, vetting, and choosing a roofer is way too much of a burden. 

Hiring A Roofing Contractor Checklist

Hiring a roofer doesn’t have to be that hard if you know what you’re doing, including the questions to ask and the red flags. If you continue reading this post, you’ll realize that it’s relatively uncomplicated after all. We’ve put together a checklist to explain every element of the search and hiring process. 

Work with a Contractor You Trust

Roof repair is unlike any other home renovation job. Once you figure out that there’s something wrong, hiring a local roofer is no longer just an option. To restore the roof’s structural integrity, you’ll have to cover the repair or replacement as soon as possible. The first step is to find a trustworthy roofing contractor. Here’s what you have to do: 

  • Ask your family, friends, coworkers, and neighbors for recommendations. 
  • Call or visit the local organization of roofers for referrals. 
  • Search for prospects online.
  • Find prospects via local newspaper and TV ads. 

Assess Your Prospects

Not every roofer is a fit. If possible, avoid hiring someone who’s not based locally. You want a quick turnaround and response in case something goes wrong after the completion of the job. Working with a company headquartered outside of the city could prove difficult because of the distance. 
To figure out which among your prospects is the best fit for the roof repair or replacement project, follow these steps:

  • Request individual quotes from at least four local roofers. Focus on those who are willing to visit your home to see the site. Some roofers hand out an estimate without an inspection. 
  • Visit the website (provided there’s one) of each roofing prospect. Favor those with an established online presence and with multiple positive reviews from previous clients. 
  • Read all reviews, especially negative feedback. Figure out if there’s a pattern of bad practice from the roofer. If you notice a trend, remove that prospect from your list.

Questions to Ask

Narrow down your list to two or three local roofers. Request a phone interview and ask these questions:

  • How long have you been in the roofing business?
  • What is your experience in a similar roofing job?
  • Can you give me a list of references?
  • Can you furnish a copy of your liability insurance? Does it cover property damage and worker’s compensation?

You’ll have a much better understanding of each prospect based on how they answer those questions. One of them will likely stand out. 

In-Person Interview

You have all your questions answered on the phone, so why go the extra mile for an in-person interview? You must personally meet the remaining prospects to review all the roofing job details; it’s also your best opportunity to temper expectations. If possible, come up with a spreadsheet to help you compare each contractor’s pitch. Discuss the technical details, including:

  • Get some more details on the insurance, i.e., policy number and limits.
  • Talk about the warranty details and the person responsible for the claim. 
  • See to it that you agree to a fixed price and that it must be included in the contract. 

Red Flags when hiring roofing contractors

As honest as your intentions are, some roofers will rip you off, while others engage in bad practice. Be wary of door-to-door contractors who go to areas devastated by storms and tornadoes. They usually scam innocent homeowners with outrageously cheap offers and misleading pre-payment deductibles. These are the common warning signs:

  • The contractor demands an upfront payment or a large down payment
  • They compel you to sign a contract right away
  • It sounds too good to be true. Whether it’s shockingly cheap bid compared to others, or whatever other reason.

Final Meeting

The final meeting is as crucial as the other steps in the hiring process. There’s a handful of things to iron out before the project begins:

  • Reconfirm the roofer’s initial quote
  • Explore payment options and make sure both parties agree on a payment plan
  • Ask for a copy of the contract, project plan, bills and invoices, proof of insurance, local government permits, and order changes

Wrapping It Up – Roofing Contractor Services

There’s no turning back once you sign the contract, so see that you get it right the first time. If you follow these steps, then you should see yourself hiring the best available roofing contractor. A roof repair or replacement project is one of the priciest investments for you this year, so there’s no room for mistakes.

Blistering and alligatoring, DIY vs Qualified Roofer in Vancouver

DIY vs Qualified Roofer in Vancouver, what’s better?

Hiring a DIY vs Qualified Vancouver Roofer

DIY vs Qualified Roofer, what are the pros and cons? Is it worthy to devote your time, money and security in giving to yourself that satisfaction of fixing your roof; or is it better to directly hire professionals?

Do-it-yourself home repair gives you a sense of accomplishment and satisfaction. Not to mention, DIY feeds your hope of saving money. However, not all improvement projects are tenable with a DIY approach. Case in point: roofing.

But if you have all the skills to cover by yourself all other home improvement tasks, why can’t you do your own roof repairs?
There’s no doubt you can give it a try. But if your skillset do not include a license as a roofer, and the equipment you need to carry it on, then you still are missing all what you need to get the job well done.

Roof repair, installation, or replacement is possibly the most dangerous job when factoring in things like height, exposure to the weather, and the likelihood of making an expensive mistake.

Experience tells us that replacing a roof it’s nothing like replacing a light bulb, remodeling the bathroom, or installing kitchen tiles. Countless homeowners can tell you about it, too. 

Then, why professional roofing contractors make it look easy? Simple: They have experience, training and count with the correct equipment. You’re better off hiring a qualified Vancouver roofer over DIY. Here are the most important reasons to do it.

DIY vs Qualified Vancouver Roofer: All you need to know

1 – Licensed roofers have knowledge and experience

The untrained eye sees a roof as a structure made of shingles or tiles. But deep down, hidden underneath, those shingles and tiles have multiple layers of different materials.

So, if you think that there’s nothing complicated about replacing a missing shingle, you couldn’t be more wrong. The roof is a complex structure made up of a wide array of parts – it takes an expert to inspect and diagnose a problem right before coming up with a solution.

Roofing pros in Vancouver understand how different roofing systems work, including their weaknesses. They take advantage of their knowledge and experience to fix, install, or replace a roof in the quickest turnaround possible.

You can learn as much as you need about your roof, but at the end of the day, there are many ways for a DIY repair job to go wrong, even if it’s as simple as replacing a shingle. 

2 – Roofing companies recognize the value of aesthetics

Regardless of its age and material, the roof eventually shows signs of damage, i.e., leaks, curled shingles. A homeowner’s natural response is to remedy the issue before it gets worst. One of the most common mistakes we find, is the homeowner’s approach to the DIY project.

We mean, as you try a DIY approach when fixing your roof, aesthetics is something secondary in your list of priorities.
In other words, it’s easy to forget about maintaining the structure’s aesthetic value. When you realise how important it is, then it’s usually too late. Haven’t you ever seen roofs with mismatched shingles? There you go.

On the other hand, a professional roofer in Vancouver fixes a roofing issue with aesthetics and function in mind. A crucial part of fixing, installing, or replacing a roof is to ensure that the solution enhances the home’s curb appeal. 

3 – Professional roofers bring with them liability insurance

Even with home insurance, you’re less likely to get covered if you choose the DIY route when fixing your roof. The insurance company could argue that you aren’t qualified to perform the job in the first place or negligent. Hence, you’ll end up paying for the damage on your property as a result of a botched roof repair project.

With experience and training, licensed roofing contractors in Vancouver are less likely to make mistakes. In the likelihood of an incident that led to property damage or injury, they have it covered with liability insurance.

So, you’re not just paying them for their expertise but the security of your investment as well. Remember that if you make a mistake in fixing the roof on your own with the insurance policy payout, you’re giving the insurance company a reason to deny any further claim. 

4 – Your roof is covered with limited warranties by working with a professional roofer

Vancouver local roofing contractors offer two types of roof warranties: labor and material. But if you choose a DIY approach for any roof repair, installation, or replacement job, you lose your right to be covered by the contractor’s limited warranty. You might very well void the material warranty against defects from the manufacturer.

Manufacturers will only honor warranties against defects if their product follow their instructions and Vancouver building code requirements. This is why it makes sense to let a licensed roofer do the job as they’re in the best position to maintain a high workmanship standard.

There’s no way to go around this rule. So, if you damage your roof after a botched DIY project, you can’t force a licensed contractor to cover for you to restore the warranty. It’ll be easy for them to argue that the existing problem with your roof was a direct result of the damage you caused. 

5 – Hiring a professional roofer helps you save money

It seems ironic, but a DIY approach to roof repair or replacement may cost you more money than hiring a professional. Even the slightest mistake may render a roofing material useless.

When you choose the DIY project, you most probably will damage your material before realizing the right way to use it. And then there’s the risk of buying the wrong materials – it’s just way too stressful to try to do it on your own.

In contrast, hiring a licensed and experienced contractor means you have someone who’ll do the hard work on your behalf, including the procurement of the materials, repair, or installation.

DIY vs Qualified Vancouver Roofer: Final thoughts

There’s a lot of intrigue in DIY roofing, but it’s not worth your time. Even if you’re a home improvement buff, roof repair or replacement is way out of your league.

There’s even a likelihood that your DIY roof repair projects reduce your home’s value, making it more challenging to sell at a fair price. 

Spring Cleaning Maintenance on Your Roof

Spring Cleaning Maintenance on Your Roof

In this blog post, we’re going to talk about spring maintenance on your roof and how it’s different this year. The snow is melted, the sun is out – it’s Springtime in Vancouver. While for most it means more hikes, walks, mountain biking, it also means that it’s time to do a little spring cleaning—and that also means roof repair.

A tough winter can be hard on your roof, especially after long periods of snow, wind and ice. Make sure trees and shrubs are not rubbing the roof, and clear from causing damage.

Maintenance on Your Roof

Every residential roof could use a simple inspection in the spring. With regular, seasonal maintenance on your roof, it lasts longer and performs better. Whether you do some of the maintenance work on your roof yourself or hire a professional roofing contractor to do it, there are some key things to do in the spring.

You should incorporate, roof repairs and maintenance routines into the seasonal changes. This is because roofing problems vary with the climatic conditions, especially the rough colder months and it’s a perfect time to fix them. The winter weather can cause problems such as:

  • Leaks around flashings or chimneys and skylights
  • Ice dams forming inside the gutters and at the edge of your roof
  • Broken and cracked shingles
  • Damages to the insulation and blocked attic vents

The first step is to get a roofing professional to do a roofing inspection to make sure that your roof is still in good shape after the winter.

Although it has been a mild winter by Vancouver’s standards, we still recommend you get a roofer to take a look at our roof to prevent large repairs. Here is a list of things to look out for:

Clearing Debris

Cleaning the roof is essential because it helps you get a better view and determine if there are any broken or cracked spots that need repairing. When you’ve had a couple days of sun without rain, brush away branches, twigs, leaves, nests and other debris. Check gutters and downspouts as part of the inspection process.

Leak Repair

After you’ve cleared away debris from your roof, you should inspect the attic, chimney, vents, skylights for any water pooling, leaks or damp areas. Darker patches are often a sign of water damage and you should address them immediately. If you see any black mould it means that the area has been problematic for awhile and might be a symptom of a much larger problem. You should contact a roofer immediately.

Replacing Shingles

If any shingles are missing, they should be replaced immediately as they can lead to leakage and other structural damage. If you see small holes, cracks, or tears, they can be fixed without replacing them, saving you money. Any broken, curled or missing pieces must be taken care of before waterproofing the vents.

Resealing Vents

Examine the vents or get a roofer to do it to make sure the sealants have not cracked or chipped. Be careful while checking the areas around the vents to prevent any mishaps. If a vent cracks, you should get a professional roofer to fix it.

Recaulk Your Chimney

When inspecting a chimney, you should be extra vigilant as this is a common problem area. If the caulking is worn, get a professional to replace it. They will apply a new high-quality sealant to prevent any water damage which will be more costly than fixing the problem immediately.

Clean Your Gutters

Troughs and downspouts are meant to safely carry water off your roof and away from the walls to prevent pooling and water damage. If your gutters have debris from leaves, sticks, or branches built up in them you will need to clean them out in preparation for spring showers. Cleaning gutters is a simple task and you can do them by yourself or hire a handyman to do it for you.

Trim The Surrounding Trees and Remove Leaves

Make sure tree limbs don’t touch or overhang your roof. If they do, they can easily scrape or fall on the shingles and loosen the granules that protect your roof. Trim trees close to your home to avoid any limbs touching the roof surface or the gutter.

If you trim your trees it will also prevent organic matter from falling onto your roof. A little leaf or a few pine needles won’t damage your roof, but if they collect and are deep enough to hold moisture, they need to be removed from you roof. Anything that holds moisture will cause mildew to form and can block gutters or cause extra weight on the roof.

Clean Any Excess Moss or Mold

Dark coloured patches on a roof can indicate mold, algae, or fungus is living there which can eat away at the roofing material and can cause leaks.

A treatment of chlorine bleach or copper sulfate solution can be applied and can kill the mould but there are more environmentally friendly options available. Recently some shingle manufacturers have created algae-resistant shingles that have a specially formulated granule that inhibits algae and moss growth. Be sure to ask your roofer about these options.

Cutting back trees in the surrounding area will reduce moss growth, as it will allow sunlight to dry up the shade and moisture that moss love. To get rid of moss, there are some environmentally friendly sprays you can use to get deep into the roots.

Examine Your Soffit and Fascia

Soffits are metal or wood panels between the wall of the house and the roofline, while fascia are the metal or wood boards along the roofline. Both of these components are crucial for a leak-free roof so don’t overlook them when doing your spring roof maintenance.
Check to see if the soffits or fascia have any water spots, cracks, or holes. Depending on how damaged they are, they might need to be repaired or replaced. If you’re unsure, ask a professional roofer to take a look at them.

Conclusion

Spring time is for renewal. It’s when flowers start to blossom and plants start to grow. It also a time when homeowners take a look around and try to tidy up and throw away things that aren’t doing any good.

Part of your spring cleaning should include either taking a good hard look at the condition of your roof to see if it’s time to call a roofer. If you need a roofing expert, give Cambie Roofing a call. They will answer any questions you might have and will give you a free roof inspection so you can make the most informed decisions about your home.

Originally published on April 15 2019, updated on March 9th 2021