joel-filipe-FMFOFQfchfs-unsplash

Preventative Maintenance 101

Preventative Maintenance 101

A well-maintained roof is the first line of defence for any home or business, protecting against the elements and ensuring structural integrity. Preventative maintenance plays a pivotal role in extending the lifespan of your roof, whether it’s brand new or has weathered the elements for years. In this comprehensive Preventative Maintenance 101 guide, we will explore the essential steps to maintain both new and old roofs, highlight common issues to look out for, and discuss when it’s time to call the professionals at Cambie Roofing for expert assistance.

Maintaining New Roofs:

Regular Inspections:

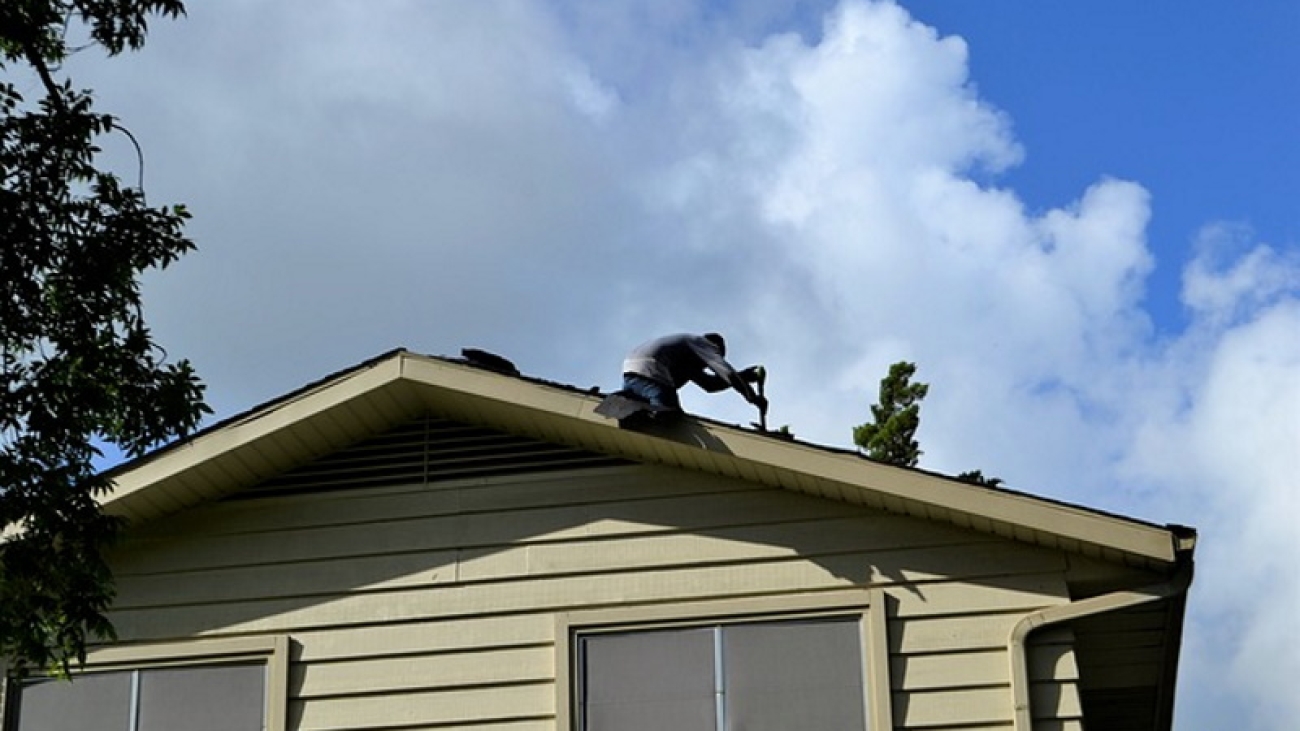
New roofs benefit greatly from regular inspections. Conduct a visual check to ensure there are no visible signs of damage, such as missing or damaged shingles. Early detection allows for prompt repairs, preventing issues from escalating.

Clearing Debris:

Keep the roof free of debris like leaves, branches, and dirt. Accumulated debris can lead to water pooling, which can compromise the structural integrity of the roof over time.

Gutter Maintenance:

Clean and inspect gutters regularly. Proper drainage is essential for preventing water damage. Ensure that gutters are free from debris and securely attached to the roof.

Trimming Overhanging Branches:

Trim branches that hang over the roof. Falling branches can cause damage, and overhanging branches provide easy access for pests like squirrels to access the roof.

Maintaining Old Roofs:

Thorough Inspections:

Regular and thorough inspections are even more crucial for older roofs. Look for signs of wear and tear, such as cracked or curling shingles, sagging areas, or water stains on the ceiling.

Sealing and Coating:

Consider applying a protective sealant or coating to extend the life of an old roof. This can provide an additional layer of protection against the elements.

Addressing Leaks Promptly:

If you notice any signs of leaks or water damage inside your home, address them promptly. Water infiltration can lead to serious issues, including mold growth and structural damage.

Replacing Damaged Shingles:

Replace any damaged or missing shingles immediately. Damaged shingles compromise the integrity of the roof and can lead to more extensive issues if not addressed promptly.

Common Roofing Issues to Look Out For:

Leakage:

Leaks are a common issue and can result from various factors, including damaged flashing, missing shingles, or worn-out sealant around roof penetrations. Regular inspections can help identify and address leaks before they cause significant damage.

Mold and Mildew:

The presence of mold and mildew can indicate moisture-related issues. Proper ventilation and addressing leaks promptly can help prevent the growth of mold and protect indoor air quality.

Poor Drainage:

Inadequate drainage can lead to water pooling on the roof, increasing the risk of leaks and water damage. Ensure that gutters are functioning correctly, and downspouts direct water away from the foundation.

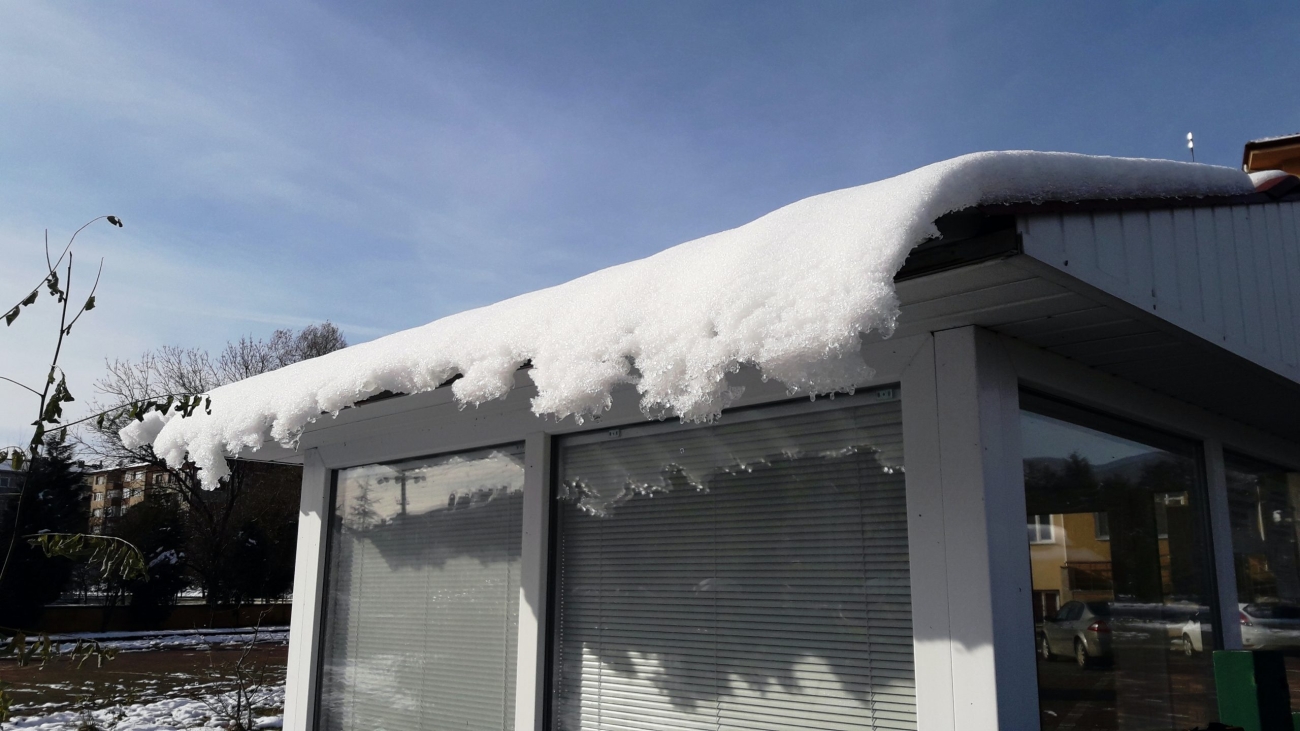
Wind and Storm Damage:

High winds and storms can cause significant damage to roofs, including lifting or tearing off shingles. After severe weather events, conduct a thorough inspection to assess any potential damage.

When to Call the Professionals at Cambie Roofing:

Extensive Damage:

If you notice extensive damage to your roof, including large areas of missing or damaged shingles, it’s time to call in the professionals. Attempting to repair significant damage without the necessary expertise can lead to further issues.

Persistent Leaks:

Persistent leaks that are challenging to locate or fix may require the expertise of roofing professionals. They have the tools and knowledge to identify and address complex leaks efficiently.

Aging Roof:

If your roof is reaching the end of its expected lifespan, it’s advisable to consult with professionals. They can assess the overall condition of the roof and recommend whether repairs or a replacement is the best course of action.

Professional Inspections:

Regular professional inspections, ideally performed annually, can identify potential issues before they escalate. Professionals at Cambie Roofing can provide a comprehensive assessment of your roof’s health and recommend preventative measures.

Conclusion:

Preventative maintenance is the key to ensuring the longevity and effectiveness of your roof, whether it’s a new installation or has stood the test of time. Regular inspections, addressing issues promptly, and enlisting the help of professionals like Cambie Roofing when needed are essential steps in maintaining a durable and resilient roof. By following these Preventative Maintenance 101 guidelines, you can protect your investment, enhance the overall safety of your property, and enjoy the peace of mind that comes with a well-maintained roof. Cambie will be going in depth about preventative maintenance in upcoming articles because we want our readers to understand how important it is to properly maintain their roofs. Reach out to us today if you have any questions.

Winterizing your roof in Canada.

Winterizing your roof in Canada

Winterizing your roof in Canada

Winter has arrived and in Canada which means some homeowners will face challenges associated with unforgiving weather conditions. The roof, being the first line of defense against snow, ice, and freezing temperatures, requires special attention to ensure it can withstand the harsh elements. In this blog post, we will delve deeper into the essential steps for winterizing your roof in Canada, offering detailed insights and tips, particularly tailored for the challenging winter.

Inspect and Repair Roof Damage:

The importance of a meticulous roof inspection cannot be overstated. Begin by examining the overall condition of your roof, paying close attention to any visible damage. Cracked or missing shingles, loose flashing, and compromised seals around vents and chimneys should be promptly addressed. Repairing these issues before winter sets in is critical to preventing further damage caused by the weight of snow and the freezing temperatures.

Clean Gutters and Downspouts:

Gutters and downspouts are vital components of your roofing system, directing water away from your home. Neglecting their maintenance can lead to clogs and ice dams during winter. Before the first snowfall, take the time to clean gutters and downspouts thoroughly. This will ensure proper water drainage and minimize the risk of ice-related problems on your roof.

Install Ice and Water Shield:

For added protection in regions experiencing severe winter conditions, consider installing an ice and water shield beneath your roofing material. This waterproof membrane acts as an additional barrier against ice dams, safeguarding your home from potential water infiltration. This is not always necessary but if you are replacing your roof, you could benefit from an added layer of protection. The experts here at Cambie Roofing can provide a free estimate and can inform you on whether or not this is necessary.

Trim Overhanging Branches:

Overhanging branches laden with snow and ice can pose a threat to your roof during winter storms. Trim branches that extend over your roof to prevent breakage and minimize the risk of damage caused by falling debris.

Insulate Attic and Ventilation:

A well-insulated attic is crucial for maintaining a consistent temperature on your roof. Inadequate insulation can result in heat escaping, leading to uneven melting and the formation of ice dams. Ensure your attic is properly insulated and well-ventilated to regulate temperature and moisture, reducing the likelihood of condensation and mold growth.

Check for Leaks and Seal Gaps:

Leaks and drafts in your attic can contribute to heat loss, exacerbating the risk of ice dams. Conduct a thorough inspection of your attic for any signs of water intrusion. Seal gaps and cracks in the attic floor, walls, and around openings such as vents and chimneys to maintain a tight thermal envelope.

Consider Snow and Ice Removal:

In areas prone to heavy snowfall, consider proactive snow and ice removal from your roof. Using a roof rake or enlisting the services of snow removal professionals can prevent the accumulation of excessive snow, reducing the risk of overloading and potential structural damage.

Contact Cambie for an Inspection

If you’re uncertain about your roofing system’s condition or lack the expertise to perform a comprehensive inspection, the experts at Cambie Roofing have more than 75 years of experience and can offer top of the line advice following a comprehensive inspection. We can identify potential issues and provide expert recommendations to ensure your roof is well-prepared for the challenges of the Canadian winter.

Final thoughts

Winterizing your roof in Canada is a multifaceted task that requires attention to detail and proactive measures to fortify your home against the rigors of winter. By following these extensive tips and recommendations, particularly tailored for the Canadian climate, you can ensure that your roof remains resilient and your home stays protected throughout the winter months. Taking the time to invest in these preventative measures will not only safeguard your property but also contribute to a more comfortable and worry-free winter living experience.

Solar panel roofing

Solar panel roofing

Solar Panel Roofing

Utilizing renewable energy sources has become a massive focus in recent years throughout all construction sectors, including roofing. Many homeowners are looking for ways to reduce their carbon footprints. One of the most popular ways of doing this is investing in solar panel roofing.

Whether you’re building a new home or renovating your current roof, solar panel roofing could be a very viable option if you’re looking to enter the sustainable roofing world. Not only are solar panels good for generating clean energy, they can also help you achieve a sleek and unique look when designing the roof of your home.

What are solar panels?

Solar panels consist of photovoltaic cells, also known as PV. These cells have one job – to convert sunlight into electricity. These panels are typically made from semiconductors like silicon. Once sunlight hits them, they absorb photons (light particles) before generating electric currents. Usually the average home can rely solely on solar energy from these cells for all electricity needs. In simple terms, this process is called the photovoltaic effect.

How does it work?

After a solar panel has absorbed light particles from the sun, it activates the electrons inside of the PV cells. This process starts the PV effect and in turn creates energy. The cells break away from their atomic bonds and work together to create a useable amount of energy. Once this occurs, the electricity becomes a ‘direct current,’ also known as DC. DC cannot be used as is within our homes, so it must be converted. In order to do this, the solar panel uses an inverter. This converts the DC into an alternating current (AC). AC’s can function with regular electrical systems that are found within residential and commercial properties.

Because the solar panels are hooked up to your home’s electrical panel, electricity will start generating right away. If your solar panel system generates too much electricity for your home to use at a given time, it can be saved by being transferred back into the system. This is called net metering which ensures your solar energy doesn’t go to waste.

Benefits of solar panels

Now you may be wondering why solar panels are a good option for your roof. We know they are good for the environment but they are also practical. You can have the best of both worlds – the benefits of a traditional roofing system and the ability to generate clean energy. Don’t rely on historical energy sources for your home. Invest and participate in the way of the future with solar panels.

We are aware that solar panels aren’t the most cost-friendly options on the market, compared to some other roofing materials. While this can be a significant barrier, factoring in the long-term financial benefits is something to think about when considering solar panels. Once installed, solar panels can greatly reduce your electricity bills. If you haven’t already noticed, everything is getting more and more expensive. Why not choose to be energy independent? Solar panels can give you this freedom and help you shy away from having to pay more and more for your electricity in 2023.

Even if you have a solar panel roof, they can be installed in ways that compliment your home. So there is no reason to be worried about aesthetics. Talk to the experts at Cambie and we can help you achieve the right look while also ensuring effectiveness.

Solar panel installation

Let’s say you’ve made your mind up about wanting solar panels on your roof, the next step includes determining your roof’s layout and ability to host these solar panels. Is your roof covered by trees? If so, there might be too much shade for your solar panels to properly function as they need to be exposed to sunlight. Is your roof tilted or flat? Will this impact how much sunlight is absorbed by the solar panels? These types of questions are things to consider when looking at the overall structural integrity of your roof.

Once you have consulted with a professional and your roofing design is official, the company will send out a team to install the solar panel system. Much like a traditional roofing installation, the roofers will ensure the solar panels are added properly. Paying attention to sealing and weatherproofing is of upmost importance.

Once installed, it is time to connect the electrical elements. This includes the inverters we mentioned above as well as wires and panels – turning the DC’s into AC’s. After this is completed, the roofing professionals will conduct an inspection before being activated to ensure everything is running smoothly and safely. If all is good, the solar panel system will become connected to your electrical grid and can be used to generate solar energy!

Conclusion

Solar panel roofing systems are a great way for you to become a greener homeowner. Because of how positive solar panels are for the environment, many cities will actually provide you with incentives to install them. This is because they can be costly at first, however you may be able to get your hands on a tax credit or rebate. While exploring your roofing options, ask us about solar panels and we can provide you with a free estimate.

What roofing materials last the longest?

What roofing materials last the longest?

What roofing materials last the longest?

When it comes to fixing your roof or installing a brand new roof, you want to choose materials that are going to last. While some roofing materials may seem like the perfect choice because they’re super affordable, you might have to replace them sooner than you’d think. Other materials on the market can last more than 50 years if maintained properly but could be too pricey for your budget. In this blog post, we will dive into some of the longest lasting roofing materials.

1. Slate

Slate is arguably the longest lasting roofing material you can choose from. Some soft slate materials will last 50 years while other harder slates will last up to 200 years. Slate is a natural substance that comes from clay and volcanic dust, also known as metamorphic rock. Slate roofs have been around for thousands of years, acting as one of the most durable and long lasting materials on the market. Because it is a stone, slate is fire resistant. This makes it a popular choice for people living in climates with harsh weather conditions such as strong winds.

If you’re searching for a sleek and beautiful roof that will last you a very long time, slate could be for you. However, because slate is a premium roofing material, it is very costly. This is because it is hard to install, it is very heavy and it’s fragile. That’s why it is important to hire a knowledgeable professional for the job because not everyone knows how to install slate roofs.

On a positive note, if you can afford the initial installation, you won’t need to worry about too much maintenance. That’s because slate is durable and does not require lots of upkeep, other than regular inspections and cleaning. Slate is available in many different colors and shapes, offering plenty of options for homeowners seeking different appearances. Slate is built to last which is why despite its high cost, it is seen as a valuable investment.

2. Metal

Another great long lasting and low maintenance roofing material is metal. Metal roofs have become increasingly popular among both residential and commercial building owners because of their longevity. They are on the more expensive side but luckily they can last up to 50 years if installed correctly. One of the greatest benefits of a metal roof is their inability to rot and grow mold. This also means insects will not impact the structure, like they sometimes do with typical shingled roofs.

Metal roofs are another great option for homeowners in places with harsh climates and they are fire resistant. Compared to a typical roof, metal does not usually erode and it actually reflects sunlight. What this means is your metal roof will last a long time, even when exposed to plenty of sunlight or other elements such as snow and rain water. Because it reflects sunlight, your metal roof can actually lower your energy costs! And unlike heavy slate tiles, metal roofs are lightweight. If you’re looking for a durable roof that will last you a long time, metal roofing could be the right choice for you! Once installed, it requires little maintenance and no, you won’t have to worry about resealing or repainting! So next time you ask ‘what roofing materials last the longest?’ Remember metal roofs are on the top of the list.

3. Concrete

Concrete is another roofing material with a lifespan that can last more than 50 years if properly maintained. In some cases even 100 years! Concrete is commonly used to achieve Spanish style roofing systems. These types of roofs are timeless and beautiful. Concrete can be more expensive than metal roofs, depending on a variety of factors such as the slope, thickness, design and of course, labor costs. If you haven’t caught on yet, longer lasting roofing materials will always be more costly than materials with short lifespans. You will always get what you pay for!

Concrete is extremely heavy, similar to slate. This means it won’t work for every home and can only be installed if the home’s structure is strong enough. It is imperative that you have a professional inspect your home before agreeing to install a concrete roof. So why are concrete roofs a good choice despite their weight? Their durability and ability to withstand fires are some of the most important aspects. Let’s also talk about environmental impacts. Concrete is sustainably formulated and in some cases can be made of recycled materials. With climate change increasingly becoming a concern, many homeowners seek to use sustainable materials for their projects and this includes concrete.

What about asphalt shingles?

Asphalt shingles are inarguably the most popular choice when it comes to residential roofing systems. However, this is not because they are the longest lasting option on the market. It’s because they are easy to install and in turn, low cost. Many homeowners do not have high budgets which means they must install a cheaper roof that will need to be repaired often and/or replaced sooner. On average, asphalt shingles will last between 12 and 15 years. In some cases, they can last longer but usually not past 20 years. That is still a relatively good lifespan so don’t assume asphalt shingles are bad! They are easy to install and repair, unlike many of the longer lasting materials we listed above. There are pros and cons to all roofing systems. That is why it’s important to consult a professional when wondering what roofing materials last the longest and what materials are best suited for your job. The experts at Cambie Roofing can help. Contact us today for a free estimate.

jacques-bopp-Hh18POSx5qk-unsplash

2023 Roofing Trends You Don’t Want To Miss

2023 Roofing Trends You Don’t Want To Miss

Techniques used to shelter and shield against the elements have been around since the beginning of human existence. As humans have evolved, their sheltering methods have also improved drastically. This goes all the way back to when mankind stopped sheltering in caves and began making structured shelters with roofs. Today, we rely heavily on advanced building techniques. Our condos, single-family homes, apartment complexes and townhouses all have something in common – roofs. Over the years, some roofing techniques have failed while others have proven to work. Luckily for home owners today, there are various roofing techniques to choose from based on a person’s budget, taste and geographical location. Cambie Roofing has compiled a list of roofing trends you won’t want to miss in 2023.

Solar Shingles

It’s 2023 which means being environmentally friendly is in style! Solar shingles are gaining popularity quickly among homeowners looking to make less of an environmental impact as well as bring value to their home. This type of shingle is not to be confused with solar panels which are also very popular across North America. Solar shingles are relatively new to the industry which has its ups and downs. They come from photovoltaic sheets which once installed, will collect electricity from sunlight. Solar shingles look relatively similar to normal shingles and based on how they are installed, they can give the outside of your home a modernized feel. While solar shingles are designed to lower electricity bills, the costs of the initial installation can be out of reach for many homeowners. These costs are expected to continue to lower as solar shingles become more available and common.

Synthetic Thatch

If you’re in need of a vacation somewhere warm, you’re not alone! Luckily, there are ways to make your home feel more tropical and you can achieve that through synthetic thatch roofs. While this trend might not be for everyone, it sure does make a statement for those willing to try it out. Originally, thatch roofs consisted of dried straw, reeds, palm tree branches and other types of vegetation. This historic style of roofing has been around since before the 11th Century and remained popular until the Industrial Revolution when it began getting replaced with other techniques that used materials such as slate. Today, thatching remains a low-cost roofing technique in rural areas and third world countries and it is also used in tropical climates and places looking to make less of an environmental impact. As a homeowner, you can achieve the same beautiful and tropical look of a thatch roof using synthetic materials that don’t pose fire threats. Are you adventurous enough to try this rustic yet urban trend out in 2023?

Green Roof Trends

In today’s day and age, being eco-friendly is something many homeowners strive for especially with large issues such as climate change and the rising costs of living looming over their heads. Green roofs which are largely popular in European countries are gaining traction here in North America, especially in condensed urban areas that lack green spaces. Green roofs can be installed on both residential and commercial buildings, offering plenty of social and private benefits to owners and people nearby. The installation process of a green roof will include water-proofing, drainage and a root repellent system, and based on the type of green roof installed, some will incorporate irrigation systems. There are so many benefits to having a green roof including the fact that they actually lower energy costs since they act as insulation which in turn, moderates your home’s temperature. Another great benefit to green roofs is they promote clean air and absorb carbon dioxide. In addition to this, they’re very stylish and can transform boring urban buildings into beautiful green spaces while also offering agricultural opportunities and habitat for native species.

Metal Roof Trends

If you’re not the type of person to invest in a wild trend like synthetic thatch, you might be more interested in a modern metal roof. In recent years, metal roofs have become available in a multitude of colors and styles so there are options for homeowners looking to make a statement or those wishing to keep it simple. One of the biggest benefits of having a metal roof is its durability and long lifespan. Metal roofs don’t curl up and break apart like shingles do over time. They also do exceptionally well in harsh weather conditions which is something that homeowners need to consider living in North America. As they’ve become more popular, manufacturers have discovered ways to keep metal roofs from being overly noisy compared to other roofing materials. Unfortunately, metal roofs can be on the more expensive side which may deter some homeowners from investing in the technology.

Conclusion

The current roofing trends have one thing in common – a focus on the environment. So much so that standard shingles are starting to be manufactured with reflective coating in order to reduce the amount of heat being absorbed by peoples homes. Whether you’re looking to install a new roof on your current home or you’re in the process of choosing a roof for a new build, there are so many 2023 roofing trends you don’t want to miss!

install Asphalt Shingles

How to Install Asphalt Shingles

The difference in how you install (replace) a roof in the present compared to the past is like night and day. Thanks to a gazillion “how-to” blogs and instructional videos on YouTube, anyone with the confidence, tools, and the right physical condition can do it. But here’s the thing: installing a roof is still not a project you should undertake if you’re not confident in your DIY skills. It’s a physically demanding job that requires safety precautions, including working from heights. One misstep could mean serious injury. So, while we won’t try to dissuade you from taking on the challenge as we’re advocates of DIY, we’ll provide you with valuable tips before you start swinging those hammers. Let’s find out How to Install Asphalt Shingles.

Step 1 – Focus on safety above all things

The inexperienced homeowner is more likely to fall off the roof while attempting to install asphalt shingles than a qualified roofer. The difference between the former and the latter is that the roofer has presumably been properly trained and knows how to work on a roof safely.

That’s not to say that you can’t install asphalt shingles – you absolutely can, but be sure to take all necessary precautions, including using a ladder or scaffold when working from height, wearing a hard hat, and using safety ropes.

Pro Tip: Not many DIYers realize the value of wearing the right shoes when working on a roof. Many roofing accidents occur because people are wearing the wrong type of footwear, which can cause them to slip and fall. When installing asphalt shingles, wear shoes with soft rubber soles and good tread. That’ll help you maintain traction on the roof and prevent slips and falls.

Step 2 – Study how sloped roofing systems work

It’s not all about you getting up there and hammering away. You need to understand the roofing system you’re working with to install the asphalt shingles properly.

Asphalt shingles are most commonly used on pitched roofs with a sloped surface. The slope of the roof is necessary so that water can run off the roof and away from the building. If you’re not sure how to determine the slope of your roof, there are a few ways to do it. You can use a level to find the pitch of the roof or, if you have access to the attic, measure the rise and run of the roof rafters.

Once you’ve determined the slope of your roof, you need to purchase asphalt shingles designed for that slope. Asphalt shingles come in various grades, each of which is designed for a specific sloped roof.

Pro Tip: If you install asphalt shingles that aren’t designed for the slope of your roof, they won’t perform as well and may even come loose and fall off. So, be sure to purchase the right shingles for your roof.

Step 3 – Gather your tools and materials

You’ll need a few essential tools to install asphalt shingles, including a chalk line, utility knife, hammer, pry bar, and nails. In terms of materials, you’ll need asphalt shingles and felt and cement designed for roofs.

Pro Tip: Be sure to use galvanized or stainless-steel nails when installing asphalt shingles as they won’t rust like regular nails.

Step 4 – Prepare the roof surface

Before installing the newly purchased asphalt shingles, you need to prepare the roof surface. This means getting rid of any existing roofing material and making sure the roof is clean and debris-free. If you’re replacing an existing roof, you’ll need to remove all of the old shingles and the felt paper and any nails left behind. Once that’s done, you can sweep or blow off the roof surface to remove any small debris.

Pro Tip: Be sure to inspect the roof deck for any signs of damage, such as rot or water damage. Any damage must be fixed before proceeding with the installation of the new shingles.

Step 5 – Begin working from the bottom up

Once the roof surface is prepared, you now begin with the drip edge. It’s important to work from the bottom up so that water runs off the shingles and doesn’t seep underneath.

The drip edge serves as the first line of defence against water infiltration and should be installed at the roof’s eaves. It’s a metal or vinyl strip placed along the edge of the roof, extending over the gutter.

Pro Tip: The drip edge should overhang the gutter by at least an inch.

Step 6 – Install the felt paper

The next step is to install the felt paper. Felt paper is a water-resistant material placed between the roof deck and the asphalt shingles. It helps protect the roof deck from moisture and extends the life of the shingles.

You only need to nail the felt paper down with galvanized or stainless-steel nails to install the felt paper. Be sure to overlap each row of felt paper by at least two inches.

Pro Tip: Don’t forget to install a strip of felt paper along the rake edge, the edge of the roof extending over the gutter.

Step 7 – Install an ice and water protector

If you live in a region with harsh winter, installing an ice and water protector is a good idea. An ice and water protector are a synthetic underlayment that helps prevent ice dams and water damage.

The ice and water protector should be installed before the final row of shingles. This will help keep your roof protected from the elements.

Pro Tip: Consult with a professional roofer to see if an ice and water protector is necessary for your region.

Step 8 – Add the roof underlayment

Before installing the roofing cement, you’ll need to install the roof underlayment. The roof underlayment is a layer of asphalt-saturated felt that helps keep the roof deck dry. If your area isn’t prone to harsh winter, you’re better off starting the underlayment at the eave rather than the whole length of the roof.

Installing the underlayment is a simple process. Just unroll it and nail it in place. As in the previous step, you need to overlap each piece by two inches.

Pro Tip: You must also use galvanized or stainless-steel nails to avoid premature rusting when installing the roof underlayment.

Step 9 – Cover the joints and valleys

Some areas or components of the roof need flashing, the purpose of which is to divert water and moisture. The flashing needs to be covered in roofing cement to create a waterproof seal.

The flashing is found at the joints and valleys of the roof. The joints are where two pieces of the roof meet, while the intersection of two sloping roofs forms the valleys.

Simply cut it to size and nail it in place to install the flashing. Then, apply a generous amount of roofing cement over the seams and allow them to dry.

Pro Tip: If you’re not sure how to install the flashing, consult with a professional roofer. You can’t “redo” this step, so it’s better to learn everything about it before proceeding.

Step 10 – It’s time to shingle

Starting at the bottom of the roof, install the first row of shingles. Align the shingles and nail them in place. Be sure to stagger the joints of the shingles as you install them. This will help keep water from seeping underneath the shingles.

Pro Tip: It’s good to use a chalk line to help you keep the first row of shingles straight.

Step 11 – Proceed with the installation of the rest of the shingles.

Once you’ve installed the first row of shingles, continue working your way up the roof, installing one row at a time. Like the previous step, don’t forget to stagger the joints of each row of shingles and use a chalk line to keep the rows straight.

Pro Tip: Use a utility knife to trim any shingles that hang over the roof’s edge.

Step 12 – Don’t forget the hip and ridge caps

If your roof has a hip or ridge, you’ll need to install hip and ridge caps. The hip and ridge caps are pieces of metal or asphalt that cap off the hips and ridges of the roof.

Installing the hip and ridge caps is a simple process. Just measure the length and width of each hip and ridge, then cut the caps to size. Once you’ve cut the caps to size, nail them in place.

Pro Tip: It’s best to use longer nails for ridge cap shingles for them to penetrate the roof deck.

At this point, you already have a clearer picture of how to set up and install asphalt shingles. That’ll help you acknowledge the cost as you purchase the necessary materials for the project and the intricacies that often go into roofing. There’s no shame in consulting a professional if you don’t feel confident.

best roofing material

What To Do If You Can’t Afford a New Roof

Nothing lasts forever – not even the most expensive roofing material. Regardless of what your roof is made of, it’ll eventually age or give in to severe damage caused by extreme weather or another fortuitous event.

When that happens, you’re left with no choice but to have it replaced. But like many property owners before you, the problem is not having the money to afford a new roof. You’re in a mess, left in a corner with no solution in sight.

If you can’t afford a new roof, know that there are other options to consider. It’s not like you sit idle and wait for nothing. Keep reading this article and learn about the potential ways to smartly solve your predicament.

Do You Actually Need a New Roof?

Some property owners are overwhelmed by the prospect of replacing a roof.  They and you are right: The cost associated with it is a big deal. But before you stress yourself out, think about the possibility of having it repaired instead.

Just because a local roofer told you that you need a new roof doesn’t mean that he’s accurate or telling the truth. Talk to other roofing contractors and tell them about your situation. Some roofers can salvage a roof for less money than it’ll cost to replace the structure.

Some old and severely damaged roofs can be remedied with the necessary repairs and the best roofing material. That will last you for at least a year. That should be enough time to save money for the inevitable replacement. Instead of relying on the sole assessment, you must get at least three independent assessments and repair estimates to fix your roof.

Property owners spend an average of $900 for roof repair, although minor fixes typically cost around $200. If you’re facing a major roof repair project, you’ll have to shell out at least $500 and upwards to $1500.

As much as you want to replace your severely damaged or aged roof, you may have to contact a roofing professional first to inspect the structure. Roof repair costs less than a total roof replacement, but even that is a hard pill to swallow when you’re low on funds.

Financing Options that Include Best Roofing Materials

If you can’t afford to pay cash for roof repairs, there’s a handful of financing options available to ease your burden. Use your credit card to get the repairs done and have enough time to pay off the charges.

If you’re uneasy about the credit card option, getting a personal loan is the next best thing. It gives you the option to pay on a monthly scheme while the needed repairs are addressed right away. Keep in mind that this is a short-term investment for your property, so please be sure to use the best roofing material. Use money wisely.

Improvement and Renovation Grants with Best Roofing Material

Applying for a home improvement or renovation grant is a popular option for roof repairs. They’re available from the local and national governments, and they usually include the best roofing material.

In North America, these home improvement or renovation grants are meant to provide financial assistance to property owners who can’t afford to have their homes fixed after weather devastation or natural disaster.

Another type of grant focuses on low-income homeowners who need help in improving their houses. Home improvement and renovation grants are meant to give property owners relief as they come with low-interest rates compared to standard loans.

Consider DIY

If you have tried roof work before, then you should explore fixing the structure one more time. On the other hand, DIY roofing projects are only meant for minor repairs. Unless you’re a roofing professional, you’ll have to tap the services of a licensed contractor for major repairs and replacements. But because you’re short on cash, there’s nothing wrong in pondering a DIY solution.

Refinance the Property

Refinancing your home make sense, too. Home improvement loans include refinancing the property, where there’s an explicit set of guidelines to be followed. In most scenarios, the loan is exclusively intended for the needed repairs and cannot be used for other purposes. Since the roof is part of the property, this option is viable for major roof repair jobs.

See to it that you talk to a financial expert before taking this path. You need professional advice since refinancing your home is a long-term responsibility that affects you and your family’s future. Aside from getting a reasonable interest rate and favourable loan term, the financial expert helps you understand the legal consequences in the failure to pay the loan.

Why Not Save Some Cash?

Investing in a new roof is out of the question, but with the help of a professional roof inspector, you could wait it out for several months to afford a repair project.

Call a local roofer to examine the structure. If the inspection report says that you can live with the damage for a year or so, you can go through your budget and save the necessary funds for a major repair. There’s always the option of cutting costs on stuff like food, vacations, and entertainment.

Instead of getting a loan and paying for the interest rates, you’ll save cash and end up fixing your roof with no long-term financial responsibilities to cover.

Home Renovations and Insurance in Vancouver

Home Renovations and Insurances in Vancouver

Getting tailored-made home renovations and insurances in Vancouver is possible if you contact professionals. Design a insurance policy with added features just for you.
Any insurance professional will tell you that having insurance does not provide protection against everything during a renovation. However, while accidents can happen, a person’s disaster preparedness will affect outcomes at least as much as their insurance policies.
Now, is it possible to be ready for home renovations, and having bullet-proof insurances in Vancouver? Sure it is! Of course, the first thing you need to do is activating your accident barometer, and tweak over it.

Alarm System Monitoring

For many years, companies have offered discounts for alarm systems, but not all alarm systems are the same. In order to qualify for this home renovation discount on your insurance policy, your alarm system must be centrally monitored by an approved company

Fire Monitoring System

Smoke and CO2 dioxide alarms are an inexpensive investment even if there were no insurance discounts associated with them. Luckily, there is sometimes an insurance reward, but for just a few dollars per unit, don’t skimp out on these lifesaving devices.
If it’s centrally monitored, meaning that if you’re out of town and the fire alarm goes off, a third party company can send a fire truck to help, you can expect to receive a better discount on your home insurance quotes.

Home Renovations To Your Plumbing System

Houses built in the 1970s and 1980s may still be using lead piping. This type of plumbing is susceptible to increased corrosion and can crack under extreme temperatures and can be hazardous to your health. It is highly recommended to substitute these with more modern copper supply lines and updated drains.
This would positively impact both your health and your insurance premiums.

Home Renovations To Your Electrical Wiring

If your house still has aluminum or knob and tube wiring, you should look at upgrading it to modern copper wiring. If you don’t, you might have to get your policy from high-risk insurance providers. Some companies may offer you coverage, but they will likely require an inspection through a certified electrician.
A lot of old wiring resulted in fires, upgrading to the new, safer standards will reduce the chance of a fire destroying your valuables and save you money on your home insurance premium.

Use Seismic Technology

British Columbia home insurance quotes are significantly higher than in other provinces since they are prone to earthquakes as we are located in a seismically unstable region.
Almost all homes are seismically resistant these days, but if you have a newly built house with updated seismic technology often you are rewarded with extra discounts. You might want to consider adding extra earthquake insurance to your home insurance policy if you haven’t already.

Home Renovations To Your Roof

It costs more to insure homes with older roofs and some providers may not offer you coverage at all if your roof is too old. Water damage to the inside of your home and costly repairs to your roof are claims an insurer wants to avoid and they will charge you extra for an old roof. Investing in a new roof will reduce your home insurance premium.
Also, know that home insurance is not a maintenance plan. If there is damage to your roof you’re ignoring, your claim may be denied altogether.  If you can afford it, opt for more than asphalt shingles and look for something that may cost more, but has a much longer life.
A lot of things can happen during a home renovation – your contractor falls off the ladder while fixing your roof, a hammer goes through your window, or a subcontractor is injured on your property. Despite all precautions, if there’s an accident on your property that leads to a liability issue, you, as the homeowner, can be in trouble.

Home Renovations and Insurances in Vancouver: The Rules

The general rule is that owners are not vicariously liable for the wrongful act of their independent contractors. But, there are a number of exceptions to this general rule. You should be aware of them for these reasons:
First, a fully awared homeowner understands the nature and extent of liability risk. Like this, they mitigate risk through carefully drafted contract documents or assign the risk to a third-party insurer.
Second, having an accurate understanding of the liability risks helps to assessing the feasibility of the project.
Finally, being fully aware of the potential liability for the acts of independent contractors may inform the choice of contractor. The owner may decide to choose a more competent and reliable contractor, rather than the one with the lowest price.
The time to find out risk and liability is before an accident happens:

Step 1:

Check the personal liability section of your homeowner’s policy. Talk to your insurance agent before beginning a renovation project. Like this, you can update your policy and extend coverage to the new space, if needed.
You may also want to ask your agent about whether you may benefit from an add-on protection called theft of building supply coverage, which may protect the construction materials while your project is in the works.

Step 2:

Check your contractor’s liability insurance. Do the same with the worker’s compensation (WCB) insurance, and ask your contractor to provide you with a policy certificate before you begin the project.
If a contractor is unwilling to verify his coverage, consider hiring someone else. This applies to subcontractors as well.

Step 3:

Minimize risks – remove fallen branches, wet leaves, and kids’ toys from your driveway before the workers even show up.

Conclusion

We hope these tips help you with home insurance and renovations. Although home renovations and insurances can be time-consuming or annoying, they provide a extended lifespan of your property.
If you’d like to have someone come out and inspect your roof for you, give the experts at Cambie Roofing a call. We’ll let you know how your roof weathered this winter, and fix any issues. For more information, or to request a free repair estimate.