Roofing Tips For The Winter, Roofing in Winter

Roofing Tips For The Winter

Winter is definitely here in Vancouver and as you all know, the harsh conditions can cause damage and decrease the longevity of your home’s roof. If your roof needs repairs, it’s generally better to do them in the drier months. In fact, most experts say the best time to do work on a roof is from July to August when the weather is best. In a perfect world, summer would be great to finish all those projects, but your roof doesn’t just leak during those months.
Moreover, In British Columbia, where the weather is often unpredictable, these ideal conditions can be few and far between. Most roofing companies have to consider how they can perform a roofing job in the winter, in less than ideal conditions.
While not always the best, roof construction and repair can be done in cold weather, as long as precautions are taken. In winter, roofers face a variety of challenges including:

  • Roofing materials don’t work quite as well as they do in moderate temperatures.
  • Shorter days give roofers less time to work which generally means the project takes longer.
  • Tools such as nail guns generally don’t work as well in the cold.
  • Snow and ice can create hazards or cover up dangers to roofers.

What to Expect When Roofing in Winter

Roofing in winter weather requires a lot more foresight, planning and safety precautions than summer days. Be aware that some companies will charge you up to 20% more for their services, while other companies will be looking for work and might give you a discount. Whatever you do, you should shop around and get between three to five quotes and ask them specifically about their winter work.

Winter Safety Is The Most Important

Safety is obviously the most important thing when it comes to roofing – no matter what time of year. Under no circumstances should you hire a company that doesn’t take safety serious as there are some unique cold weather issues to be aware of when doing winter roofing work.
For example, roof surfaces can become slippery thanks to snow, ice, and frost. A common winter problem is snow removal or de-icing of the roof surface must be done after a snowstorm. The roofers must take extra precaution and use specialized equipment, which they need to be trained on, along with increased monitoring while the removal is taking place.

Snow can also disguise dangers such as skylights, debris and other risks. The roofing contractor needs to pay close attention to where they walk to ensure they don’t accidentally step on or fall through a skylight or trip over hazards hidden under snow. Even on a freshly cleared roof, there may be black ice or frost build-up on the roof or deck surface, which can make work extremely dangerous. If the temperature is too cold and the snow and ice remain, it is best to wait until the weather warms up.
Another thing to do before getting a roofing contractor to work is to ensure that the attic space is adequately air-condition. Often, what appears to be a roof leak is actually condensation from interior air drifting up into a cold, improperly ventilated attic.

Working in the Winter

Working in cold, damp temperatures can put a strain on the body, making your heart and lungs work harder, while at the same time putting you at increased risk for hypothermia or frostbite. Be aware roofers, as mentioned before, will work shorter hours, and plan around the sunshine and weather forecasts. Be prepared for work stoppage and delays because of the weather.
Roof contractors should also wear warm clothing that is breathable but also provides an ample range of motion. If you notice that a roofer isn’t appropriately dressed, do not let them work.

The Weigh Of Your Roof

Another thing to consider is the extra weight that snow and ice can add to a roof. If you add a human’s weight into the mix, you can potentially be looking at serious injury. A roofer must ensure that the surface he is working on is sturdy and safe from collapse. An experienced roofer will test the structure before beginning to work on it to ensure that there is no danger from collapse.

Equipment and Materials

Now you know what to expect in the winter, you also have to keep in mind the quality of craftsmanship which can suffer if the roofer is inexperienced.

Asphalt shingles

The best temperatures to install asphalt shingles is between 4 and 26 degrees Celsius. If a roofer decides to install roofing shingles in cold weather below these temperatures, your shingles may become brittle and more prone to breakage. To prevent this, when working in below-zero temperatures, make sure the roofer stores your materials in a warm place until you need them. Shingles will mould to the shape of the surface they rest on, so if you are buying them before using them, keep them flat, stacked and raised on pallets so they don’t touch the ground. Be aware that a roofer should not work in below-zero temperatures unless it is an emergency situation that needs fixing.

Types of Roofing Materials

Most roofing organizations recommend using winter weather membranes to seal your eaves, valleys, skylights, and vents, rather than warm weather roll roofing, which can buckle or warp when applied in cold weather. When you choose to use any kind of felt or membrane, the roofer will roll it out in a staging area, away from the elements and allow it to relax before you apply. This will help reduce wrinkles caused by the weather.

Conclusion

The information in this blog is purposeful to be a starting point for cold weather roofing applications. Each situation is different and as always consult a professional roofer before starting. If you have any questions, then please don’t hesitate to contact us at Cambie Roofing to schedule a free roofing estimate.

How To Become A Roofer

How to become a roofer: roofing responsibilities

How to become a roofer: roofing responsibilities

Not surprisingly, roofers use their specialized skills to ensure your home has a proper roof that protects you from rain, wind, snow and other elements. They are the guys who patch holes or build you a completely new roof.
Roofs tend to work on all types of roofs, from asphalt to cedar to metal. These roofs are either sloped or flat. Slopped roofs usually require slating, tiling, or asphalt while a flat roof uses a bitumen layer or fitting felt sheets.
A large part of a roofer’s work is making sure your roof is structurally sound. They repair roofs by removing and replacing broken tiles, cutting, and fitting roofing material.

How Do You Become a Roofer?

There are no specific schooling or academic requirements to become a roofer. They do not need to have a trade certificate or any licence to work in B.C, although there is a certification people can take to enhance their employability. Most roofers start off at the bottom and work their way up first as common labourers while others might go through apprenticeships with professional roofing companies.

Roofers need to be nimble with their hands and need to be able to think on their feet. They also need to be able to handle heights. They should be able to understand architect plans and have some math skills to measure out the different materials. Roofers must also enjoy being outside in the elements and a background in construction certainly helps. It’s a physically demanding job, requiring lots of dexterity. There is a lot of crouching, bending and kneeling involved.

A roofer involves repairing, replacing and installing new roofs on homes or commercial properties. They work with many different types of materials including asphalt, tiles, slates, bitumen, and metal sheets.
The work they put into a roof will ensure that the roof will endure weather of all types including rain, snow, sun and everyday wear-and-tear for years to come.

The Roofers Contractors Association of British Columba (RCABC) is a leader in the roofing industry. RCABC has trained over 1,500 apprentices in the 20 years. Apprentices from throughout British Columbia are engaged in learning theory and practical applications, the latest application technology, current product information and safe work practices. RCABC instructors have over 50 years combined industry experience and keep up to date with developing product technology and applications.

For those interested in roofing, you may be able to find apprenticeship programs or a local unior or contractor association who will sponsor them. The typical entry qualifications for something like a 3-year apprenticeship include:

  1. You must be at least 18 years old
  2. Have a high school diploma or equivalent degree/certificate
  3. Be physically capable of performing the job

Becoming a roofer also requires one be physically fit and healthy enough. Along with possessing a good attitude, to perform the job. Roofers often work in warm weather, on hot roofs, and may sometimes need to climb quite high in order to complete a project. This means being okay with heights and hot weather are very important for anyone considering a career in roofing.
Roofers construct and repair roofs on all kinds of buildings. The jobs can range from stripping and re-slating a roof on a domestic household, working on a renovation project on an historic building, to working as part of a team on a new commercial development such as a shopping centre.

Roofers perform some or all of the following duties:

  • Install, repair or replace built-up roofing systems using materials such as asphalt saturated felts and hot asphalt and gravel
  • Install, repair or replace single-ply roofing systems using waterproof sheet materials such as modified plastics, elastomeric or other asphaltic compositions
  • Install, repair or replace shingles, shakes and other roofing tiles on sloped roofs of buildings
  • Install sheet metal flashings and metal roofs using hand and power tools

Skills and Attributes Roofers Need

Working as a roofer is most rewarding for those who enjoy physical exercise, working with their hands, developing special skills, and the security of steady employment.

A roofer should have the following skills and attributes to be successful:

Ability to work both independently and in a team setting
Good physical condition and ability to lift heavy objects
Good manual dexterity and an eye for detail
Comfortable working at heights
Interested in working outdoors
Ability to read and interpret drawings, specifications and manuals
Ability to work in varying weather conditions

Becoming Qualified as a Roofer

In B.C., an individual can become certified as a roofer by completing either the apprenticeship program through the Industry Training Authority (ITA) or by challenging the ITA Certificate of Qualification. Apprenticeship programs are for people who require more training and have employers to sponsor them, and challenging the Certificate of Qualification is for individuals who have extensive experience working in the occupation and wish to challenge the certification. For more information on the apprenticeship program fora roofer, visit the Industry Training Authority’s website. The duration of the apprenticeship program depends on how training is delivered, however it generally takes 3 years to complete the apprenticeship program through ITA.

If you are already an experienced roofer you may challenge the ITA Certificate of Qualification. To challenge the Certificate, you must apply to the Industry Training Authority and in your application provide proof of 5,400 directly-related work hours as a roofer. This is usually provided in a signed declaration from either a current or previous employer. You will need to provide proof of achievement of required competencies.
If your application and work experience are approved you must write the Interprovincial Red Seal exam and achieve at least 70% on the exam to obtain the ITA Certificate of Qualification. Red Seal endorsement is recognized by employers as a standard of excellence. And indicates that the certificate holder has met the Interprovincial knowledge, skills and work experience standards established by this industry.

The Future of Roofing

Installed properly, a roof should be able to prevent water from leaking into buildings and damaging the interior. With different types of roofs come different techniques and skillsets, which is why some roofers choose to specialize in a particular kind, such as low- and steep-slope roofs, or even roofs with solar shingles.
With the increased popularity in both solar and vegetation features on roofs, roofers can easily adapt to modern trends to make a name for themselves in the already-niche industry.

Originally published January 2018.
Updated and republished Sept. 2023.

Best Roofing Contractor in Vancouver

Tips for Selecting the Best Roofing Contractor in Vancouver

Tips for selecting the best roofing contractor in Vancouver

Selecting the best roofing contractor in Vancouver can be easy if you know what to look for.
Yes, there are a lot of roofing contractors in Vancouver, so choosing the right one for you can be challenging. How can you know if you’re making the correct decision or not? What are the concrete signs you should look for in a roofing contractor?
Beyond solving the emergency of a leaking roof, it’s important to do your due diligence and not to rush into a decision. Get the boll rolling! Follow these tips and answer important questions before choosing a professional roofing contractor in Vancouver, and be sure you will do the best for you!

Tips for Selecting the Best Roofing Contractor in Vancouver

Tip 1: Determining Authority

To sift and determining what are the best options to select the best roofing contractor in Vancouver, you need to shrink your list of possible choices in roofing services from many to few. Here are some questions you need to answer to speed up this part of the process:

How Long Has The Company Been In Business?

With a little research online it’s easy to find out how long a company has been in business. An established company will most likely be around in the future should any problems arise.
You don’t want a roofer who has been only one or two years on the job. Inexperience can lead to complications and if they go bankrupt it will be next to impossible to follow up with them.
At Cambie Roofing we have half a century in the roofing and drainage industry, which means we have the expertise and the knowhow to do a job done correctly. We are recognized in our community as trustworthy and dependable.

Does The Company Have Good Reviews?

There is less chance of potential issues or scams when you choose a contractor who has good Google and Yelp reviews. Don’t just trust reviews on their website, although that’s always a good place to start. Dig deeper and find some third party review sights. They generally have honest, unbiased opitions.
Ask the company if you can talk to some of their past customers and if they don’t give you a few names then that should raise some red flags. As the past customers about their experience and if they would recommend the roofer.

Tip 2: Service Quality and Warranties

Does The Company Offer Warranties On Its Products And Services?

As surprising as it may be, not all roofers offer manufacturer warranties that include coverage of the contractor’s workmanship.
If a contractor installs the roof incorrectly, it may take months or years for the damage to show up—and insurance won’t pay for it. If the contractor won’t fix it, your only recourse is to go to court which can take months, if not years, or pay for their mistake yourself.
At Cambie Roofing we guarantee all our labour and products so you know we stand behind the work we do.

Is The Company Licensed?

Check for proper licensing and insurance. The contractor should have insurance for all employees and subcontractors and be able to provide a copy of their insurance certificate for validation.
Not having adequate insurance could potentially lead to litigation between a contractor and homeowner if a roofing employee sustains an injury at the home. If someone is injured on your property and the roofer doesn’t have correct insurance then you might have to pay Worker’s Compensation .

Have There Been Any Complaints Against The Company?

Research your potential roofer on the Better Business Bureau. Look for the overall business rating and keep in mind the general size of the company when checking for complaints.
It’s important to verify they have a good standing and no outstanding complaints against them. You should stay away from roofers who do not exist on the Better Business Bureau.

Tip 3: Best Practices

Is Safety An Important Issue for the Company?

Roofing can be a dangerous job. More important than budget, safety should be the roofer contractor’s primary concern. A contractor without a training or safety program may not be the best person for your job. Although this may be hard to gauge when first interviewing them, ask
them direct questions about what they do to ensure safety on the job.
At Cambie roofing we ensure all our employees are certified and up to standard with the latest regulations. When you hire us, you will discover the safety of our workers are the highest priority.

Does the Roofer Put Everything in Writing?

All job specifications and prices should be supplied in writing so you can refer to it when the job is done. The roofer should take time to explain everything in the contract in detail and answer any questions that you may have. Contracts have the estimated price and competition date as well as anything that might be a problem during the job.
To protect both you and the roofing company, make sure that all aspects of the job are well understood. Write down the details and make sure that you don’t hand over the funds for the work until you’ve inspected everything. By setting a clear expectation, it’s easier to avoid frustrations later on down the road.
Do no do a straight for cash deal or sign any contract you do not feel comfortable with. Watch out for a contractor who pressures you to sign a contract before the insurance company has estimated the damage. Some contractors say they can work with whatever your insurance company settles upon, however the homeowner needs to ensure it’s not just any amount, but the right amount.
The contractor should thoroughly examine the home and check that their insurance adjuster didn’t miss any damages.

Conclusion

Your home should be your family’s sanctuary. You spend a majority of your time there and you need to be able to enjoy it and worry about the roof or any other aspect of your house. Why would you trust it to anyone less you weren’t confident in?
Whether you are in need a roof inspection or have a leaky, it’s important to choose a roofing contractor that is trustworthy, reliable, and experienced. At Cambie Roofing we are experts in providing you the service you need within your budget. Give us a call or email us for a free estimate.

Torch on roofing, Modified Bitumen Roofing Tips

Modified bitumen roofing tips

Modified Bitumen Roofing Tips

Modified bitumen is a very popular roofing material. In this blog post we will explore what it is, how it works, how to identify it, installation methods and more.

What is Modified Bitumen Roofing?

Modified Bitumen Roofing is made from asphalt and a variety of rubber modifiers and solvents. It is the next evolution of asphalt roofing. In an application process the seams are heated to melt the asphalt together and create a seal. There is also hot-mopped application, similar to how conventional roofs are installed.

How Modified Bitumen Works

Modified bitumen can be installed overtop of an existing tar roof unlike rubber flat roofing, which can be eaten away. It is also very rugged and can sustain a fair amount of foot traffic. Modified bitumen roofs involve some traditional materials, but use modern fabrication methods, and traditional or more contemporary installation techniques.

Modified bitumen roofs are made from prefabricated rolls of modified asphalt or coal tar reinforced with a fiberglass or polyester reinforced mat. Rubber-modified asphalts, such as styrene-butadiene-styrene materials, are granular surfaced and are normally installed in two or more plies using mopping asphalt, cold adhesives, or torch welding. Plastic-modified asphalts such as atactic polypropylene systems are smooth or granular surfaced and can be heat welded or laid in cold adhesive.

Modified bitumen membranes combine the features of a built-up roof with the added strength from its polymer modification. Using a reinforced sheet that is prefabricated in the plant, modified bitumen systems require a less labor-intensive application than other types of roofing and can be applied in both commercial and residential roofs.

A modified bitumen roof is composed primarily of polymer-modified bitumen reinforced with one or more plies of fabric such as polyester, fiberglass or a combination of both. It can also include mineral granules, aluminum or copper. The bitumen determines the membrane’s characteristics and provides primary waterproofing protection, while the reinforcement adds strength, puncture resistance and overall system integrity.

A roofer will ensure modified bitumen membranes undergo strict quality control standards to ensure uniform thickness and consistent physical properties throughout the membrane. The finished roofing is usually two to four layers of modified bitumen membrane and a base sheet, with additional plies for added strength if needed. Usually if more layers are applied, the roof will last longer.

How to Identify Modified Bitumen

The best way to identify a Modified Bitumen roof is to look at the material edges. Modified bitumen roofing is thicker, and its edges are sealed by heating with a torch. You should see a little runout of melted bitumen at the material seams. If there is no runout the roof may have been adhered using some other method. But if it was “torched” it was not heated sufficiently and may be less durable.
Secondly, , it also is better at resisting tearing and breaking. If you find that it is easy to tear into the roof material edge it’s probably roll roofing not mod-bit.

Properties & Installation Methods

Most modified-bitumen roofs are torch-applied, although there are also self-adhesive and cold-process systems. The waterproofing membrane, sometimes called “single-ply modified,” consists of asphalt bitumen reinforced with a polyester or fiberglass fabric. And modified with polymers to give it greater strength, flexibility, resistance to UV degradation, and resistance to heat and cold.

A variety of different chemical formulations have been tried over the years. It is best to stick to a product with an established track record. In general, modified-bitumen roofs can be applied to slopes as shallow as 1/4 inch per foot.
There are two main forms of modified bitumen roofing installation: the torch-down installation method, and a peel-and-stick installation.

Installation Methods for Modified Bitumen Roofs

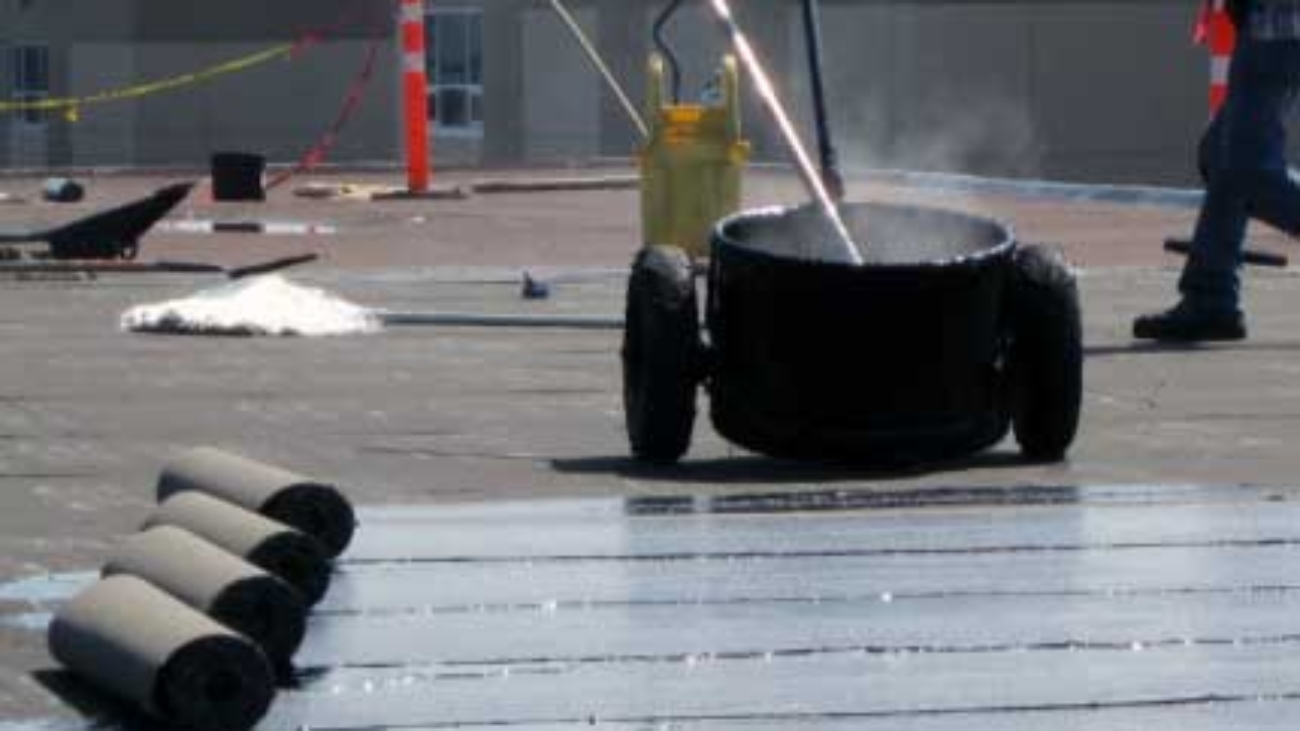
A torch-applied, or torchdown, roof starts with a non-flammable base sheet made of asphalt-saturated felt or fiberglass that is mechanically attached to the roofing deck. In residential construction, the base sheet is usually attached with roofing nails driven through metal caps.

The second layer is the waterproofing membrane. This is heated with a torch as it unrolls, fusing it to the base sheet, to itself at seams, and to penetrations such as skylights. Installers must learn to heat the membrane so it is hot enough to fuse but not so hot as to burn through.

Membranes may be either smooth or have a granular surface like roll roofing. Smooth-faced membranes need a third coating, which has colored or reflective pigments to protect against UV radiation. The smooth type is preferable where foot traffic is expected or where decking is going over the roofing.

Torchdown roofing is self-flashing and uses no adhesives or solvents to seal around openings. The material can be run up parapets and abutting wall. And patches are used to seal around metal skylight curbs and similar openings. A special patching compound is used to seal to PVC stacks. If applied correctly, the torchdown membrane is essentially seamless.

Pros and Cons

Bitumen roofs are very durable and are one of the longer lasting types of flat roofing materials, easily lasting 20 years or more. They are also easily repaired without solvents or adhesives, making it less expensive to maintain. It is compatible with asphalt shingles and asphalt compounds, although patching with roofing cement is not recommended. The reinforced fabric layer isolates the membrane above from building movement and gives the material enough strength to support occasional foot traffic.

The main drawback of modified bitumen roofing is the risk of fire during installation. While the risk of fire is low in the hands of trained installers, care must be taken when using torchdown on a wood-frame structure. A number of fires have started with sawdust that has accumulated in empty cavities, such as crickets and parapets. Inspection of the roof for sawdust pockets while it is being framed is advised.

Typical Slopes for Modified Bitumen Roof Systems

Modified bitumen roofing is normally installed on low-slope roofing, up to 3 inches in slope. Or depending on the application method, up to six inches of slope per foot may be permitted. Because there are quite a few approved installation methods. Manufacturers typically use a alphameric roof application method name that encodes the basics of how the roof covering should be installed.

Originally published August 2017.
Updated and republished June 2023.

luke-southern-ZzZouwiQWV0-unsplash (1)

Emergency Roof Repairs

Emergency Roof Repairs

Vancouver gets its fair share of extreme weather conditions, especially during the winter months. This too is the worst time to have an emergency of any kind, but especially a roofing emergency. Leaks are more likely to happen when your home is subjected to heavy rain, snowstorms, strong winds and/or hail.
A leaky roof is one of the worst situations that a homeowner has to face. Immediate intervention is critical since water damage can directly affect the stability of the entire structure. As well as destroy furniture, flooring, appliances.
In the midst of a severe storm, a professional roofing contractor may not be immediately available because, let’s face it, you’re probably not the only one looking for help from a professional during this time. So what should you do to prevent further damage to your roof before a professional arrives? Emergency roof repairs – this can help to minimize water damage until a roofing contractor is available to permanently and correctly handle the repairs.

What To Do When You Have An Emergency

If you’re faced with serious weather conditions that impact your home and cause a leak in your roof, the most important thing you can do is stop the flow of water. Placing buckets under the leak can help prevent damage to flooring while also ensuring you don’t slip and injure yourself. Even if you do have experience looking for roof damage, it may not be smart to do so during a storm. Wait until a professional is available. If the storm does let up and you can safely check your roof, try to clear away any snow, puddles or stagnant water forming. If left unattended, these things can cause even more damage and can cost you even more in the long run. Next, you can try to locate the exact source of the leak. This may be tedious but checking both inside and outside should help determine the location of the leak. If you have a skylight or chimney, look around the edges first as those areas could be the culprit.

Emergency Roof Repairs

Aside from skylights and chimneys, roof vents are one of the most common causes of a roof leak. Air vents are used to allow outside air to enter into attics and other ventilation spaces. Rusty and cracked vent pipe collars around their base allow the water to first pool around and then seep through the interior walls of your home.
Occasionally, vent pipe leaks can also occur at the collar surrounding the base of the vent pipe, where it breaks through the surface of the roofing material. When this occurs, rainwater can seep in between the rubber boot and the vent pipe while accumulating in your home and causing damage. If the rubber boot collar is cracked or damaged, it will need to be replaced. Talk to a roofing contractor about this because this isn’t something you can fix on your own. If you have determined that the issue isn’t a skylight, chimney or roof vent, then you should consider inspecting the attic to see if you can find the source of the leak.

If you are able to find the leak, plug it if possible. Use plastic sheets or tarps as temporary methods until a professional arrives. A good method is to enclose a piece of wood (a two-by-four is an ideal size) in an end section of plastic sheeting. Wrap the board several times to ensure it will stay covered and then secure the plastic to the wood with staples.

Plastic Sheeting

Lay the wood down on the roof and place the plastic sheeting over the leaky area. Wrap a second two by four in the other end of the plastic sheeting. Do not staple or nail the wood planks or plastic to the roof as you might risk creating more leaks or other damage.
Contact a roofing company as soon as possible and explain your problem. Let the customer service representative know if your roof is made of shingles, tiles, wood shakes, metal or if you have a flat roof. This information will help the contractor know what repairs will be required before sending out the most knowledgeable expert.

The Dangers of Ice Damming

With the prolonged presence of snow in Metro Vancouver, many homeowners may be at risk of ice damming and not even know it. Ice damming occurs when a thin layer of ice pools at the edge of your roof, preventing melting snow from draining off. Ice is heavy and can cause severe damage to your roof if not addressed. In order to prevent ice damming, you can purchase a roof rake. This is basically a sideways shovel with a long handle that you use to reach up and remove snow from your roof’s edge before it turns to ice. When the weather drops, you should use this rake at least once a week to clear the ice.

Where Do Ice Dams Come From?

When snow is allowed to accumulate on your roof, the heat from inside your home can cause it to melt. However, if the outside temperature is still below freezing, the snow will instead turn to ice. When ice develops around the edges of your roof, it can quickly build up into increasingly large blocks, also known as ice dams.
If too much ice accumulates on your roof, it can damage the shingles and lead to leaks and water damage. In severe cases, roofs have been known to collapse under the weight of ice dams. However, such instances are rare, especially in Vancouver where the weather doesn’t stay below freezing for long. With the proper precautions and routine roof maintenance, you can prevent ice dams from taking a toll on your home.

Conclusion

In the event of a storm, knowing these quick fixes could save your roof. Being able to perform an emergency repair quickly could save you thousands of dollars. If you’re concerned your roof is damaged, don’t hesitate to call the experts at Cambie Roofing for a free inspection.

Originally published June 2017.
Updated and republished March 2023.

Drainage Solutions for Flat Roofs

Three Drainage Solutions for Flat Roofs in Vancouver

There’s no denying the preference for flat roofs in Vancouver. From apartment buildings to residential homes, Vancouverites love the simplicity of flat roofs over other types. But what about the downfalls? Flat roofs are known for their vulnerable design in inclement weather, puddling water and quick saturation. So, anyone planning to install a flat roof or replace an old one must have a failsafe drainage solution. Check here Three Drainage Solutions for Flat Roofs in Vancouver.

Importance of an Adequate Drainage on a Flat Roof

Proper drainage on a flat roof ensures that both rain and snow are adequately removed. In addition, it’ll prevent leaks, water damage and structural problems with your building’s foundation.

Both the outer surface of the roof and any insulation applied to it become saturated with water, particularly after a heavy rainfall or snow. That’s why a drainage system is necessary during both the summer and winter months as it ensures that the roof doesn’t freeze, causing cracks in the material.

Proper drainage will also reduce ice dams – when thick accumulations of snow form on your roof under shingles or tiles where they melt and refreeze again with water trickling down, causing leaks over time. Unfortunately, if this melting process happens frequently, it’ll also damage the insulation under the roofing material, allowing ice bridges to form.

What Happens If There Isn’t Enough Drainage?

Flat roofs in Vancouver won’t last long without an established drainage solution. The first thing to go will be the roofing material. With enough water exposure, your shingles start peeling at their bottom layers. The underlying roof deck will then be damaged, resulting in leaks.

And if your building’s insulation is affected by water damage, expect to pay more out of pocket for heat in the cold winter months. Plus, the humidity build-up in the insulation leads to mould growth in your attic space. It even speeds up shrub growth on the roof surface that also leads to roof leaks.

Further compounding these problems is polluted rainwater. With inadequate drainage, rainwater will sit on your roof’s surface for extended periods. You don’t want those contaminants to find their way into your indoor environment, contaminating both the soil and groundwater where they eventually reach groundwater used for drinking.

These problems can all be prevented with a well-planned drainage design for your flat roofing project.

Choosing the Right Solution for Your Building

If you have a flat roof on your house or building, these three drainage solutions offer the best protection:

1 – Gutter System

The best thing about gutters is that you don’t need to perform a pricey modification on your flat roof to install them. Gutters work by directing water from the roof into a downspout. The bigger the gutter and downspout, the more effective it is at draining off excess water.

Aside from being a cost-effective drainage solution, a gutter system doesn’t require a ton of maintenance, provided you install protection, i.e., gutter guards or mesh. Of course, you’ll need a professional who’s experienced in installing gutters and their accompanying protection, but it shouldn’t be expensive either.

Warning: Gutter systems often accumulate debris over time and may need to be maintained or cleaned. Otherwise, you’ll experience blockage and overflow, especially if you don’t equip them with protection.

2 – Scuppers

Scuppers aren’t as common as gutters, but they’re an excellent drainage solution for flat roofs. Scuppers are simply openings in the roof that allow water to seep into a perforated pipe leading to cleanouts and downspout extensions.

The perforations on the scupper’s pipe direct rainwater to the downspout, avoiding any overflow. In addition, it means they protect your building’s foundation from water seeping through cracks and holes, which could lead to irreparable damage.

Scuppers are a better drainage option for flat roofs because it’s one of the least expensive solutions that offer excellent performance. It works best for homes or small commercial buildings with minimal roof area that can accommodate scupper openings.

Warning: The drawback to using scuppers is that small debris or fallen leaves can clog the roof opening and prevent water from draining. You may need to maintain them regularly, i.e., by cleaning out any excess dirt and debris.

3 – Interior Drains

For larger flat rooftops, using interior drains is the best option. It requires drilling holes in your roof decking and placing drainage pipes below to direct water elsewhere.

This drainage solution comprises guttering, pipes, and a system of drains that ensure water is never allowed to remain on your roof. The system works if the density of your insulation is higher than other flat roofs. Where water accumulates faster after heavy rainfall. The downside of this solution is that you’ll need to cut through the roof decking, which can be an expensive process.

Warning: Installing an interior drain system requires hiring a professional plumber and roofer who’s experienced in installing drainage systems for flat roofs. You’ll also need to regularly clean the system to avoid blockage, leading to water build-up.

Why Not DIY?

If you’re tempted to design your own drainage solution for your flat roof, don’t.

A DIY approach may save you money initially, but there’s a high chance it will cost more in the long run. Flat roofs are difficult to work with and require specialized designs that aren’t possible without professional installation. You’ll end up wasting time and money if you try to do it yourself.

Of course, a DIY approach might work for a small roofing structure with a less complicated design. However, for anything more extensive or complicated, hire a professional.

Vancouver roofing

How Colour Affects Your Roofing Choice In Vancouver

As you drive through your Vancouver neighbourhood, the colour of a roof is probably the last thing on your mind. In fact, you will probably only notice a roof if it’s out of place or doesn’t look right. Well, allow us to explain why you should mind about your roofing in Vancouver. Yes, the roof colour in Vancouver tends to blend into the background of the landscape, but did you know your home’s roofing colour affects your home in more ways than one? In this blog post, we explore why the colour of your roof matters.

Vancouver Roofing: Light or Dark Colours?

Unfortunately, there’s no straightforward answer to which is better: light roofs or dark roofs.Ultimately, the best roof colour for your home is the one you like the best and the one that fits in with your neighbouring roofs. But there is a little more than just aesthetics when it comes to roofing colour choices in Vancouver.

How Roof Colour Reflects or Absorbs Heat

Did you know roof colour affects your home’s internal temperature?  In general, light-coloured roofs reflect away heat from the sun, while dark-coloured roofs absorb much of that heat and transfer it into the rooms below.
Obviously, if you have a lighter-coloured roof, your home absorbs less heat through the roof during summertime. As a result, your air conditioner operates more efficiently, uses less energy, and leads to lower utility bills.
In contrast, a dark roof likely raises the temperature inside your home’s highest rooms. Your cooling system works harder to compensate for the extra heat, and your bills slowly rise.
However during the colder months, the reverse is true. A dark roof brings in more heat from the sun than a light roof. This feature makes dark roofs advantageous in colder climates with long winters and short summers.
Thankfully in Vancouver we live in a temperate climate which means that there aren’t as hug fluctuations in temperature as there are in other cities. In Toronto, for example, you get extremely humid summers and bitter cold winter months.
In Vancouver, we’re more likely to have worry about the colder months but we are also seeing hotter summers in recent years so we may seem lighter roofs becoming more popular.
Or course, colour isn’t the only aspect of your roof that affects home temperature but it is a larger factor.
The roofing material also affects how your roof reflects or absorbs the sunlight. For example, asphalt shingles are less reflective than metal or rubber roofing. This quality means even tan asphalt shingles may welcome more heat into your home than a dark brown metal roof.

How Roof Colour Affects Snow Melt

Now, let’s consider how snow, another huge factor affects the equation. Because dark roofs absorb more heat, they can also help melt snow but does it actually help enough for you to take into consideration?
First, consider Vancouver has fewer sunny daylight hours during the cold winter months. And less sunlight exposure means less sun beating down on a roof and less time for the roof to absorb that heat.
Next, remember that even dark-coloured roofs may not actually appear black during the winter because they’re covered in snow. Snow actually reflects much of the sunlight before it can reach the roof so the dark roof underneath cannot absorb heat and melt the snow. This means dark-coloured roofs may have a small snowmelt effect but not a sizeable one.
Similarly, if your roof experiences winter problems like ice dams, your roof colour probably isn’t the primary culprit. More likely, insufficient attic insulation and poor roof ventilation create the problem.

Location 

Which part of your roof gets the most sunlight? Does the front of your home face north? Is the sun blocked by taller buildings or maybe you are high up on a hill? Sunlight can affect the appearance of your roof. Because of how far north we are in the hemisphere, the sun can bring out cool, blue hues while in southerly regions, roofs can appear more orange. These variations can completely change the look of a roof.

Roof Design

the architectural style and materials of your home should be kept in mind when deciding on a roof colour. Also what colour roofs are your neighbours?
Your home will look awkward if your roof sticks out like a sore thumb in your neighbourhood. There might actually be homeowner associations or subdivision rules about how your roof should look so remember to check with your neighbours before doing any major work.
Lastly, You should keep in mind that, like paint in a room, dark roofs make a home look smaller and light colours make a home look larger.

Last Thoughts in Vancouver Roofing

If you have the budget, advances in modern roofing material technology mean you can likely find a colour your like in a roofing material that suits your taste without worrying too much about heat or coolness.  However, if you just want to stick with the traditional materials you should think about
Cambie Roofing will bring you shingle samples to your home for you to view the colour next to your brick or siding. This makes the decision extremely simple as you can visualize how it will look.
Homeowners should be smart and do research when searching for a roofer who can correctly advise you on how to proceed. It could save you money and prevent a whole lot of trouble if you find a roofer that you can trust and who will do the job properly the first time around.
If you need a roof replacement from a reputable contractor, call our team at Cambie Roofing. We are happy to help with any questions you may have.  We look forward to hearing from you and assisting with your roofing repair needs.

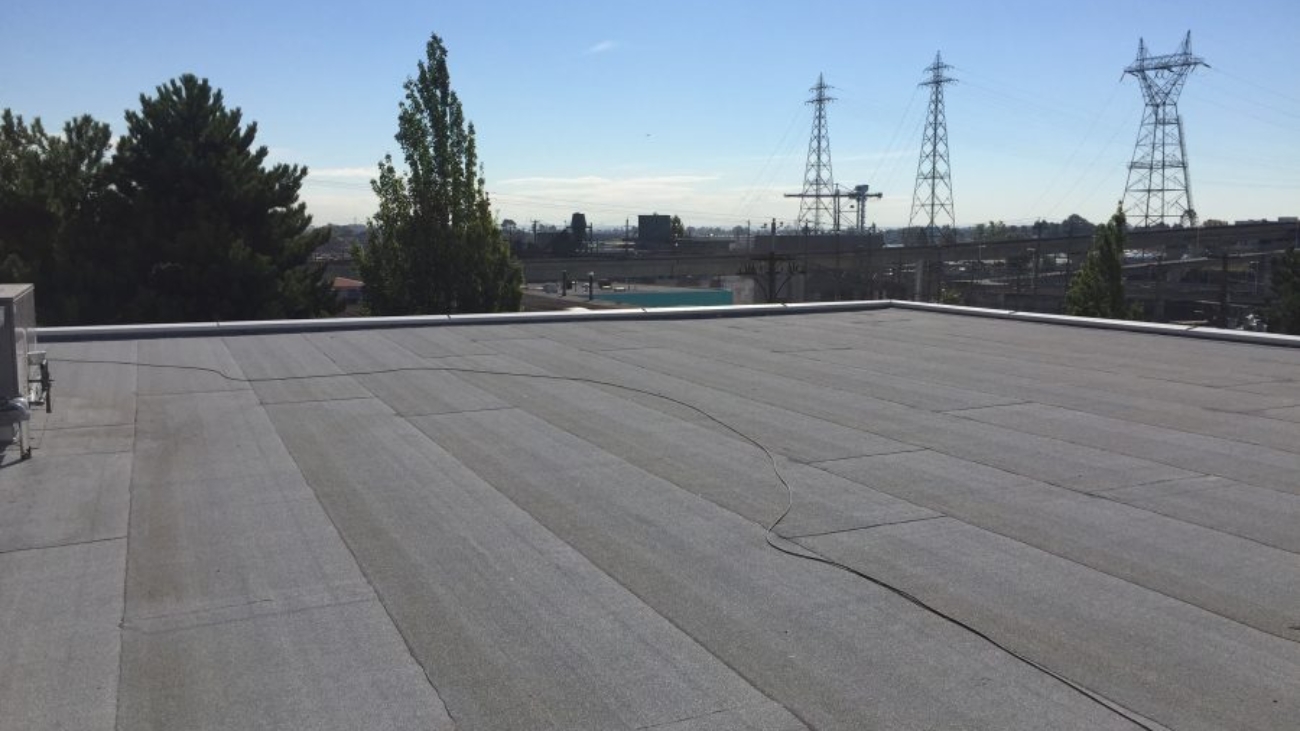
Flat Roof Construction Tips, showing a flat roof, Best Roofing Systems for Flat Roofs

Flat Roof Construction Tips

Update: August 5th 2019
Article Originally Published April 17, 2017

Flat Roof Construction Tips

Before you begin any roof construction project, there are a few factors to consider. This is especially true for commercial flat roofs. Flat roofs are susceptible to very specific kinds of wear and tear that need to be addressed. There are a wide variety of flat roof options on the market, all with different costs and benefits. Whether you are building a new commercial property or replacing an existing flat roof on your building, it is important to consider all of these factors before beginning construction. Here are some important tips to help you through the flat roof construction process.

Factors To Consider Before Selecting Your Roofing

Repair or Replace?:

Replacing an entire roofing system can be costly. If the majority of your roof is still in good condition, you may be able to save some money by having a professional repair the damage. You may also consider having your roof reconditioned. Depending on the extent of repair work necessary, however, it may be more cost effective to replace the roof. A trained professional will be able to help you weigh your options and make the best decision for you.

Roof Deck Integrity:

If you decide to replace your flat roof, you will need to have the structural integrity of your roof decking inspected first. If the structural integrity of the roof deck is damaged it will not hold up the roof. It’s advised to have your roof deck inspected by a professional before beginning any roof replacement.

Drainage:

Flat roofs have different challenges than low and high slope roofs. Flat roofs require a lot of thought about where rain, snow, and other precipitation will drain since they have no natural drainage system. As with any roofing system, if installed incorrectly flat roofs will leak. You need to make sure that the system you choose has both proper drainage and waterproofing materials like spray foam (SPF) or restoration coatings.

Load Weight:

If you plan on having a heavy load on your roof, such as a lounging area for employees, or heating and air conditioning units, you will need to select materials that will strengthen your roof and protect your structure from weight damage. SPF is one material to consider as it can withstand a great deal of weight.

Temperature:

Your roof needs to be designed to withstand the climate. If you live in an area with hot direct sun, you need a roof that can withstand heat and block against ultraviolet and ozone damage. If you live somewhere that gets very cold, you need a roofing material that has the ability to expand and contract with the temperature change.

Wind Uplift:

Another crucial environmental factor to consider is wind. Wind can be very damaging to any roof system so you need to be sure to choose a roofing material with wind resistance that meets the needs of your local area. A professional roofing company will be able to assess the average wind speeds in your area and help you choose a material that will withstand those speeds.

R-Value:

R-value is not a structure related concern, but it is an important consideration. The R-value is the reflective value of your roofing. Choosing a roofing material with a high R-value can save you a lot of money on energy bills, which is especially important on a larger commercial property. A low R-value material will allow heat to escape in the winter and to penetrate your building in the summer, resulting in higher energy bills to heat and cool your building. A higher R-value roof will require a bit more of an initial investment, but it will pay off in energy savings over time.

Selecting Your Roofing

You may want a particular roofing product for its appearance, such as a tile or shingle roof, however, this type of material should not be place on a flat roof as it will lead to building damage down the road. The following are some common flat roof options:

Built-Up Roofing (BUR):

Also called “tar and gravel roofing,” BUR roofing uses layers of roofing felts or ply sheets that are coated in asphalt or coal tar and topped with pea-size gravel. BUR roofs are the most common roofing style and very cost-effective. They do require some routine maintenance.

Modified Bitumen:

Modified Bitumen, also known as “torch-on” roofing, is very similar to BUR. Moreover, Modified Bitumen contains an additional polymer binder called Styrene Butadiene Styrene (SBS), which improves the durability and extends the lifespan of your roof.

Ethylene Propylene Diene Monomer (EPDM):

EPDM is a type of single-ply membrane roofing that uses a strong flexible polymer. It is resistant to the elements and is a great option for a roof in a harsh climate.

Thermoplastic Olefin (TPO):

TPO is another single-ply membrane that provides similar benefits to EPDM but does not offer as long of a lifespan.

Polyvinyl Chloride (PVC):

PVC is a single-ply membrane that provides similar benefits to EPDM and comes in a wide variety of colours and styles to match your architecture.

Each of these options varies in terms of costs and benefits, so it is important that you weigh them against the factors impacting your particular roof before making a final decision. The most important construction tip for a flat roof system is to consult an experienced professional in your local area.
Since 1952, Cambie Roofing has been constructing flat roof systems in the Vancouver area. We understand all the factors that can impact your construction and can help you identify which roofing system is best for your building. Call us today at 604.261.1111 or contact us on our website and let’s talk about how we can help your flat roof repair or replacement go smoothly.