Roofing Tips For The Winter, Roofing in Winter

Roofing Tips For The Winter

Winter is definitely here in Vancouver and as you all know, the harsh conditions can cause damage and decrease the longevity of your home’s roof. If your roof needs repairs, it’s generally better to do them in the drier months. In fact, most experts say the best time to do work on a roof is from July to August when the weather is best. In a perfect world, summer would be great to finish all those projects, but your roof doesn’t just leak during those months.
Moreover, In British Columbia, where the weather is often unpredictable, these ideal conditions can be few and far between. Most roofing companies have to consider how they can perform a roofing job in the winter, in less than ideal conditions.
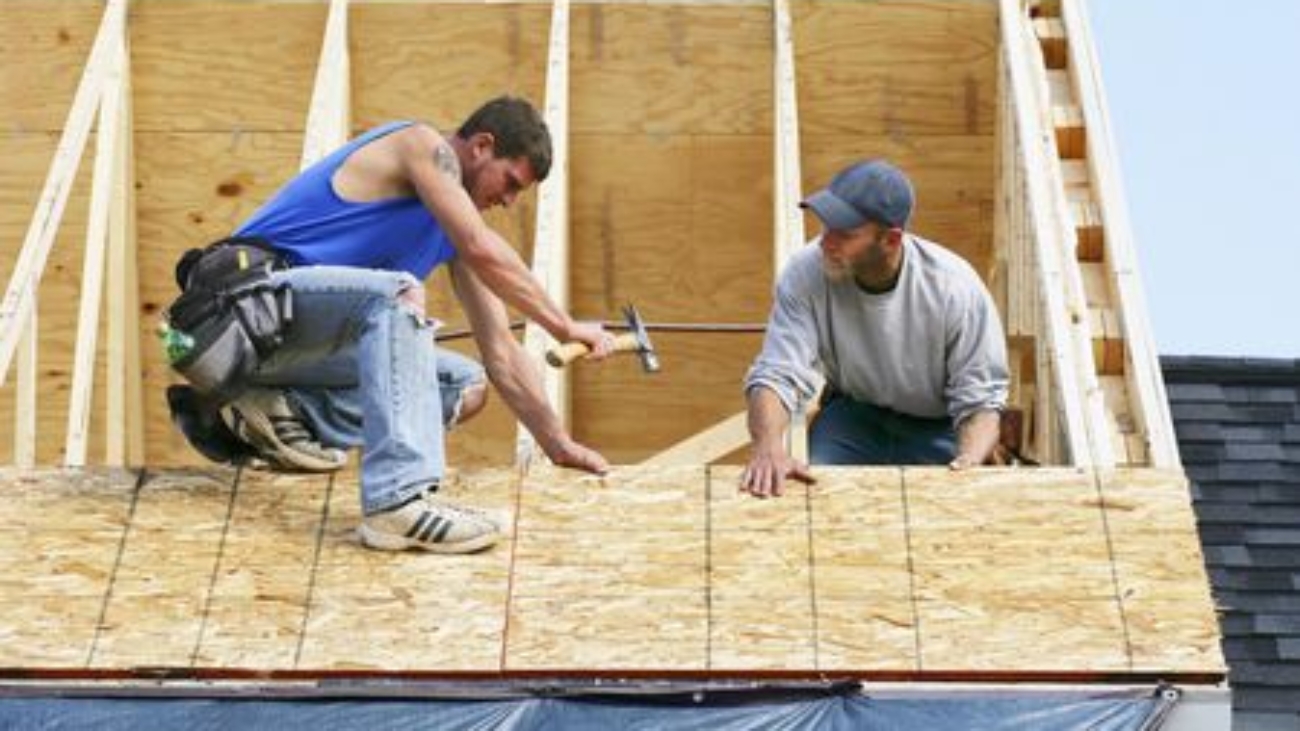
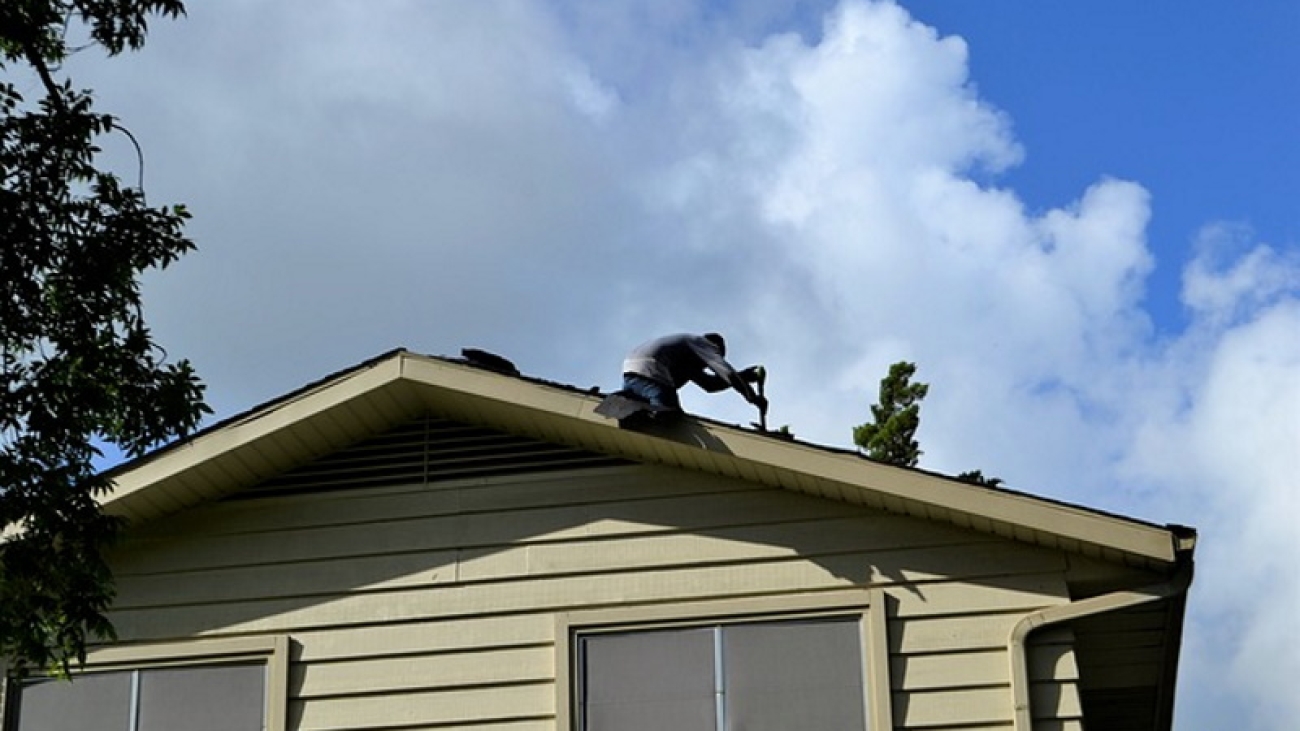
While not always the best, roof construction and repair can be done in cold weather, as long as precautions are taken. In winter, roofers face a variety of challenges including:

  • Roofing materials don’t work quite as well as they do in moderate temperatures.
  • Shorter days give roofers less time to work which generally means the project takes longer.
  • Tools such as nail guns generally don’t work as well in the cold.
  • Snow and ice can create hazards or cover up dangers to roofers.

What to Expect When Roofing in Winter

Roofing in winter weather requires a lot more foresight, planning and safety precautions than summer days. Be aware that some companies will charge you up to 20% more for their services, while other companies will be looking for work and might give you a discount. Whatever you do, you should shop around and get between three to five quotes and ask them specifically about their winter work.

Winter Safety Is The Most Important

Safety is obviously the most important thing when it comes to roofing – no matter what time of year. Under no circumstances should you hire a company that doesn’t take safety serious as there are some unique cold weather issues to be aware of when doing winter roofing work.
For example, roof surfaces can become slippery thanks to snow, ice, and frost. A common winter problem is snow removal or de-icing of the roof surface must be done after a snowstorm. The roofers must take extra precaution and use specialized equipment, which they need to be trained on, along with increased monitoring while the removal is taking place.

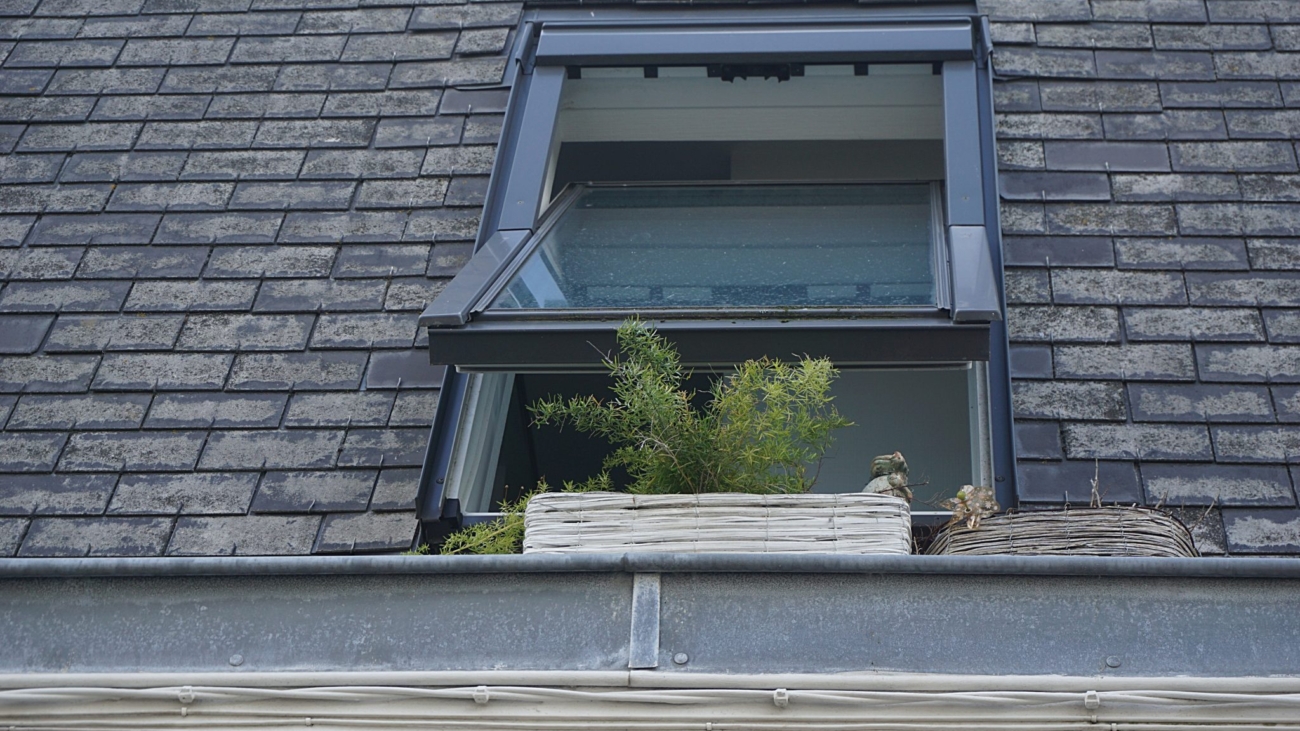
Snow can also disguise dangers such as skylights, debris and other risks. The roofing contractor needs to pay close attention to where they walk to ensure they don’t accidentally step on or fall through a skylight or trip over hazards hidden under snow. Even on a freshly cleared roof, there may be black ice or frost build-up on the roof or deck surface, which can make work extremely dangerous. If the temperature is too cold and the snow and ice remain, it is best to wait until the weather warms up.
Another thing to do before getting a roofing contractor to work is to ensure that the attic space is adequately air-condition. Often, what appears to be a roof leak is actually condensation from interior air drifting up into a cold, improperly ventilated attic.

Working in the Winter

Working in cold, damp temperatures can put a strain on the body, making your heart and lungs work harder, while at the same time putting you at increased risk for hypothermia or frostbite. Be aware roofers, as mentioned before, will work shorter hours, and plan around the sunshine and weather forecasts. Be prepared for work stoppage and delays because of the weather.
Roof contractors should also wear warm clothing that is breathable but also provides an ample range of motion. If you notice that a roofer isn’t appropriately dressed, do not let them work.

The Weigh Of Your Roof

Another thing to consider is the extra weight that snow and ice can add to a roof. If you add a human’s weight into the mix, you can potentially be looking at serious injury. A roofer must ensure that the surface he is working on is sturdy and safe from collapse. An experienced roofer will test the structure before beginning to work on it to ensure that there is no danger from collapse.

Equipment and Materials

Now you know what to expect in the winter, you also have to keep in mind the quality of craftsmanship which can suffer if the roofer is inexperienced.

Asphalt shingles

The best temperatures to install asphalt shingles is between 4 and 26 degrees Celsius. If a roofer decides to install roofing shingles in cold weather below these temperatures, your shingles may become brittle and more prone to breakage. To prevent this, when working in below-zero temperatures, make sure the roofer stores your materials in a warm place until you need them. Shingles will mould to the shape of the surface they rest on, so if you are buying them before using them, keep them flat, stacked and raised on pallets so they don’t touch the ground. Be aware that a roofer should not work in below-zero temperatures unless it is an emergency situation that needs fixing.

Types of Roofing Materials

Most roofing organizations recommend using winter weather membranes to seal your eaves, valleys, skylights, and vents, rather than warm weather roll roofing, which can buckle or warp when applied in cold weather. When you choose to use any kind of felt or membrane, the roofer will roll it out in a staging area, away from the elements and allow it to relax before you apply. This will help reduce wrinkles caused by the weather.

Conclusion

The information in this blog is purposeful to be a starting point for cold weather roofing applications. Each situation is different and as always consult a professional roofer before starting. If you have any questions, then please don’t hesitate to contact us at Cambie Roofing to schedule a free roofing estimate.

The Importance of Ventilation and Insulation in Asphalt Shingles

The Importance of Ventilation and Insulation in Asphalt Shingles

Roofs need the right balance of both ventilation and insulation to work properly, especially with the type of weather we’ve been having in Vancouver the past couple of ears. In warmer weather, poorly ventilated roofs can result in hot attic spaces which can significantly damage shingles, causing curling or even breaking, reducing the lifetime of a roof.

In the colder seasons, a lack of ventilation can trap cold air and cause moisture to build up, resulting in problems with mold, rot, and mildew, which can damage the roof and walls. Properly ventilated and insulated roofs upon are important to protecting against the problems caused by seasonal extremes and avoid costly repairs. Just think of the leaky condo crisis that cost Vancouver over $4 billion in damages because buildings didn’t have the proper ventilation.

While in Vancouver ventilation was a problem with newer buildings, it is usually common in older homes, which were generally constructed when building codes did not require as much insulation.
As many Vancouver builders discovered, creating the proper ventilation and insulation of asphalt shingle roofs is isn’t always easy. You need to get the advice of an experienced, licenced roofer to do the job correctly.

Roof Ventilation

Proper roof ventilation reduces electricity bills, extends shingle life, and prevents roof rot and ice dams in winter. Doing it right the first time also protects your house from expensive future repairs. The most important aspect of roof ventilation is to ensure your roof has vents so that the excessive moisture can escape. Ventilation is required by building codes. If you don’t properly ventilate your roof it will likely void your roofs warranty.

The number of vents within roof space will depend on the size of the roof and the material used, however, the general rule is that a single vent should be enough for a squared 30-meter roof space. A specific number of vents are required per square footage to ensure that the right amount of air enters and exits the attic.

Roof Insulation

Insulation plays a vital role in ensuring your home is properly ventilated. While you need to have enough insulation to help your house efficiently maintain a comfortable temperature. It is just as important t that you do not have too much insulation in case it blocks proper air circulation.

An experienced roofer or contractor can decide what your home needs and advice you on the proper course of action. Of course any work a roofer or building contractor does on the vents needs to be done carefully. So you do not decrease the area of the vents or anyway stop the airflow.

You probably won’t notice if something is wrong with your roof’s insulation or ventilation which is why it’s important to have an experienced, trustworthy roofer do a checkup at least once a year. If there is a problem with the airflow, they will know and be able to fix it. Often the solution depends on what is causing the lack of airflow. In the simplest and least costly case, there may be something obstructing the vents which is an easy fix.

lack of ventilation

Unfortunately, in many cases, the lack of ventilation is caused by something more serious. Such as a lack of or inappropriate placement of vents. If that’s the case, you might need to rip up a part or the complete roof to fix it.
Insulation placed on an air-sealed attic floor is simple, yet one of the most underappreciated building assemblies. A vented attic works in all types of climates to keep the home regulated.

Same, unexperienced builders do not install insulation correctly. Which causes excessive energy losses, ice dams, mold, rot which all need to be fixed sooner than it should.

If your builder has properly ventilated your roof space, then you will have to keep the vents free. So they can allow for proper air flow. This means that the vents should not be obstructed otherwise the moisture will still stay trapped within the roof structure. And eventually turn into mold and rot the wood.

Using Vents In Your Roof

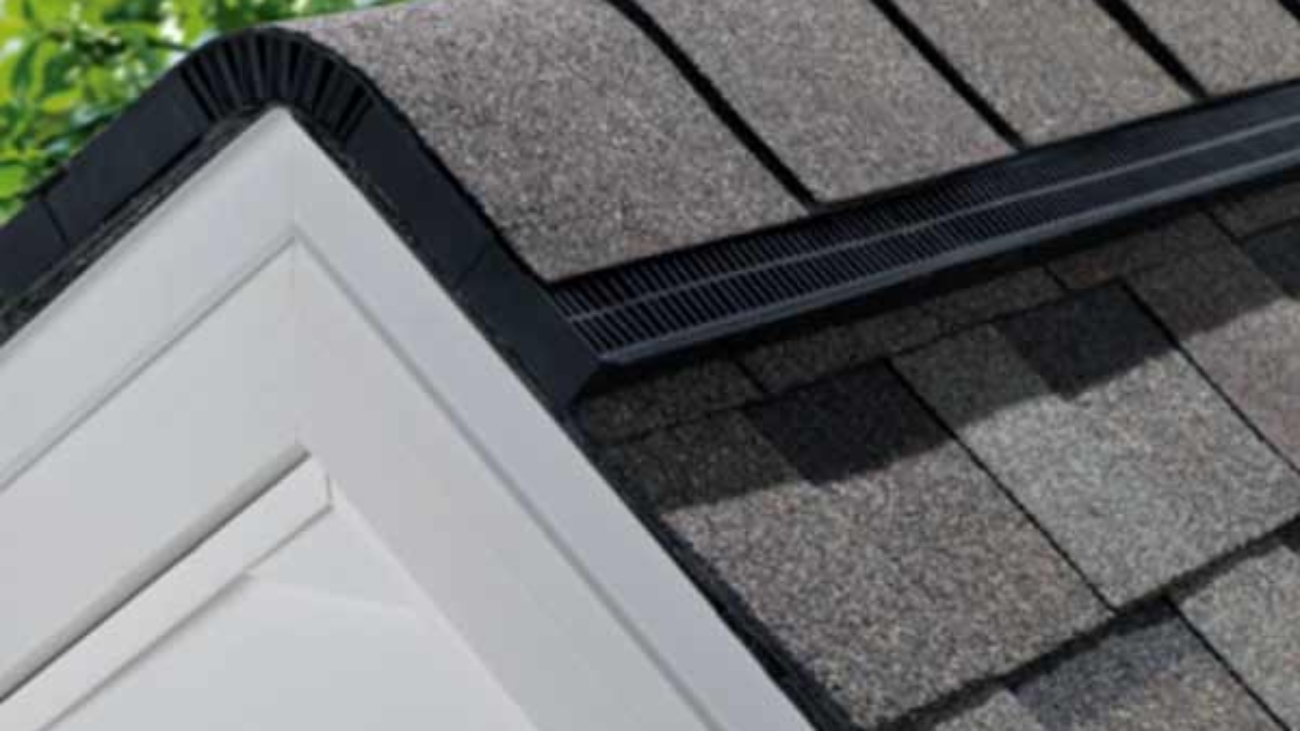
There is a variety of different vents to select from when choosing a new vent for your roof. Two of the more common vents you will find are the box vent and turbine vents. The box vent uses natural air flow to draw hot air out of the attic. However they are not as effective as turbine vents and you will require more of them to properly ventilate your space. Turbine vents are wind-driven and more effective.

There is a third type of vent which are called ridge vents. But they are not as common as the first two. They, as you might suspect, run along the ridge of your roof. Moreover, They keep a more consistent temperature across your roof than box vents. And do not require wind to operate like turbines.

They are slightly more expensive, but when used with soffits. The underside of the area which connects the roof to the wall, they will keep your space well ventilated.

Conclusion

Whether you are in need a roof inspection or have a leaky, it’s important to choose a roofing contractor that is trustworthy, reliable, and experienced. At Cambie Roofing we are experts in providing you the service you need within your budget. Give us a call or email us for a free estimate.

Roof Warranties

The Ins and Outs of Roof Warranties

The Ins and Outs of Roof Warranties

Homeowners are often confused by warranties and their terms, which is compounded when a lot of roofing contractors don’t explain them adequately. Homeowners assume that when a product includes, for example, a 15-year roofing warranty, that everything to do with their roof installation will be covered for 15 years. Unfortunately, this isn’t always the case. More commonly, a warranty is limited to material costs only, and does not cover cost of labour and other costs associated with the removal and replacement of materials. When looking at roofing warranties always read the fine print and ask if you don’t know.
In fact, roofing warranties can be complicated and it’s important as the building owner that you understand what type of warranty covers your roof, the terms of the warranty, factors that may make the warranty void. In this post, we will demystify some of the issues that surround roof warranties.

 Types of Roofing Warranty

There are two basic types of roofing warranty which area the contractor warranty and the manufacturer warranty. Just as they sound, the contractor warranty is provided by the roofing contractor. That installs your roof whereas the manufacturer warranty is provided by the company that makes your roofing material. The type of warranty can vary significantly from one company to another, from one manufacturer to another. Typically, a contractor offers a warranty that covers labour while manufacturers’ warranties cover materials. Sometimes these warranties overlap, but that’s certainly not always the case. Just what kind of roof warranties do you need, and what does each kind actually protect you against?

While this is not a complete list, here are some of the basic warranties:

Labour warranties: This means the labour costs to remove and reinstall defective building materials. This does not always include the original installation. If leaks are due to workmanship errors with the original installation, a labour warranty may not cover this problem.
Material warranties: are fairly inexpensive but apply only to material defects that cause early deterioration of roofing systems. These Roof warranties include the roof membrane but not flashings, adhesives, or edges. A material warranty will cover the costs of material replacement but not the labour costs associated with repair.
Workmanship warranties: This type of warranty can be confused with a labour warranty. It is, in fact, a type of warranty that will cover you against costs related to actual installation failures and errors which a labour warranty may not cover. If you’re worried about sloppy workmanship, than this is probably the best warranty to purchase.

Terms of Roofing Warranty

As you may have guessed, the terms of your roofing warranty will depend on the type of warranty you have. and also the company providing the warranty. A thing to keep in mind is that the warranty is only as good as the company backing it.
It is important to note that there are typically maintenance responsibilities that are outlined in your warranty. If you fail to maintain your roof, your warranty may be deemed voided. For example, if you fail to fix curling shingles, the warranty may not be honoured. Additionally, roofing warranties are not likely to cover damage from standing water, damage to interior structures, and also so-called “Acts of God”. Acts of God are extreme weather conditions such as a floor, lightning, earthquakes, vandalism, or fire.

It probably won’t surprise you to learn that a lot of roofing warranties are more geared toward protecting the manufacturer than the homeowner. Manufacturers, of course, don’t want to shell out money to homeowners unless they really have to. Which is why they spend a lot of money on lawyers to compose the fine print that ultimately tries to limit their own liability if something goes wrong with their roofing products. That’s why it’s so important that you understand the following before signing off on your project and warranty purchase:

  • What type of roof warranty am I getting?
  • How long does the warranty last?
  • What can void my roof warranty?
  • What are my responsibilities for maintaining my roof warranty?
  • What doesn’t a typical roof warranty cover?

Manufacturer Warranty

The most common kind of manufacturer warranty is a shingle warranty which may cover you for 20 to 50 years. As described earlier, this type of warranty only protects you against defects in the roofing materials themselves, not against improper instalment or worker error.

Although having a manufacturer warranty is important for your peace of mind, it’s actually rare for a roofing problem to be traced to a manufacturing defect. More commonly, a substandard roof is attributable to poor installation which is a separate issue altogether and which a manufacturer warranty won’t cover. Keep in mind even if the materials themselves are at fault, your warranty may only cover those materials, not the labour required to install them.

Conclusion

The actual terms of a roofing warranty will differ from company to company and the roofing material you select. Always ask for a copy of the warranty before signing the contract. And educate yourself about the exclusions and limitations in the warranty.
When you hire a roofing contractor, you should first check to see if your roof is under warranty. If it is, then it can help you save possibly thousands of dollars in repairs. Call us at Cambie roofing because we offer you the most warranty choices for your new roof or roof repairs. For the best protection for your home, call our Vancouver roof experts to schedule a free, in-home consultation.

Originally published February 2019.
Updated and republished November 2023

Repair vs Replace Your Roofing

Repair vs Replace Your Roofing

Repair vs Replace Your Roofing

Roofing is one of those tasks like replacing the alternator on your car – nobody wants to do it but sooner or later it has to get done. After all there are so many more fun tasks to be done around the home that are so much more satisfactory. Let’s see the difference between ” Repair vs Replace Your Roofing”
Roofs are prime targets for procrastination– what you can’t see doesn’t matter, right? Unfortunately, that isn’t true and those leaks, missing tiles and other issues have started to pile up so you might be wondering whether its’ time to fix them or invest in a new roof all together.

The question of whether to repair or replace isn’t always an easy one to answer because there a number of different factors to consider which we will cover in the blog post. The big one of course, is always the cost but before we get to that one, there are a few other things.

What Are My Plans For Your Home?

This is probably the most important question to ask yourself before spending money on your roof. Do you plan on spending a long time in your home or do you intend to sell it in the next couple of years? Nothing can stop a sale faster than a roof that’s in bad shape and in desperate need of replacement. Even if you’re pricing the home relatively modestly for roofing repairs, many people don’t want to deal with the hassle or stress of replacing the roof. Making an investment in your roof can actually help your property sell faster and get a higher value for it – more than the cost of replacement.

While an old roof can scare off potential buyers quickly, a new roof can just as quickly attract plenty of hopefuls. For those looking to move into a new property, not having to immediately invest in something major like a new roof is a huge benefit.

If you want to retire in your home and don’t mind waiting or dealing with the headaches that come with an old, damaged roof then you might want to consider putting off spending money on a new room. A word of warning, however: be prepared for the fallout that comes with not upgrading your roof including major water damage.

What Is The Nature Of The Damage?

The first question you need to ask is what is the extent of the damage to the roof. A single missing shingle or a small leak can be easy to fix. In fact, the sooner you do so, the less likely the damage will spread and will cost more.
Larger problems that are more widespread like a large hole or a leak that is flowing can be your signal that a roof replacement will soon be in order.

Visually inspecting your roof from both the inside and the outside can tell you just about everything you need to know about its condition. Start outside from the curb in front of your house. And look for any visible locations where the tiles or shingles are damage or missing. These areas are major weak points in your roof’s ability to withstand another winter and are most likely the sites of leaks that could be causing discolouration or signs of water damage on your ceilings.

Once you’ve checked around the outside of your house, climb up into your attic and take a look. You should be checking for any wet spots or water. Water damage can be a real problem as it can cause havoc both on your roof and the interior or your home. Signs of water intrusion include wood rot, mold and mildew growth. Another thing to look out for could be small cracks where light is shining through. Ultimately, you will need to get a roofer to take a look and give your professional opinion on whether or not these cracks, water damage, or mold warrant a new roof or if they can be patched up.

How Old Is the Roof?

Your roof’s age is another large factor in whether you should repair it or replace it. If your roof is still on the newer side, then repairing it is probably the better way to go. However, if your roof is old and has fallen into a state that no amount of repairing will really salvage, then replacing is definitely the optimal choice.

The expected lifespan of your roof depends on the material it’s built from. For example, in Vancouver asphalt shingles are common because they are inexpensive, lightweight, and easy to repair, but generally only have a lifespan of about 15 years. On the other hand, tiles, clay, and aluminum are much harder, more durable, and resistant to natural hazards and can last between 30 and 50 years or more in most cases. If your roof is approaching this age, then it may be time to consider replacing your roof and starting new.

What Is The Cost Difference?

Cost is obviously the first question wonder, but it shouldn’t be the major factor behind your decision making. If you’re a home owner you should be putting money away in a renovations fund each month to prepare for things like roof repair or roof replacement. If you don’t have the money, it’s not a good idea to go into debt to replace your roof unless it’s going to cause a large amount of damage to the interior of your home.

Conclusion

So, I hope you get an idea after this comparison “Repair vs Replace Your Roofing”. Unfortunately no roofing system lasts forever. Particularly in a climate as diverse as Vancouver’s’ and will eventually have to be replace. However, as a home owner, you should be able to stretch the lifespan for as long as possible. Roofing systems are important to the structure and protection of your home. It’s what keeps you dry, warm and safe from the elements. If you notice leaks, broken shingles or other problems with your roof, contact Cambie Roofing, a family owned & operated local roofing contractor with decades of experience in residential and commercial roofing. We’ll evaluate your roofing system and recommend whether you should repair or replace your roof.

Originally published 2019.
Updated and republished July 2023.

luke-southern-ZzZouwiQWV0-unsplash (1)

Emergency Roof Repairs

Emergency Roof Repairs

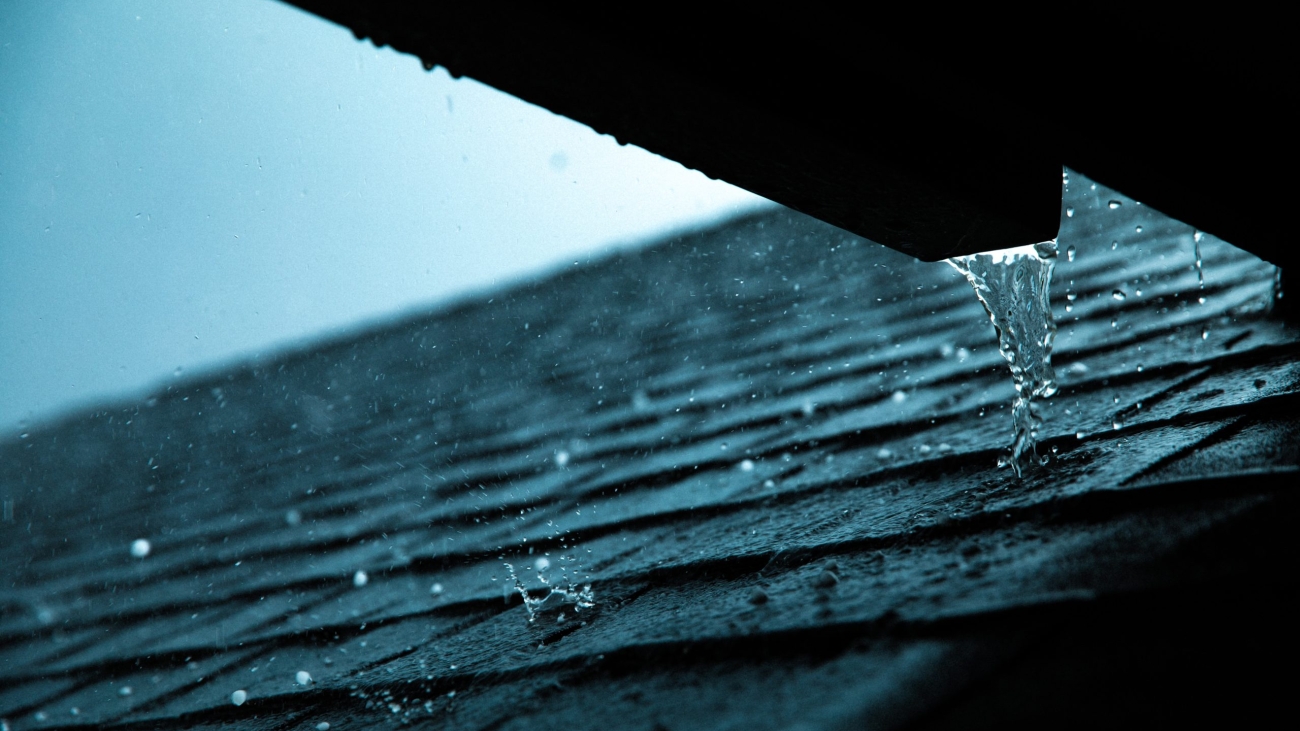
Vancouver gets its fair share of extreme weather conditions, especially during the winter months. This too is the worst time to have an emergency of any kind, but especially a roofing emergency. Leaks are more likely to happen when your home is subjected to heavy rain, snowstorms, strong winds and/or hail.
A leaky roof is one of the worst situations that a homeowner has to face. Immediate intervention is critical since water damage can directly affect the stability of the entire structure. As well as destroy furniture, flooring, appliances.
In the midst of a severe storm, a professional roofing contractor may not be immediately available because, let’s face it, you’re probably not the only one looking for help from a professional during this time. So what should you do to prevent further damage to your roof before a professional arrives? Emergency roof repairs – this can help to minimize water damage until a roofing contractor is available to permanently and correctly handle the repairs.

What To Do When You Have An Emergency

If you’re faced with serious weather conditions that impact your home and cause a leak in your roof, the most important thing you can do is stop the flow of water. Placing buckets under the leak can help prevent damage to flooring while also ensuring you don’t slip and injure yourself. Even if you do have experience looking for roof damage, it may not be smart to do so during a storm. Wait until a professional is available. If the storm does let up and you can safely check your roof, try to clear away any snow, puddles or stagnant water forming. If left unattended, these things can cause even more damage and can cost you even more in the long run. Next, you can try to locate the exact source of the leak. This may be tedious but checking both inside and outside should help determine the location of the leak. If you have a skylight or chimney, look around the edges first as those areas could be the culprit.

Emergency Roof Repairs

Aside from skylights and chimneys, roof vents are one of the most common causes of a roof leak. Air vents are used to allow outside air to enter into attics and other ventilation spaces. Rusty and cracked vent pipe collars around their base allow the water to first pool around and then seep through the interior walls of your home.
Occasionally, vent pipe leaks can also occur at the collar surrounding the base of the vent pipe, where it breaks through the surface of the roofing material. When this occurs, rainwater can seep in between the rubber boot and the vent pipe while accumulating in your home and causing damage. If the rubber boot collar is cracked or damaged, it will need to be replaced. Talk to a roofing contractor about this because this isn’t something you can fix on your own. If you have determined that the issue isn’t a skylight, chimney or roof vent, then you should consider inspecting the attic to see if you can find the source of the leak.

If you are able to find the leak, plug it if possible. Use plastic sheets or tarps as temporary methods until a professional arrives. A good method is to enclose a piece of wood (a two-by-four is an ideal size) in an end section of plastic sheeting. Wrap the board several times to ensure it will stay covered and then secure the plastic to the wood with staples.

Plastic Sheeting

Lay the wood down on the roof and place the plastic sheeting over the leaky area. Wrap a second two by four in the other end of the plastic sheeting. Do not staple or nail the wood planks or plastic to the roof as you might risk creating more leaks or other damage.
Contact a roofing company as soon as possible and explain your problem. Let the customer service representative know if your roof is made of shingles, tiles, wood shakes, metal or if you have a flat roof. This information will help the contractor know what repairs will be required before sending out the most knowledgeable expert.

The Dangers of Ice Damming

With the prolonged presence of snow in Metro Vancouver, many homeowners may be at risk of ice damming and not even know it. Ice damming occurs when a thin layer of ice pools at the edge of your roof, preventing melting snow from draining off. Ice is heavy and can cause severe damage to your roof if not addressed. In order to prevent ice damming, you can purchase a roof rake. This is basically a sideways shovel with a long handle that you use to reach up and remove snow from your roof’s edge before it turns to ice. When the weather drops, you should use this rake at least once a week to clear the ice.

Where Do Ice Dams Come From?

When snow is allowed to accumulate on your roof, the heat from inside your home can cause it to melt. However, if the outside temperature is still below freezing, the snow will instead turn to ice. When ice develops around the edges of your roof, it can quickly build up into increasingly large blocks, also known as ice dams.
If too much ice accumulates on your roof, it can damage the shingles and lead to leaks and water damage. In severe cases, roofs have been known to collapse under the weight of ice dams. However, such instances are rare, especially in Vancouver where the weather doesn’t stay below freezing for long. With the proper precautions and routine roof maintenance, you can prevent ice dams from taking a toll on your home.

Conclusion

In the event of a storm, knowing these quick fixes could save your roof. Being able to perform an emergency repair quickly could save you thousands of dollars. If you’re concerned your roof is damaged, don’t hesitate to call the experts at Cambie Roofing for a free inspection.

Originally published June 2017.
Updated and republished March 2023.

dillon-kydd-2keCPb73aQY-unsplash

Asphalt Shingles Repairs

Asphalt Shingles Repairs

Repairing or replacing the most common type of roofing-asphalt or asphalt fiberglass shingles is relatively easy. A professional roofer can work safely to ensure that you get the highest quality repair job.
You can repair your roof yourself, but the repair may stick out like a sore thumb if you don’t know what you’re doing, or if you don’t have an exact replacement product for your type of roofing. There’s also the potential to do more damage to your roof if the repair is not done correctly. For those reasons, we don’t recommend you do the repair job yourself, but rather call a professional like Cambie Roofing to do the job for you.

Types of Shingle

Organic is the current word used to describe traditional asphalt shingles, which differentiates them from the up-and-coming alternative called fiberglass shingles. The two types of shingles look the same on your roof: coloured granules held together by hardened tar. Both types are flexible and both are applied in the same way. The difference has to do with what the tar is bonded to.
Organic shingles are built on a substrate of heavy felt, while fiberglass shingles have a foundation of non-woven glass fibers. This difference doesn’t sound like much, but it actually leads to substantially different performance, especially in particular situations.
The main advantage of fiberglass shingles is their resistance to heat and durability. They’re much less likely to curl up than organic shingles, even when used on hot, unventilated roof structures. This means they will last longer, especially when you use higher-end products. Fiberglass shingles can carry up to a 50-year warranty. They are also less susceptible to catching fire or melting from the heat of a fire below.

What To Look For In Asphalt Shingles

These are some of the common things to look for to see if your Asphalt shingles need to be replaced:
Curling or crawling shingles are signs of both an aging roof system and excessive heat. In Vancouver, we don’t have to necessarily worry about heat, so if a shingle curls, it means that it is worn and at the end of its life span. Curled shingles are highly susceptible to water damage, wind uplift, and ice damage. These shingles will become rigid and can break easily and lose edges.
Broken or missing shingles greatly weaken a roof’s ability to shed water and can be an entry point for leakage. Buckling shingles are visible waved distortions that can run vertically or horizontally across the roof. Overall, roof age and wet or poor installation are common causes of buckled shingles.
When your roof has multiple leaks or a lot of damaged shingles, it usually means it’s time to replace the roofing entirely. Although a greater expense up front, it can be more cost effective than repairing the shingles all the time. When you put on a new roof, make sure to store a few extra shingles in your garage or somewhere safe so you’ll have matching replacements for repairs.

The Loss of Protective Granules

Aging roofs or physical damage can cause bare spots and a loss of granules. When the protective granules of a shingle are lost, the shingles begin to harden from heat and sun exposure. Granule loss on a roof will accelerate aging and shingle decaying.
Roofing problems make themselves known in the form of leaks and drips. You should repair a leaky roof before ceiling and walls are damaged. We recommend you get your roof checked by an expert at least twice a year in Fall and Summer.

Finding The Leak

The source of most leaky roofs is hard to find because it ordinates away from where the leak shows up. To find the source of the leak follow the slop of the roof. You will need to “think like water.” This may seem like strange advice but will actually help you find the area you need to repair. Water typically comes through worn, or missing shingles, or where nails are loose. Other entry points for water are at poorly sealed roof flashing around vents, skylights, or chimneys.

The water from a leak often travels down the rafters and shows up down-roof from where it begins. Once water passes the roof, it flows along the rafters or topside of the ceiling until it finds a place to drip down. Look for roof leaks during the day because they will be much easier to find. Scrambling around in the dark is usually a futile endeavor.

Go into the attic with a bright flashlight. Remember to step only on secure framing beams and never on the insulation or top side of the ceiling below. They will not hold your weight. Start above the place where the drip has occurred and work your way up the roof, looking for wetness along the beams.
If the weather has been dry for a while, look for a watermark stain or discolouration on the wood made by moisture. Then switch off the light and try to find a hole where the light shows through the roof. With a wooden shingle roof, you’ll see many such places but while the overlapped shingles let light show through they shed water. If it’s raining put a bucket under the leak in an area with proper support.

Shingle Warranties

You should know how long your roof warranty is good for and if your repair still falls within that warranty period. When you replace your roof, ask the roofing company about the warranty.
Some warranties cover only the cost of materials, while others will cover both the materials and labour. The most common reason for a warranty claim is incorrectly laid shingles and poor attic ventilation, not because of faulty material. Heavier shingles are generally more durable and will come with a longer warranty, while lighter shingles wear out faster.
If you need to replace your asphalt roof or get it repaired, it’s best to trust a professional who knows what they’re doing. Call Cambie Roofing today and we will come out to assess your roofing needs.

Originally published on May 7, 2017.
Updated and republished on Feb. 14, 2023.

thom-milkovic-QXebPkNw2jQ-unsplash

What is the most popular style of roofing and why?

What is the most popular style of roofing and why?

Choosing the perfect style of roof for your home can be a tedious task, especially when it comes to where you live and what climates your home will be faced with. You want to make sure the roof you pick is durable and long lasting but also affordable and stylish! However, your budget will ultimately determine what style of roof you end up with even if it wasn’t your first choice. Today we’re going to dive into the most popular style of roofing: asphalt shingles and why they’re by far the most commonly chosen.

Asphalt shingles have been around since the early 1900’s after being invented by a man named Henry Reynolds from Grand Rapids, Michigan. History suggests that asphalt shingles were first created in 1903, were used generally throughout parts of the United States by 1911 and quickly became produced in the millions by 1939. Asphalt shingles became popular throughout efforts to eliminate wood shingles which were massive fire hazards. Today, asphalt shingles are by far the most commonly used across North America. But why?

Affordability

Asphalt shingles are extremely cost effective which is why they’re so popular. For years now people have chosen this style of roofing because purchasing the supplies and paying for the installation is easy on the wallet. The average cost of asphalt shingles can range anywhere from $3.00 to $5.50 per square foot but costs do vary. So if your home’s roof area is in the 2,000 square feet range, you’re only paying between $6,000 and $11,000. (Please note this is only an average estimate and numbers can vary).

Easy and fast installation

Because asphalt shingles are so popular, getting your hands on them isn’t a difficult task and most roofing companies are well versed in installing them. As a result, getting them ordered for your home whether you’re replacing an old existing roof or you’re building a new home is easy. Just another reason why you might consider asphalt shingles for your upcoming project.

Advanced technology

Asphalt shingles have come a long way since they were first created. Today, there are two main types including fiberglass and organic asphalt shingles. Fiberglass shingles are obviously made using a fiberglass base which is then coated with the asphalt. This makes these shingles waterproof and durable while protecting your home. On the other hand, organic style asphalt shingles are made from recycled substances like paper. The base of the shingle is put together using these materials before it is layered with the asphalt. This too ensures the shingles are waterproof before being installed on your home. Additionally, the organic asphalt shingles are an eco-friendly alternative if you’re looking to make less of an environmental impact.

Lifespan

Asphalt shingles are an inexpensive choice but this also comes with some downfalls. The lifespan of this style can be between 10 and 25 years, sometimes more. As already mentioned, climate and location are two factors that will help determine how long your asphalt shingles last before needing to be replaced. Despite this, they are still the most popular style of roofing chosen because the positives outweigh the negatives. While these shingles are considered easy to install, it is still a good idea to consider using a professional roofing company. But, if you do decide to try it out for yourself, there is a ton of information online to help guide you through the steps.

As we’re sharing this information from Canada today, we know asphalt shingles are the go to choice for most Canadians. It comes down to cost and our harsh climates. These shingles can withstand freezing temperatures and hail storms. They are also fire resistant which is something to consider when installing your roof, especially if your geographic location is prone to extreme weather conditions such as high winds and scorching temperatures. And if you’ve decided that asphalt shingles are the right choice for you, you’ll be pleased to know that their styles and colours have transformed over the years to include a wide range of profiles to give off any look you’re trying to achieve on your budget! If you want to learn more about roofing styles and asphalt shingles in particular, contact our specialists at Cambie Roofing today.

glenn-carstens-peters-RLw-UC03Gwc-unsplash

5 signs your roof needs repairing or replacement

5 signs your roof needs repairing or replacement

Oftentimes we forget just how important the roof is over our heads. But just like everything else on the inside and outside of our homes, our roofs will eventually need repaired and/or replaced. Knowing the early signs of roof damage can save you thousands of dollars in the long run and it could mean the difference between a small repair and a total replacement. Getting into the habit of routinely checking your roof on the outside and inside is a good starting point. You’ll want to familiarize yourself with the early signs of damage so you’re prepared when and if something happens. To help, we’ve compiled a list of eight signs your roof may need repaired or replaced.

Cracked or curled shingles

Knowing what it looks like when your roof’s shingles are damaged is essential when questioning if your roof needs replaced. Asphalt shingles are the most common and they usually only last up to 20 years before needing replaced, but this isn’t a guarantee. If you live in an area with lots of rain, scorching temperatures, wind storms, heavy snowfalls and/or humid conditions, remember that your roof is always exposed to whatever mother nature brings its way. A shingle can become cracked or curled for a variety of reasons such as improper installation, extreme weather conditions or if it has surpassed its lifespan. A cracked or curled shingle is a sign that your roof needs some work. These damaged shingles are no longer laying flat against your roof which could lead to a variety of problems such as water exposure or an invitation to unwanted rodent visitors.

Moss

If you’ve noticed something green growing on your roof, be alarmed! Moss is a sign that your roof needs attention. Moss thrives in damp environments so if your roof is in a shaded area near trees and other vegetation and the climate is relatively moderate, your roof is constantly exposed to moisture. When moss spores are carried through the wind onto your roof, they will plant themselves between your shingles and will start to grow. Feeding off of rain, moss will become thick and spongy and will start to take over your shingles. This will cause the shingles to lift, inviting water into your roof. Moss that is left on a roof for a long period of time will not only decay your roof, but it can also lead to harmful mold. Depending on the amount of moss you find on your roof, contact a professional to assess the situation.

Shingle granules are deteriorating

Similar to when shingles curl and crack, if you notice the granules on your shingles are missing, this is a sign they are no longer effective in protecting your home. A good way to determine if your shingles are losing granules is to check your roof’s gutter and downspouts. Granules are tiny bits of rock which are attached to shingles to protect them from the elements. Over time it is normal for them to erode and fall off but how long it takes to do this depends on the quality of your shingles. If granule loss is noticeable, it’s time to reach out to a roofing company and get an evaluation.
Leaks
One of the most common and dreaded signs your roof needs some fixing is when it’s leaking. Whether its missing shingles, flashing problems or a clogged gutter, a roof leak can happen in many ways, causing lots of damage to your beloved home. Sometimes it can be very difficult to pinpoint where a leak is coming from. Be sure to check your attic regularly and inspect the outside of your roof. While there are many DIY fixes for roof leaks, getting a professional to examine the damage is always a smart choice.
Old age is creeping up
Just like anything in your home, your roof can become outdated and with that, it can bring serious problems. To prepare yourself, always keep a paper trail from the last time your roof was installed, replaced and/or serviced. Each style of roofing differs along with its quality and recommended lifespan. Knowing when your roof is due for an inspection can eliminate all problems associated with an aging roof. Preparing yourself for when the time comes to replace your roof will help alleviate any financial surprises.

Conclusion

If you’ve noticed a few problems with your roof, don’t jump to conclusions! A few cracked shingles doesn’t mean you need to spend thousands of dollars replacing your entire roof. A little bit of routine maintenance and double checking goes a long way when it comes to your home’s roof. Contact us at Cambie Roofing today if you have any questions or concerns and we will be happy to help you!

Blistering and alligatoring, DIY vs Qualified Roofer in Vancouver

What’s The Difference Between Blistering and Alligatoring?

Updated Aug 15, 2022
Originally Published August 15, 2020

What’s The Difference Between Blistering and Alligatoring?

Blistering and alligatoring are two common problems with most membrane roofing systems. Alligatoring is a cracking pattern in the roof’s surfacing that looks a lot like alligator skin.
That’s the reason we them alligatoring. Blistering is a slightly different phenomenon in which bubbles form underneath the roof’s membrane.
Blistering sometimes results in cracks or pops, but unlike alligatoring, the damage caused by blisters usually follows the length of the blister rather than forming a pattern.

Commercial roofs, in particular, require different repair and maintenance routines than residential roofs.
For starters, most commercial roofs are usually flat and this means they react much differently to sun, rain, ice, and snow which means alligatoring and blistering are much more common. Commercial roofs often require more frequent maintenance to ensure there isn’t any damage and if there is wear and tear, it is taken care of before it can spread.

What Causes Alligatoring?

Alligatoring is a sign that your roof is aging. Prolonged exposure to the elements damage the roof’s surface, and after about five years, the coating may develop small cracks. If left untended, the problem will get worse and spread across your roof.
Fluctuation in temperatures, ice, snow and sunlight shifts will cause new cracks to appear while widening the existing cracks.
Because these problems are common among some membrane roofing systems, you should make sure to get a roofing contractor to inspect your roof at least twice per year.

Is it possible to Fix Alligatoring?

Roof alligatoring is a sign that your roof is aging but it is possible to prevent alligatoring, and to repair small patches before they get so bad that you have to replace your roof entirely. First, a roofing contractor will need to apply a new coating to the roof. He will start by cleaning the roof thoroughly, making sure that all dust and loose particles are removed. After that, the contractor will apply a primer that is compatible with the roof’s original surface, and once dry, apply the coating itself. Embed strips of fiberglass mesh in the coating as you apply it to help increase its strength.

What Causes Blistering?

Blisters form when there are pockets of air or moisture trapped between layers of your roof’s membrane.
If left untreated, a blister can grow larger and allow more moisture to get in so that the problem gets worse until more extensive repairs and possible replacement is necessary…unless it pops! The origins of blistering are several. Among them, we count poor ventilation, trapped moisture or UV light.
As these pockets expand and stretch the membrane they form bubbles. In severe cases, the membrane will actually crack when the pressure becomes too great. Once blistering forms, the membrane stretches permanently, which allows for even more air or moisture to infiltrate the membrane layers.
This causes even more expansion. Each time the sun heats your roof, there is the potential for the blisters to grow a little larger.

How to Fix Blistering?

In general, blisters keep air in will keeping water, preventing serious water damage. This usually means unless the blisters have certain characteristics, it may be preferable to leave them undisturbed. Some of the blisters may pop, but most of them may not.
The question is, should we repair all of the blisters or only the blisters that have exposed?  There are certain circumstances in which you should repair the blister:

  • The paint or surface is coming off of the blistered area.
  • The membrane itself has cracked.
  • The blister is close to a seam and may cause the seam to open up.

To repair a blister

To repair a blister, cut away the membrane until you reach an area where the membrane still adheres to the roof tightly. You’ll then need to reapply new membrane material at least as many layers as you removed over the blistered area.
Make sure that the new membrane extends at least six inches around the edges of the blister to ensure that your patch remains leak-proof despite the expansion and contraction caused by temperature shifts. Alternatively, on a bitumen roof, our roofing contractor may be able to cut an “X” into the blister and then peel back the loose membrane layers. He will then fill the void underneath the membrane with bitumen and then press the membrane back into place. Keep in mind that this type of repair is only advisable if the membrane is otherwise undamaged and the blistering isn’t too great.

Prevention of Alligatoring and Blistering

It is possible to prevent roof alligatoring and blistering by scheduling regular inspections and keeping up on maintenance.
Regular inspections will help ensure you’re able to tackle any blistering or alligatoring problems before they become bigger problems.
Our roofing contractors can apply a protectant or reflective roof coating on a consistent schedule to prevent alligatoring and other damage from happening. While prevention represent an additional cost, it will save you money in the long run: Alligatoring and blistering are expensive to fix.
As noted, flat commercial roofs require a bit more upkeep than sloped, residential roofs, and it’s important to have them inspected at least twice a year if you want to extend the life of your roof.

Repair

If you’ve noticed small splits and cracks in your roof, it’s best to call a roofing inspector. They will likely tell you if the problem is worth fixing or if it can be left to be fixed at a later date. At Cambie Roofing, we give you a realistic picture of what needs to be done to your roof.
Some small hairline cracks can be filled by applying an appropriately rated energy sealing polyurethane, but in general, it’s best to just get rid of those troublesome sections as they appear.
Most roofs come with warranties lasting on average between 10 to 20 years and so if your roof is starting to show signs of damage, it may be covered under warranty. Property owners and homeowners looking for roof replacement or roof repairs can call Cambie Roofing for a free roof estimate.

install Asphalt Shingles

How to Install Asphalt Shingles

The difference in how you install (replace) a roof in the present compared to the past is like night and day. Thanks to a gazillion “how-to” blogs and instructional videos on YouTube, anyone with the confidence, tools, and the right physical condition can do it. But here’s the thing: installing a roof is still not a project you should undertake if you’re not confident in your DIY skills. It’s a physically demanding job that requires safety precautions, including working from heights. One misstep could mean serious injury. So, while we won’t try to dissuade you from taking on the challenge as we’re advocates of DIY, we’ll provide you with valuable tips before you start swinging those hammers. Let’s find out How to Install Asphalt Shingles.

Step 1 – Focus on safety above all things

The inexperienced homeowner is more likely to fall off the roof while attempting to install asphalt shingles than a qualified roofer. The difference between the former and the latter is that the roofer has presumably been properly trained and knows how to work on a roof safely.

That’s not to say that you can’t install asphalt shingles – you absolutely can, but be sure to take all necessary precautions, including using a ladder or scaffold when working from height, wearing a hard hat, and using safety ropes.

Pro Tip: Not many DIYers realize the value of wearing the right shoes when working on a roof. Many roofing accidents occur because people are wearing the wrong type of footwear, which can cause them to slip and fall. When installing asphalt shingles, wear shoes with soft rubber soles and good tread. That’ll help you maintain traction on the roof and prevent slips and falls.

Step 2 – Study how sloped roofing systems work

It’s not all about you getting up there and hammering away. You need to understand the roofing system you’re working with to install the asphalt shingles properly.

Asphalt shingles are most commonly used on pitched roofs with a sloped surface. The slope of the roof is necessary so that water can run off the roof and away from the building. If you’re not sure how to determine the slope of your roof, there are a few ways to do it. You can use a level to find the pitch of the roof or, if you have access to the attic, measure the rise and run of the roof rafters.

Once you’ve determined the slope of your roof, you need to purchase asphalt shingles designed for that slope. Asphalt shingles come in various grades, each of which is designed for a specific sloped roof.

Pro Tip: If you install asphalt shingles that aren’t designed for the slope of your roof, they won’t perform as well and may even come loose and fall off. So, be sure to purchase the right shingles for your roof.

Step 3 – Gather your tools and materials

You’ll need a few essential tools to install asphalt shingles, including a chalk line, utility knife, hammer, pry bar, and nails. In terms of materials, you’ll need asphalt shingles and felt and cement designed for roofs.

Pro Tip: Be sure to use galvanized or stainless-steel nails when installing asphalt shingles as they won’t rust like regular nails.

Step 4 – Prepare the roof surface

Before installing the newly purchased asphalt shingles, you need to prepare the roof surface. This means getting rid of any existing roofing material and making sure the roof is clean and debris-free. If you’re replacing an existing roof, you’ll need to remove all of the old shingles and the felt paper and any nails left behind. Once that’s done, you can sweep or blow off the roof surface to remove any small debris.

Pro Tip: Be sure to inspect the roof deck for any signs of damage, such as rot or water damage. Any damage must be fixed before proceeding with the installation of the new shingles.

Step 5 – Begin working from the bottom up

Once the roof surface is prepared, you now begin with the drip edge. It’s important to work from the bottom up so that water runs off the shingles and doesn’t seep underneath.

The drip edge serves as the first line of defence against water infiltration and should be installed at the roof’s eaves. It’s a metal or vinyl strip placed along the edge of the roof, extending over the gutter.

Pro Tip: The drip edge should overhang the gutter by at least an inch.

Step 6 – Install the felt paper

The next step is to install the felt paper. Felt paper is a water-resistant material placed between the roof deck and the asphalt shingles. It helps protect the roof deck from moisture and extends the life of the shingles.

You only need to nail the felt paper down with galvanized or stainless-steel nails to install the felt paper. Be sure to overlap each row of felt paper by at least two inches.

Pro Tip: Don’t forget to install a strip of felt paper along the rake edge, the edge of the roof extending over the gutter.

Step 7 – Install an ice and water protector

If you live in a region with harsh winter, installing an ice and water protector is a good idea. An ice and water protector are a synthetic underlayment that helps prevent ice dams and water damage.

The ice and water protector should be installed before the final row of shingles. This will help keep your roof protected from the elements.

Pro Tip: Consult with a professional roofer to see if an ice and water protector is necessary for your region.

Step 8 – Add the roof underlayment

Before installing the roofing cement, you’ll need to install the roof underlayment. The roof underlayment is a layer of asphalt-saturated felt that helps keep the roof deck dry. If your area isn’t prone to harsh winter, you’re better off starting the underlayment at the eave rather than the whole length of the roof.

Installing the underlayment is a simple process. Just unroll it and nail it in place. As in the previous step, you need to overlap each piece by two inches.

Pro Tip: You must also use galvanized or stainless-steel nails to avoid premature rusting when installing the roof underlayment.

Step 9 – Cover the joints and valleys

Some areas or components of the roof need flashing, the purpose of which is to divert water and moisture. The flashing needs to be covered in roofing cement to create a waterproof seal.

The flashing is found at the joints and valleys of the roof. The joints are where two pieces of the roof meet, while the intersection of two sloping roofs forms the valleys.

Simply cut it to size and nail it in place to install the flashing. Then, apply a generous amount of roofing cement over the seams and allow them to dry.

Pro Tip: If you’re not sure how to install the flashing, consult with a professional roofer. You can’t “redo” this step, so it’s better to learn everything about it before proceeding.

Step 10 – It’s time to shingle

Starting at the bottom of the roof, install the first row of shingles. Align the shingles and nail them in place. Be sure to stagger the joints of the shingles as you install them. This will help keep water from seeping underneath the shingles.

Pro Tip: It’s good to use a chalk line to help you keep the first row of shingles straight.

Step 11 – Proceed with the installation of the rest of the shingles.

Once you’ve installed the first row of shingles, continue working your way up the roof, installing one row at a time. Like the previous step, don’t forget to stagger the joints of each row of shingles and use a chalk line to keep the rows straight.

Pro Tip: Use a utility knife to trim any shingles that hang over the roof’s edge.

Step 12 – Don’t forget the hip and ridge caps

If your roof has a hip or ridge, you’ll need to install hip and ridge caps. The hip and ridge caps are pieces of metal or asphalt that cap off the hips and ridges of the roof.

Installing the hip and ridge caps is a simple process. Just measure the length and width of each hip and ridge, then cut the caps to size. Once you’ve cut the caps to size, nail them in place.

Pro Tip: It’s best to use longer nails for ridge cap shingles for them to penetrate the roof deck.

At this point, you already have a clearer picture of how to set up and install asphalt shingles. That’ll help you acknowledge the cost as you purchase the necessary materials for the project and the intricacies that often go into roofing. There’s no shame in consulting a professional if you don’t feel confident.