What is Torch On Roofing?
Torch On roofing consists of two layers of modified asphalt that are usually melted together by a torch – hence the name. This creates a roof that is resistant to ultraviolet light and a waterproof barrier, ideal for Vancouver’s wet season.
The Torch On roofing system, also known as Torch Down, is usually used for flat roofs where snow or rain can easily collect and sit for long periods of time. It covers the entire roof at an even thickness, usually about 3-4 mm thick, while traditional tar roofs can have bumps, thinner, and thicker spots.
The base layer is either mechanically secured with screws or attached with adhesive. The cap sheet is similar in composition but often has granulated surface to provide protection.
Both the top surface of the base sheet and the bottom face of the cap sheet have a thermos-fusible plastic which is melted together. This is also called rubberized asphalt.
The Different Types of Torch On Roofing
Torch On roofing is available in a two-layer or three-layer system. A two-layer system is usually made up of a smooth base ply and one ply with a granular surface. The three-layer system has an asphaltic recovery board, a smooth base ply, and a top ply with a granular surface. The three-ply roof is a little sturdier and lasts a little longer than the two-ply system.
What Is the Benefit of a Torch On Roof?
The major advantage of Torch On roofing, apart from its waterproof barrier, which we mentioned, is its durability. Torch On roof lasts anywhere between 15 and 20 years and is virtually maintenance -free during that time. However, it’s not a bad idea to get it inspected a couple of times a year, once in Fall and once in Summer. Torch On roofing provides many of the same benefits of traditional tar and gravel roofs. However, Torch On doesn’t use a gravel ballast. That means the roof is lighter and there’s no gravel to clog up drains or eavestroughs.
In recent years, with improved technology, prices have come down and quality has gone up, meaning Torch On is a more viable option for homeowners. Maintenance costs are also very low for this type of roof. A Torch On roof provides strength and flexibility to a homeowner. Although usually not an issue in Vancouver, it also provides protection from heat. If the homeowner requests it, a roofer can also add an extra coat to apply an ire-resistant layer to the roof. Finally, Torch On roofing is also free of harmful fumes. Unlike a tar roof, Torch On systems do not give off any type of fumes.
Maintenance
No matter what roofing material you choose, maintenance is key to keeping your roof working properly and increase its longevity.
If you get a leak, it’s important that you repair it as soon as possible. If you can, climb up on a ladder or check your attic at least once a month for water damage. You might not catch a leak right away but the sooner you do find the leak the better. Don’t wait until it becomes a huge problem. Remove any debris build up on the roof – especially if you have a flat roof. Consider having your roof resealed every five years. Although this isn’t necessary, it does help to keep the roof waterproof. When monitoring your roof, always check the areas around the chimney, around your gutters and around your flashing. These are all areas that will probably require repair over your roof’s lifespan.
Installation
Believe it or not, the installation of Torch On roofs does not always require the removal of an existing roof. If your current roof is in decent shape, you can likely install a Torch On roof over top but if not, it is recommended that you remove it so you ensure the new Torch On roof lasts as long as possible. Installation of a Torch On roofing system requires knowledge and experience using a blowtorch. Using this type of tool to install a Torch On system calls for the right type of materials and insulation to ensure that the torch does not damage the overall structure.
The application process should not be exposed to any type of adhesives or solvent-based materials and should only be performed by those who understand the dangers behind using a torch. This method should be able to provide a secure, leak-proof seal; however, if it is not done correctly, it could cause more problems than it’s worth.
The roof then needs to be covered by a layer of fiberglass felt. This is nailed to the roof to secure it. This becomes the base sheet for the roofing material to be joined. This base sheet needs to cover the roof smoothly.
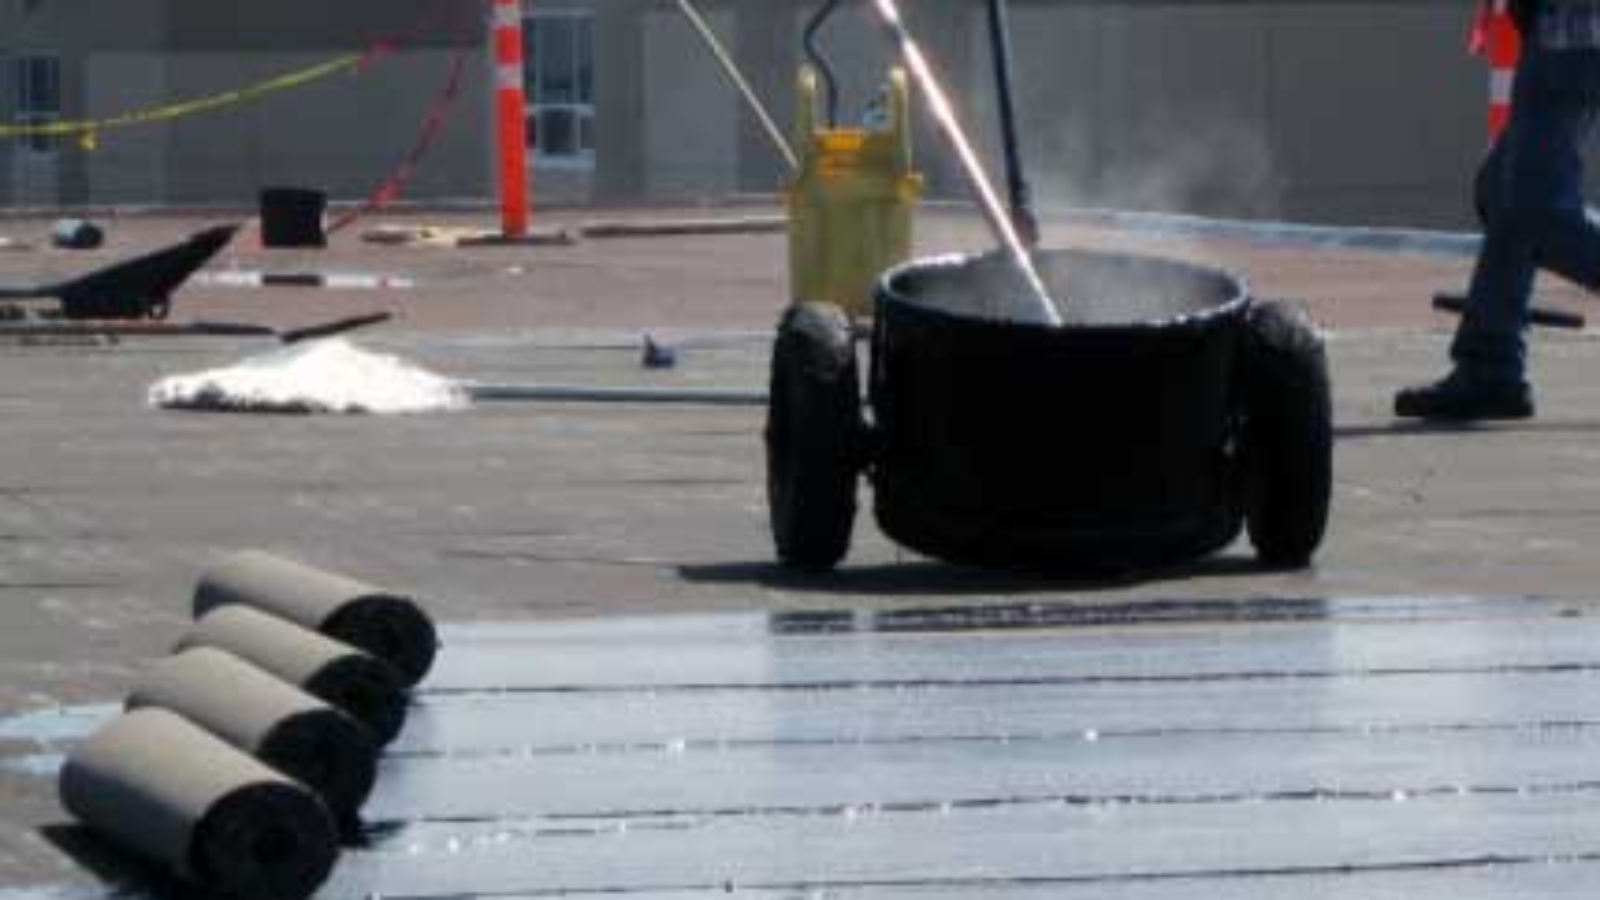
The bitumen layer
The bitumen layer is rolled out onto this base layer. While it is rolled out, a torch is used to melt the material so it adheres to the base. The roll is moved forward, and the bitumen layer pressed down to get a good seal. To get a good seal on metal flashings, such as around vents and chimneys, a primer or other similar material is applied to the metal surfaces before covering it with the roofing layer. After the roof has settled into place for a few months, you can have an additional coating applied. This makes your Torch On roof more fire resistant, waterproof and resistant to tears and punctures.
Finding a Pro
Torch On roofs provide a strong, leak-proof seal that will last for many years with very little maintenance or upkeep needed. While they are not as popular as they once were due to the dangerous application, many homeowners still prefer the classic method of installing a two or three-ply Torch On roof.
Since installation can be hazardous, it’s important to find the right company to do the job. It’s very easy to make a mistake while applying torch on materials to a roof. Materials can be accidentally overheated and cause a fire that can quickly spread throughout the dry, hot attic area. If you would like to learn more about if a Torch On roof is right for you, give us a call.
Originally published April 2017.
Updated and republished February 2023.